

Connecting Your Service
In the previous step you created your post data. Now it is time to show that data to real users. Because WEEGLOO takes care of storing and managing the data, how you present it through a service is entirely your choice. You can build a web application, expand it into a mobile app, or run both side by side. The key point is that you can fetch the data through the RESTful API that WEEGLOO provides and use it in whatever form you want.
In this example you build the Tech Blog as a website. Visitors view posts in a web browser, and you build the screen (front-end) they see. The static web files you create this way can be deployed with WEEGLOO's Web Hosting feature.
A mobile app connects to the same backend without any changes. Storing the data, taking in members, and showing each person only their own content works the same way on the web and in an app. You can see a complete example where an app and a web page share a single backend, from start to finish, in Running Tracker Service.
Issuing a Read-Only Token
To call the WEEGLOO API you need an Access Token for authentication. In this example you use a Delivery Access Token, a read-only token meant for showing posts to visitors, together with the CDA (Content Delivery API), the API that delivers published content.
Before you create the token, you first need to decide what data it can access by using a SpaceRole. For security, you create a SpaceRole that grants read access only to the Article Content Type you made earlier. This way the token can do nothing other than read posts.
- In the left menu, click Roles & Permissions.
- Click Create and enter a role name. For example:
Article Read-Only. - Allow only Read for Content and Content Type of
Article. Do not turn on any other permission. - Save it with Save.
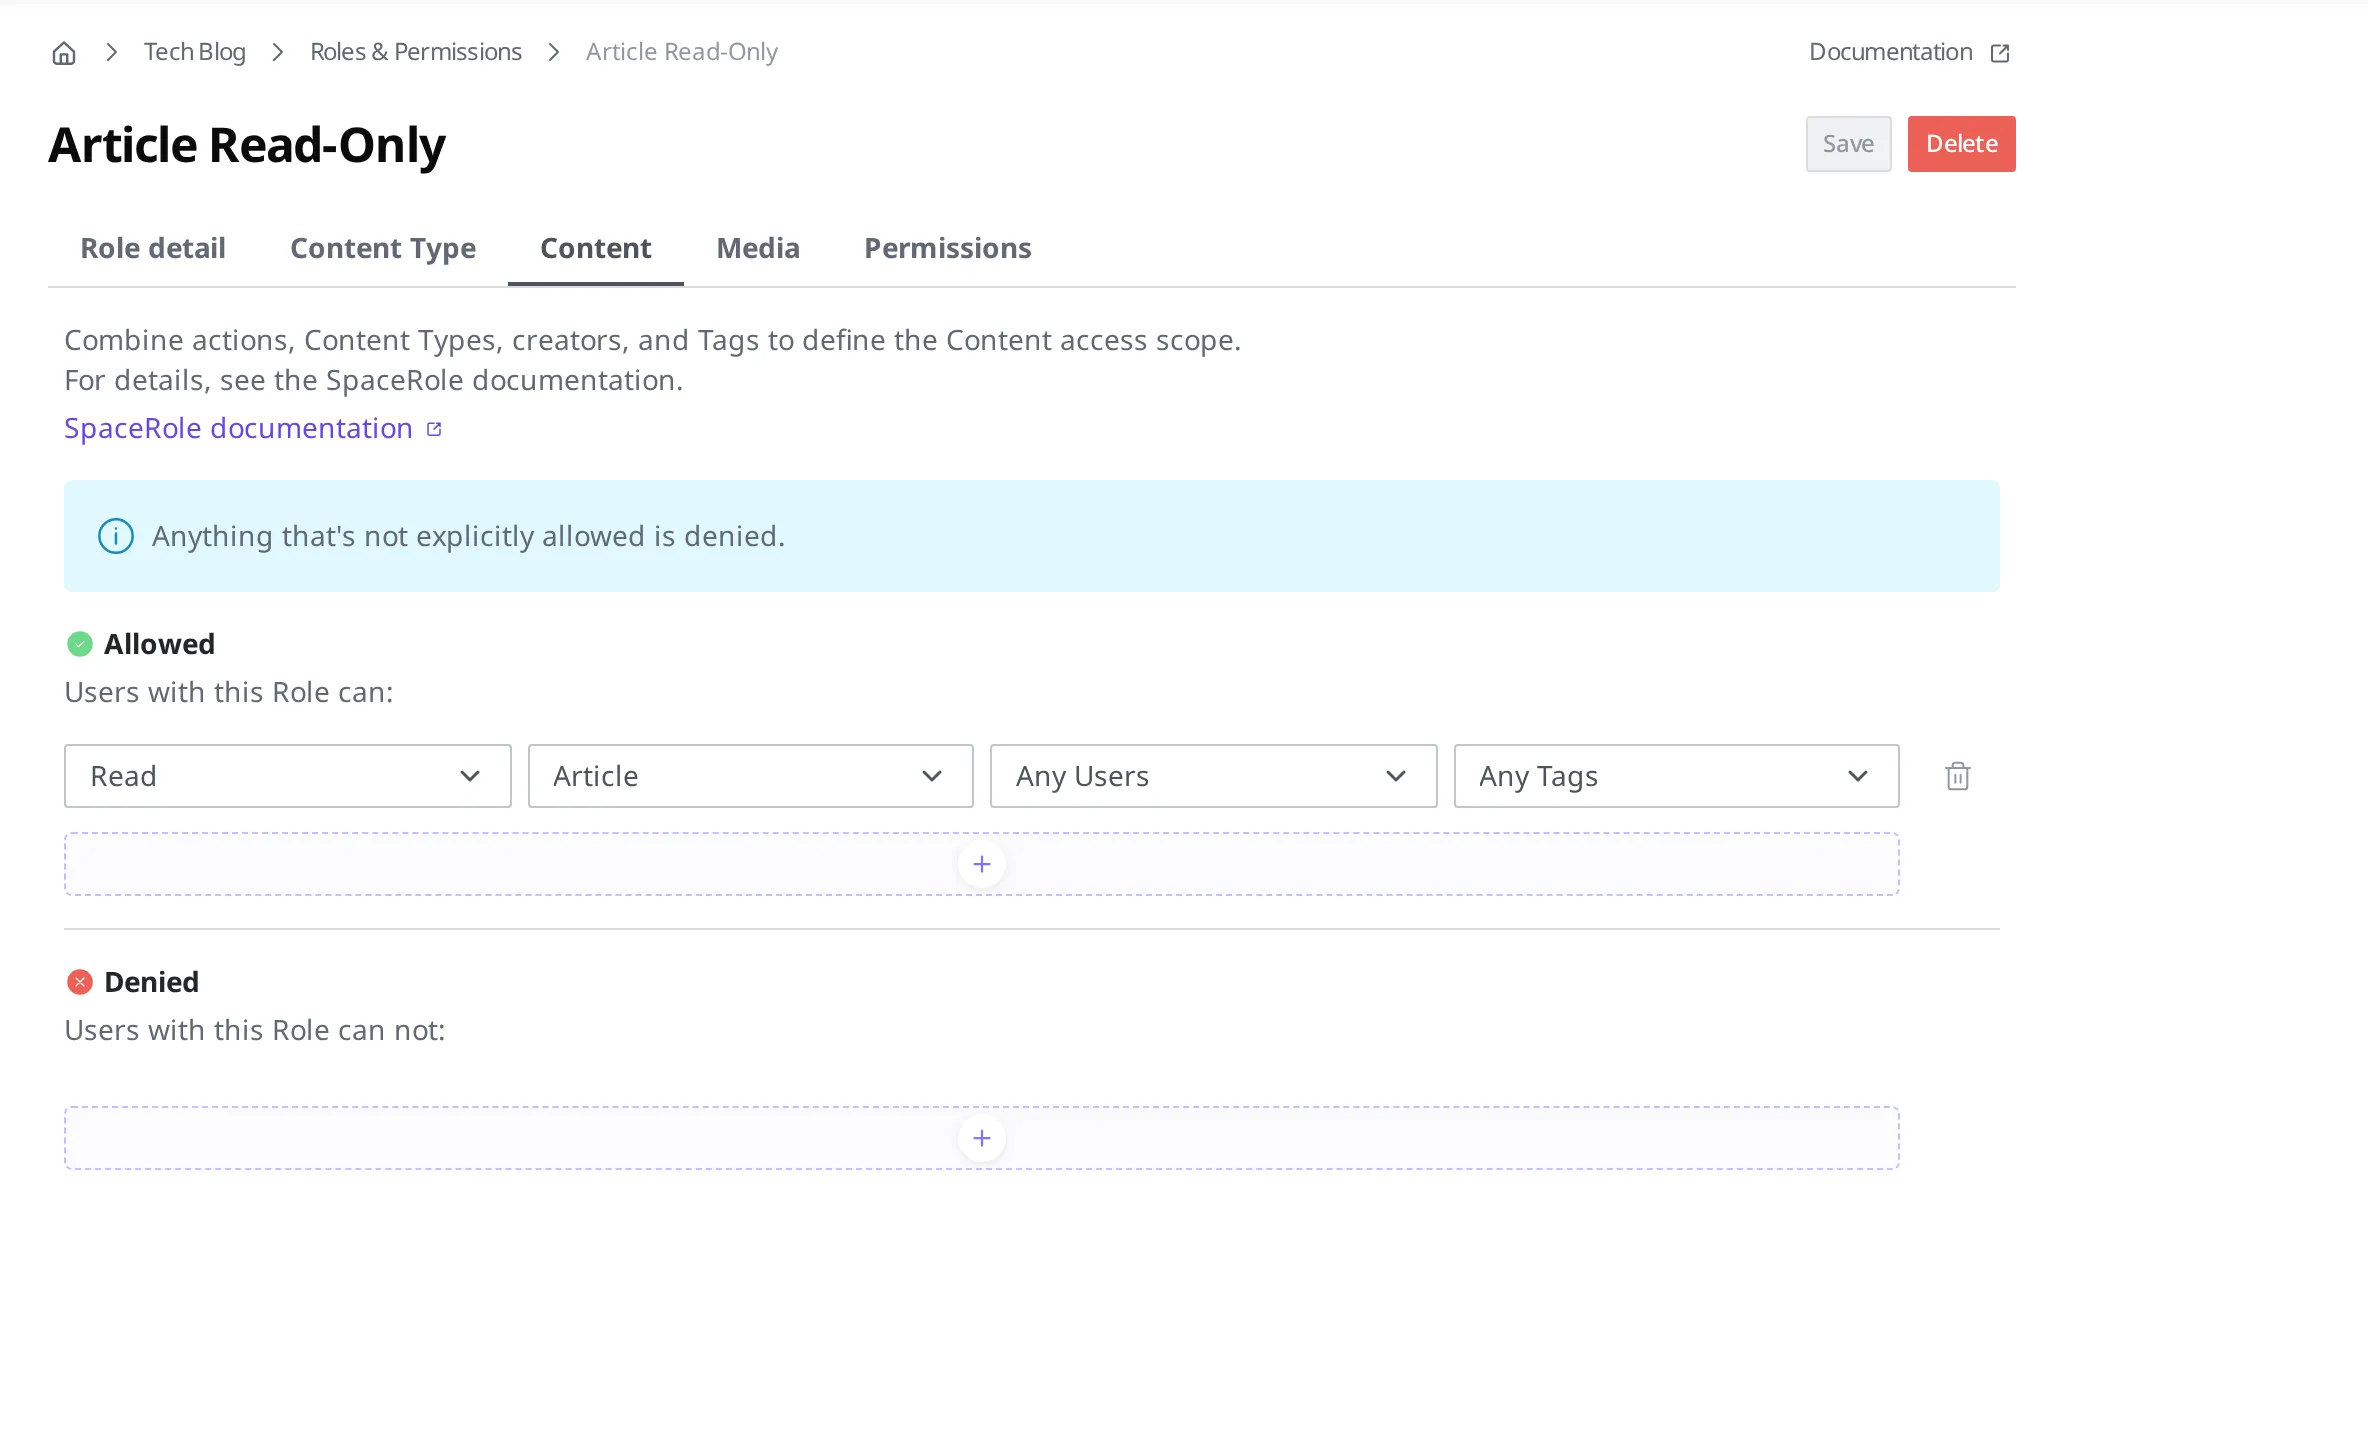
For more details on SpaceRole settings, see Roles and Permissions.
Now you create a Delivery Access Token that holds this SpaceRole.
- In the left menu, click Delivery Access Tokens.
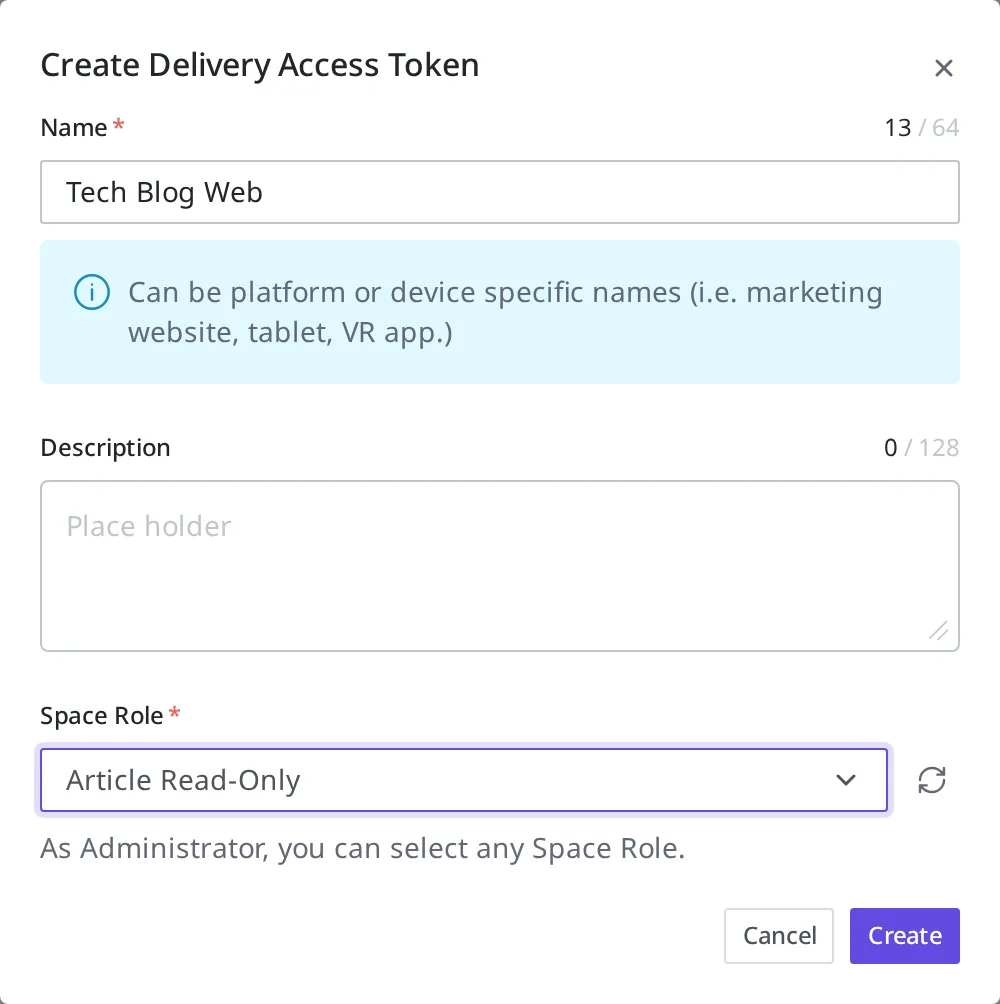
- Click Create at the top right of the list. The Create Delivery Access Token screen opens.
- Enter
Tech Blog Webin the Name field. - In SpaceRole, choose the
Article Read-Onlyyou created earlier. - Leave Allowed referrers on its initial value, No restriction. Listing addresses there means only requests coming from those addresses get through, so once the address of your Tech Blog site is settled you can come back and narrow this token to that site alone.
- Click the Create button at the top right of the screen to issue it.
Once you finish issuing, you move to that token's detail screen. The token value sits in the Token field under Basic information, and clicking the copy button on the left of the field copies the value. You can come back to this screen and copy the value again at any time. Still, this value is a secret, so store it somewhere safe. Because it can be exposed all the way to the visitor's browser, it is important to narrow its scope with a read-only SpaceRole as shown above.
For more details on the Delivery Access Token and the Allowed referrers setting, see Tokens.
Fetching Your Post Data
Now you actually call the API that fetches your posts. For authentication, put the Delivery Access Token value you created earlier into the Authorization header using the Bearer scheme.
Authorization: Bearer <Delivery Access Token>| API | Method | Path | Params |
|---|---|---|---|
| CDA | GET | /v1/spaces/{spaceId}/content-types/{contentTypeId}/contents | ?order=-sys.createdAt,sys.id |
This API fetches the list of Article Content within a specific Space. The order option sorts them newest first, and the include option lets you fetch linked data along with them.
The first time you call it, you may get no data at all. That is because the Content you created has not been published yet. WEEGLOO adds a publishing step to separate the data you are still working on from the data shown to visitors. Once you publish the Content and call the API again, the posts appear.
{
    "sys": { "type": "TotalPageResponse" },
    "limit": 15,
    "totalCount": 1,
    "items": [
        {
            "sys": {
                "id": "3trmXRkRjC1x4J9h2om4Qh41o7sejd",
                "type": "Content",
                "space": { "sys": { "id": "ep8f7qJY", "type": "Refer", "targetType": "Space" } },
                "contentType": { "sys": { "id": "3trmXRkRjC1x4J9h2om4QZv0jC58Nv", "type": "Refer", "targetType": "ContentType" } },
                "createdAt": "2026-06-21T15:38:22.630Z",
                "updatedAt": "2026-06-21T15:38:22.630Z",
                "revision": 1
            },
            "fields": {
                "title": "Building a Headless Blog with WEEGLOO",
                "body": "WEEGLOO lets you define your content structure once and deliver it anywhere through a REST API. In this post we model an Article, write our first entry, and fetch it from a web app, with no backend server to build or maintain.",
                "category": "Web"
            }
        }
    ],
    "links": {
        "self": "/v1/spaces/ep8f7qJY/content-types/3trmXRkRjC1x4J9h2om4QZv0jC58Nv/contents?order=-sys.createdAt,sys.id"
    }
}
For detailed API usage and options, see the API Reference.
Multilingual Support
Going one step further, you can offer your posts in several languages. WEEGLOO provides the Locale feature so you can manage a single piece of content in multiple languages.
First, add a new language in the Locale settings. Here you add Korean and set the Fallback language to English, which is shown instead when a value is missing. A fallback is the language shown in place of another when that language has no value.
Then, when you go to the Content you created earlier, you will see that a field for entering per-language values has appeared for each Field. This is how you manage the content of the same post separately by language. Note that to use this feature, you must turn on the multilingual option for that Field in the Content Type beforehand.
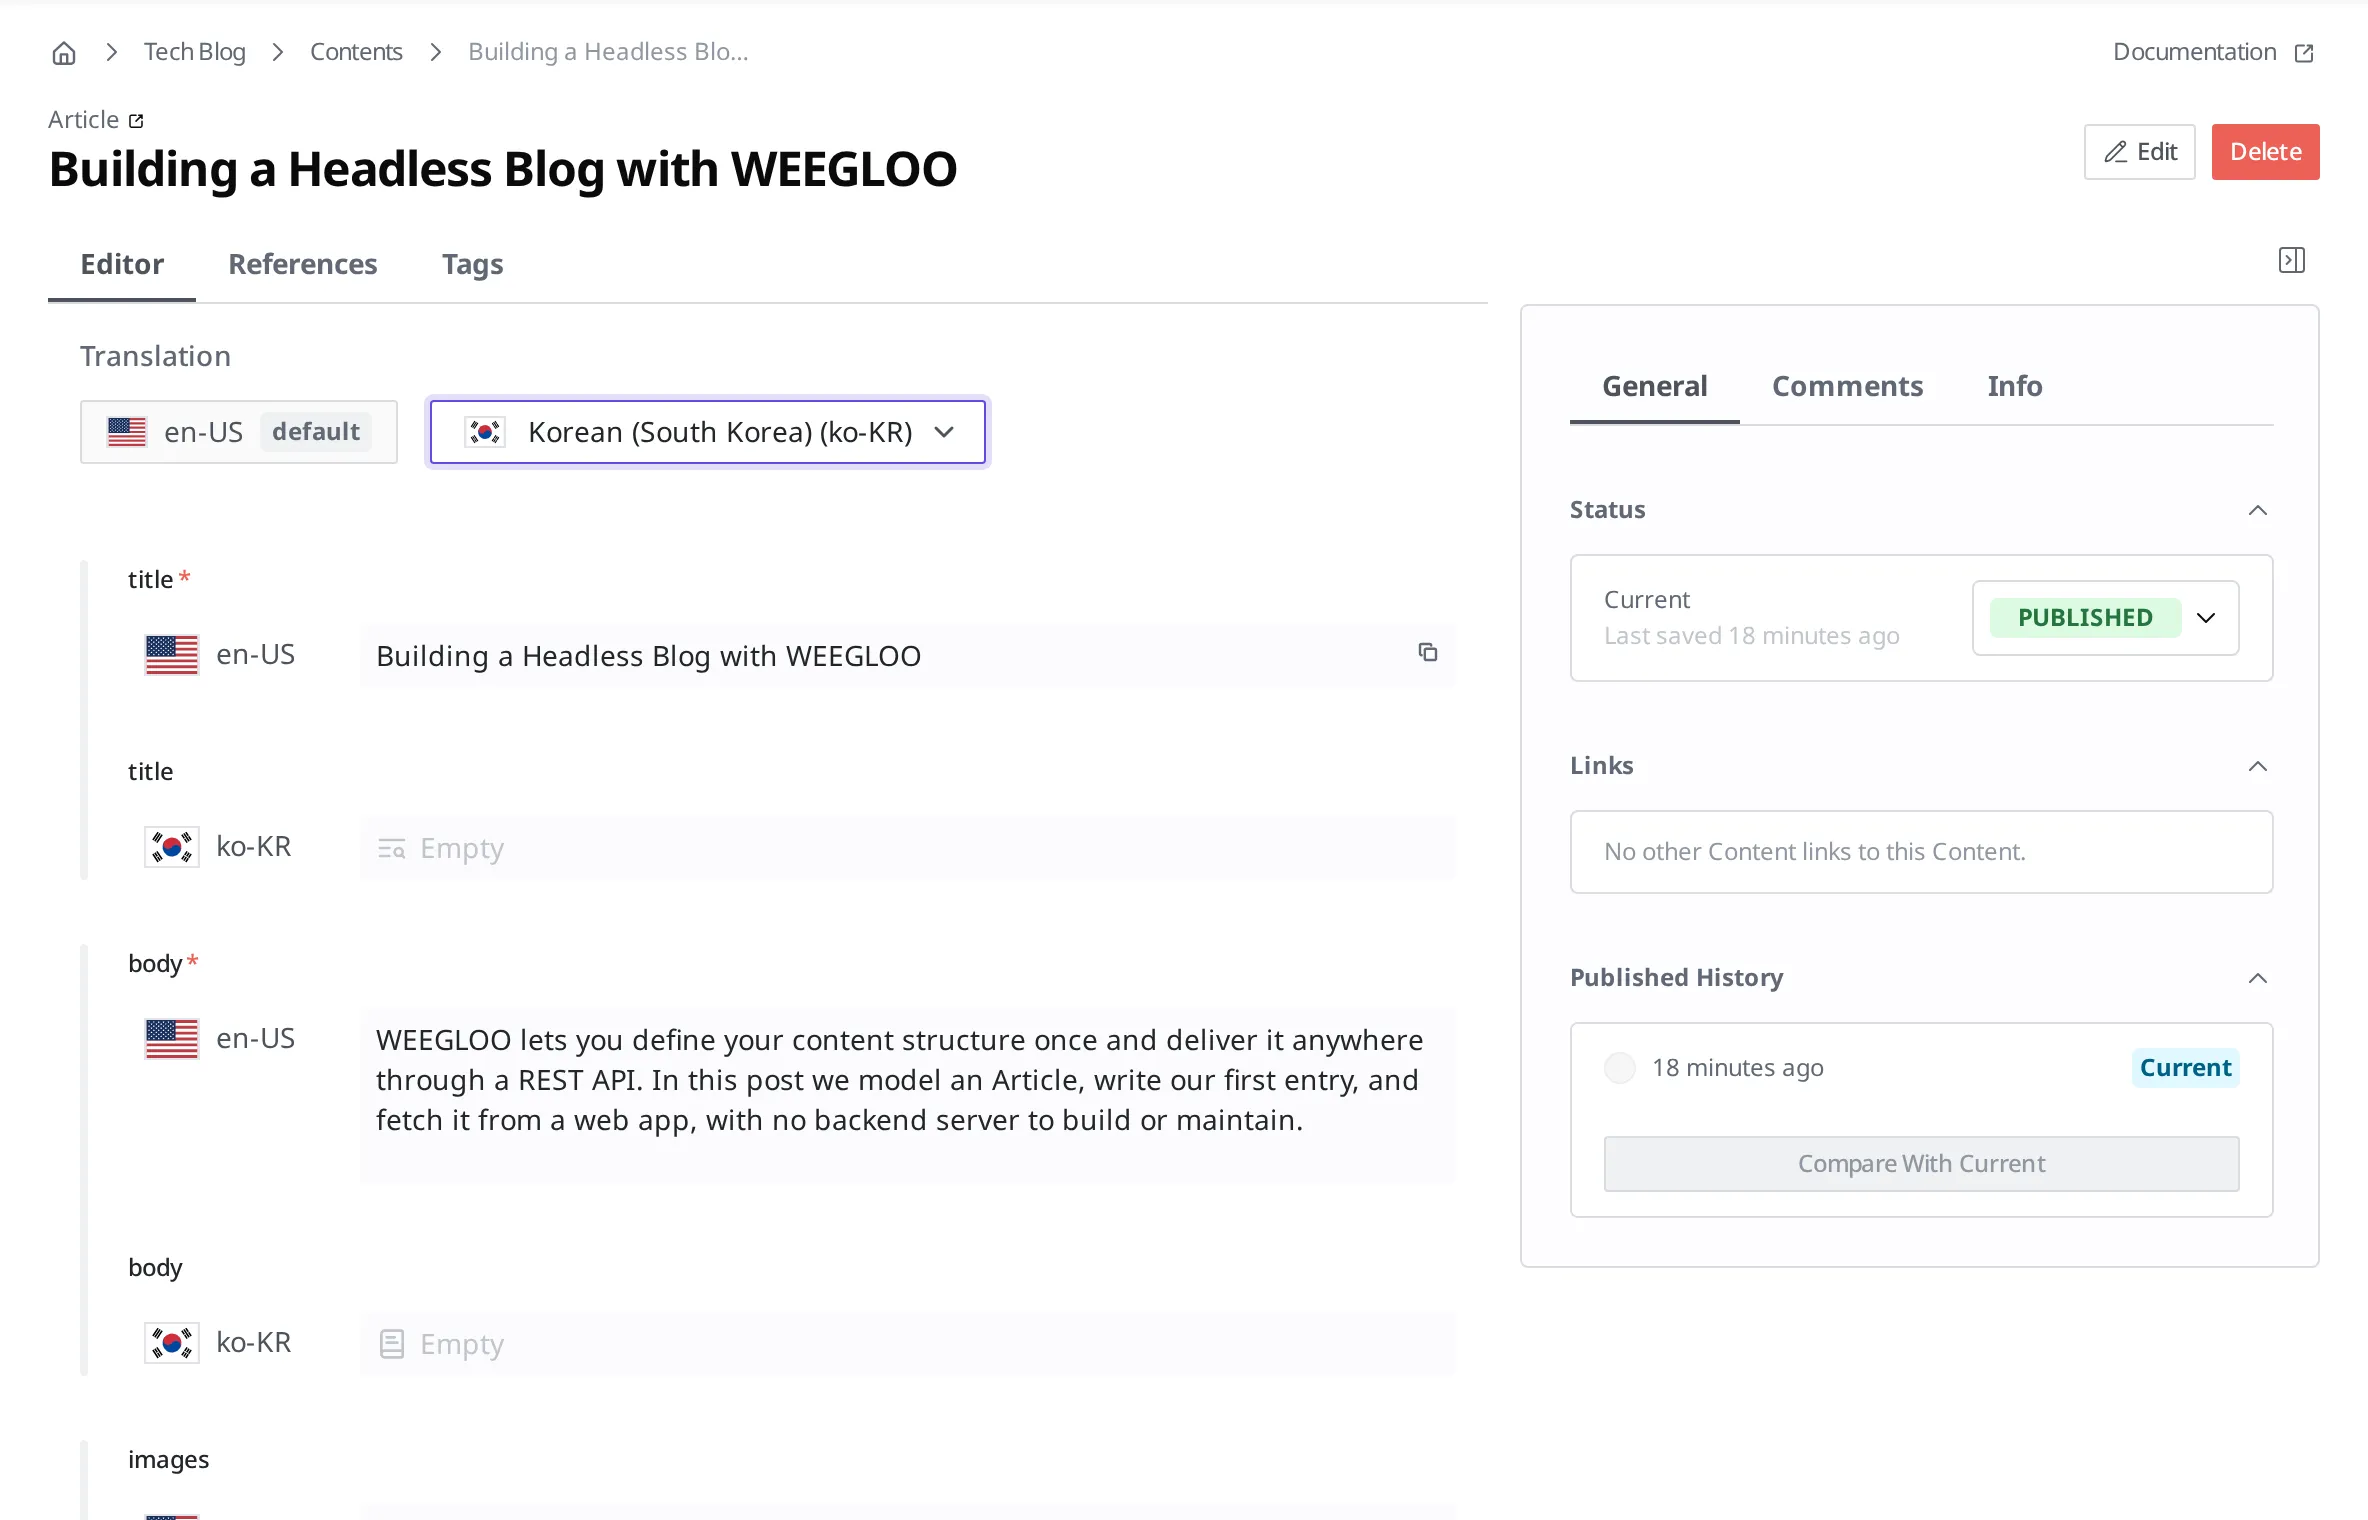
For more details on multilingual support, see Managing Localization.
This is how you can build a web service that supports multiple languages from a single data structure. Now that you have completed basic content retrieval and multilingual handling, the next step looks at the collaboration features that let several people write and manage content together.
- Collaborating: Invite several people to a Space and divide roles to manage content together.