

Tag
As products pile up in a clothing store's online shop, you start wanting groupings that cut across the structure. For example, you might want to pick out the best-selling products and group them as "Bestsellers," or group this season's products as "Summer New Arrivals." These products are all made from the same "Product" Content Type (the structure), but a shared trait like "sells well" can't be expressed through the structure.
This is where Tag comes in. A Tag is a label you attach to a product or a photo. Once you create a "Bestsellers" label and attach it one by one to your well-selling tumbler, mug, and thermos, you can later gather or filter out only the items carrying that label, all at once.
This page first looks at what a Tag is, then walks through creating a "Bestsellers" Tag and attaching it to the tumbler product.
Label items to group them across the board
A Content Type is the structure that decides what each individual product looks like. Tumblers and mugs are all made from the single "Product" structure. But you'll still want occasional groupings like "products that sell well" or "products released for summer," where the structure is the same but you want to bundle them separately each time. A Tag is exactly the label that creates such a grouping.
Using a label works the same way as putting a sticker on a cardboard box. You leave the box (the product) itself as is, and stick a label reading "sells well" (the Tag) on the outside. You can peel a sticker off and put it back on, and you can put the same sticker on several boxes.
Here is what to keep in mind when working with Tag.
- You create the label first, then attach it. Once you create a "Bestsellers" Tag, from then on you only need to pick products and attach it.
- You can attach several labels to one product. You can put both "Bestsellers" and "Summer New Arrivals" on a single tumbler. The maximum number of Tag you can attach to one product is 10.
- You can attach the same label to several products. You can put a single "Bestsellers" Tag on the tumbler, the mug, and the thermos alike.
- Label names can't overlap within a Space. There is only one "Bestsellers" Tag in the same Space (the workspace where you and your colleagues work together). If you try to create another Tag with the same name, it won't be created. That way, everyone shares the one label you created.
A Tag attaches to photos (Media) the same way. If you put a "Summer New Arrivals" Tag on a tumbler product photo, you can gather just the photos you'll use this season.
How it differs from Content Type
A Content Type and a Tag both organize products, but they play different roles. A Content Type is the structure that is fixed to exactly one per product. A tumbler is one kind of item made from the "Product" structure. A Tag, by contrast, is a label you attach freely, from zero to 10, across products. A tumbler can have no Tag at all, or several.
A Tag is also not a hierarchy that splits into upper and lower levels like folders. Every Tag is just a flat label at the same level, with no top-and-bottom relationship such as putting "Bestsellers" under "Summer New Arrivals." When you organize products, instead of putting them into a folder and keeping them in one place, think of attaching several labels so an item belongs to several groupings at once.
Creating the "Bestsellers" Tag
First, create the "Bestsellers" label to attach to products. A Tag is created once you decide just one thing: its name.
- In the left menu, click Tag.
- Click the Create button at the top right of the list.
- When the "Create Tag" modal opens, enter
Bestsellersin the Tag name field. - Click the Create button.
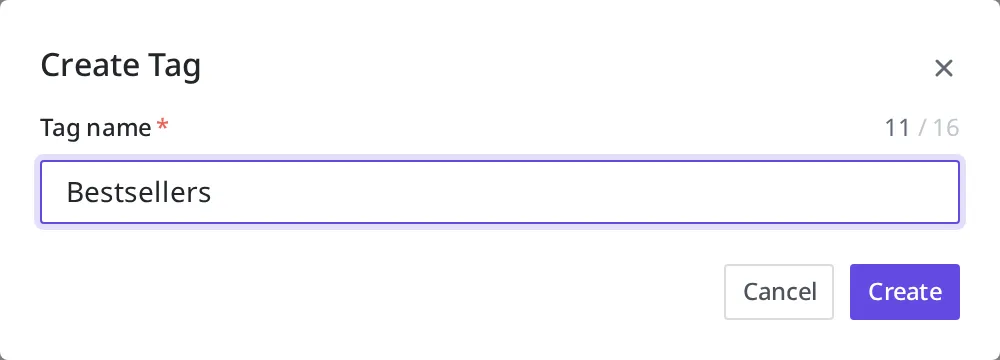
When "Bestsellers" appears in the list, the Tag has been created.

You can have only one Tag of the same name within a Space. If you try to create "Bestsellers" again, a notice tells you it already exists and it won't be created. In that case, don't make a new one; just attach the existing "Bestsellers" to your products.
Attaching the Tag to the tumbler
Now that the label is created, attach "Bestsellers" to the "Stainless Tumbler 500ml" product. You attach a Tag from the screen where you edit that product (Content).
- In the left menu, click Content and open "Stainless Tumbler 500ml".
- Click the Tags tab at the top of the editing screen.
- Enter
Bestsellersin the Tag field. - Click the Save button at the top right.
Once attached, the "Bestsellers" label appears on the tumbler product.
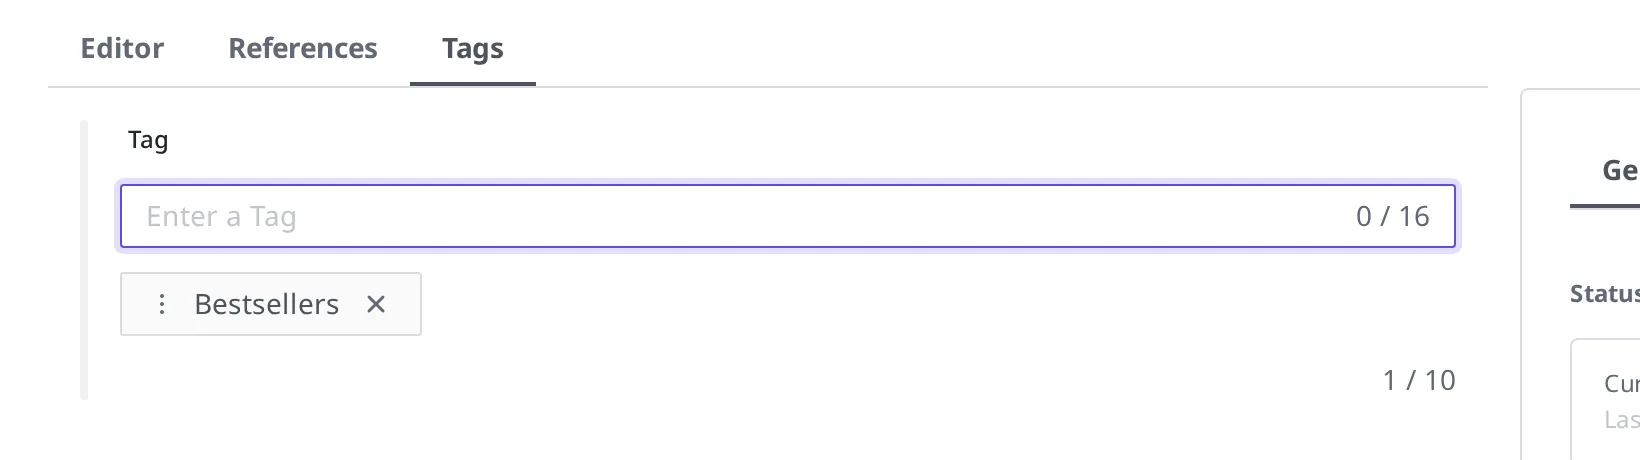
Attach "Bestsellers" to the mug or the thermos in the same way, and the three products are grouped under the same label. You can attach up to 10 labels to one product, so you can also add another label like "Summer New Arrivals" alongside it.
Attaching a Tag to photos (Media) works the same way. Open the Media and pick a label from the same Tags tab to attach it. How to upload Media is covered in Media.
What to know after attaching
Labels can be peeled off and put back on. When a tumbler is no longer a bestseller, you can remove the "Bestsellers" label from the Tags tab on the tumbler editing screen. The "Bestsellers" Tag itself remains, still attached to other products and ready to attach to new ones.
A label in use can't be deleted right away. If the "Bestsellers" Tag is attached to even one product (Content) or photo (Media), that Tag can't be deleted. To delete it, first remove the label from every product and photo it is attached to, then try again. This is a safeguard that keeps an entire grouping from scattering by mistake.
What to do next
- Authoring and publishing Content: Covers how to create and publish the products (Content) you'll attach a Tag to.
- Media: Covers how to upload photos and attach a Tag to them as well.
- API Reference: Covers technical specifications such as how to create a Tag in code and the request format for fetching only the products carrying a given Tag.