

Getting Naver Mail ready to send
This page is where you get the password you will enter when you use Naver Mail as your sending server in Sending email.
The value you get here is not the account password you use to sign in to Naver. It is a 12-character value that Naver issues separately, and it is called an application password.
Getting the value from Naver
After signing in to Naver, work through the three steps below in order. If you skip an earlier step, the screen for the next step does not appear. You can only do this setup on a PC.
Turning on POP3/SMTP
Naver Mail starts out with POP3/SMTP turned off. If you do not turn it on, you cannot send mail from an outside program.
-
In Naver Mail, press 환경설정 (Settings) at the bottom left.
-
Press POP3/IMAP 설정 (POP3/IMAP settings).
-
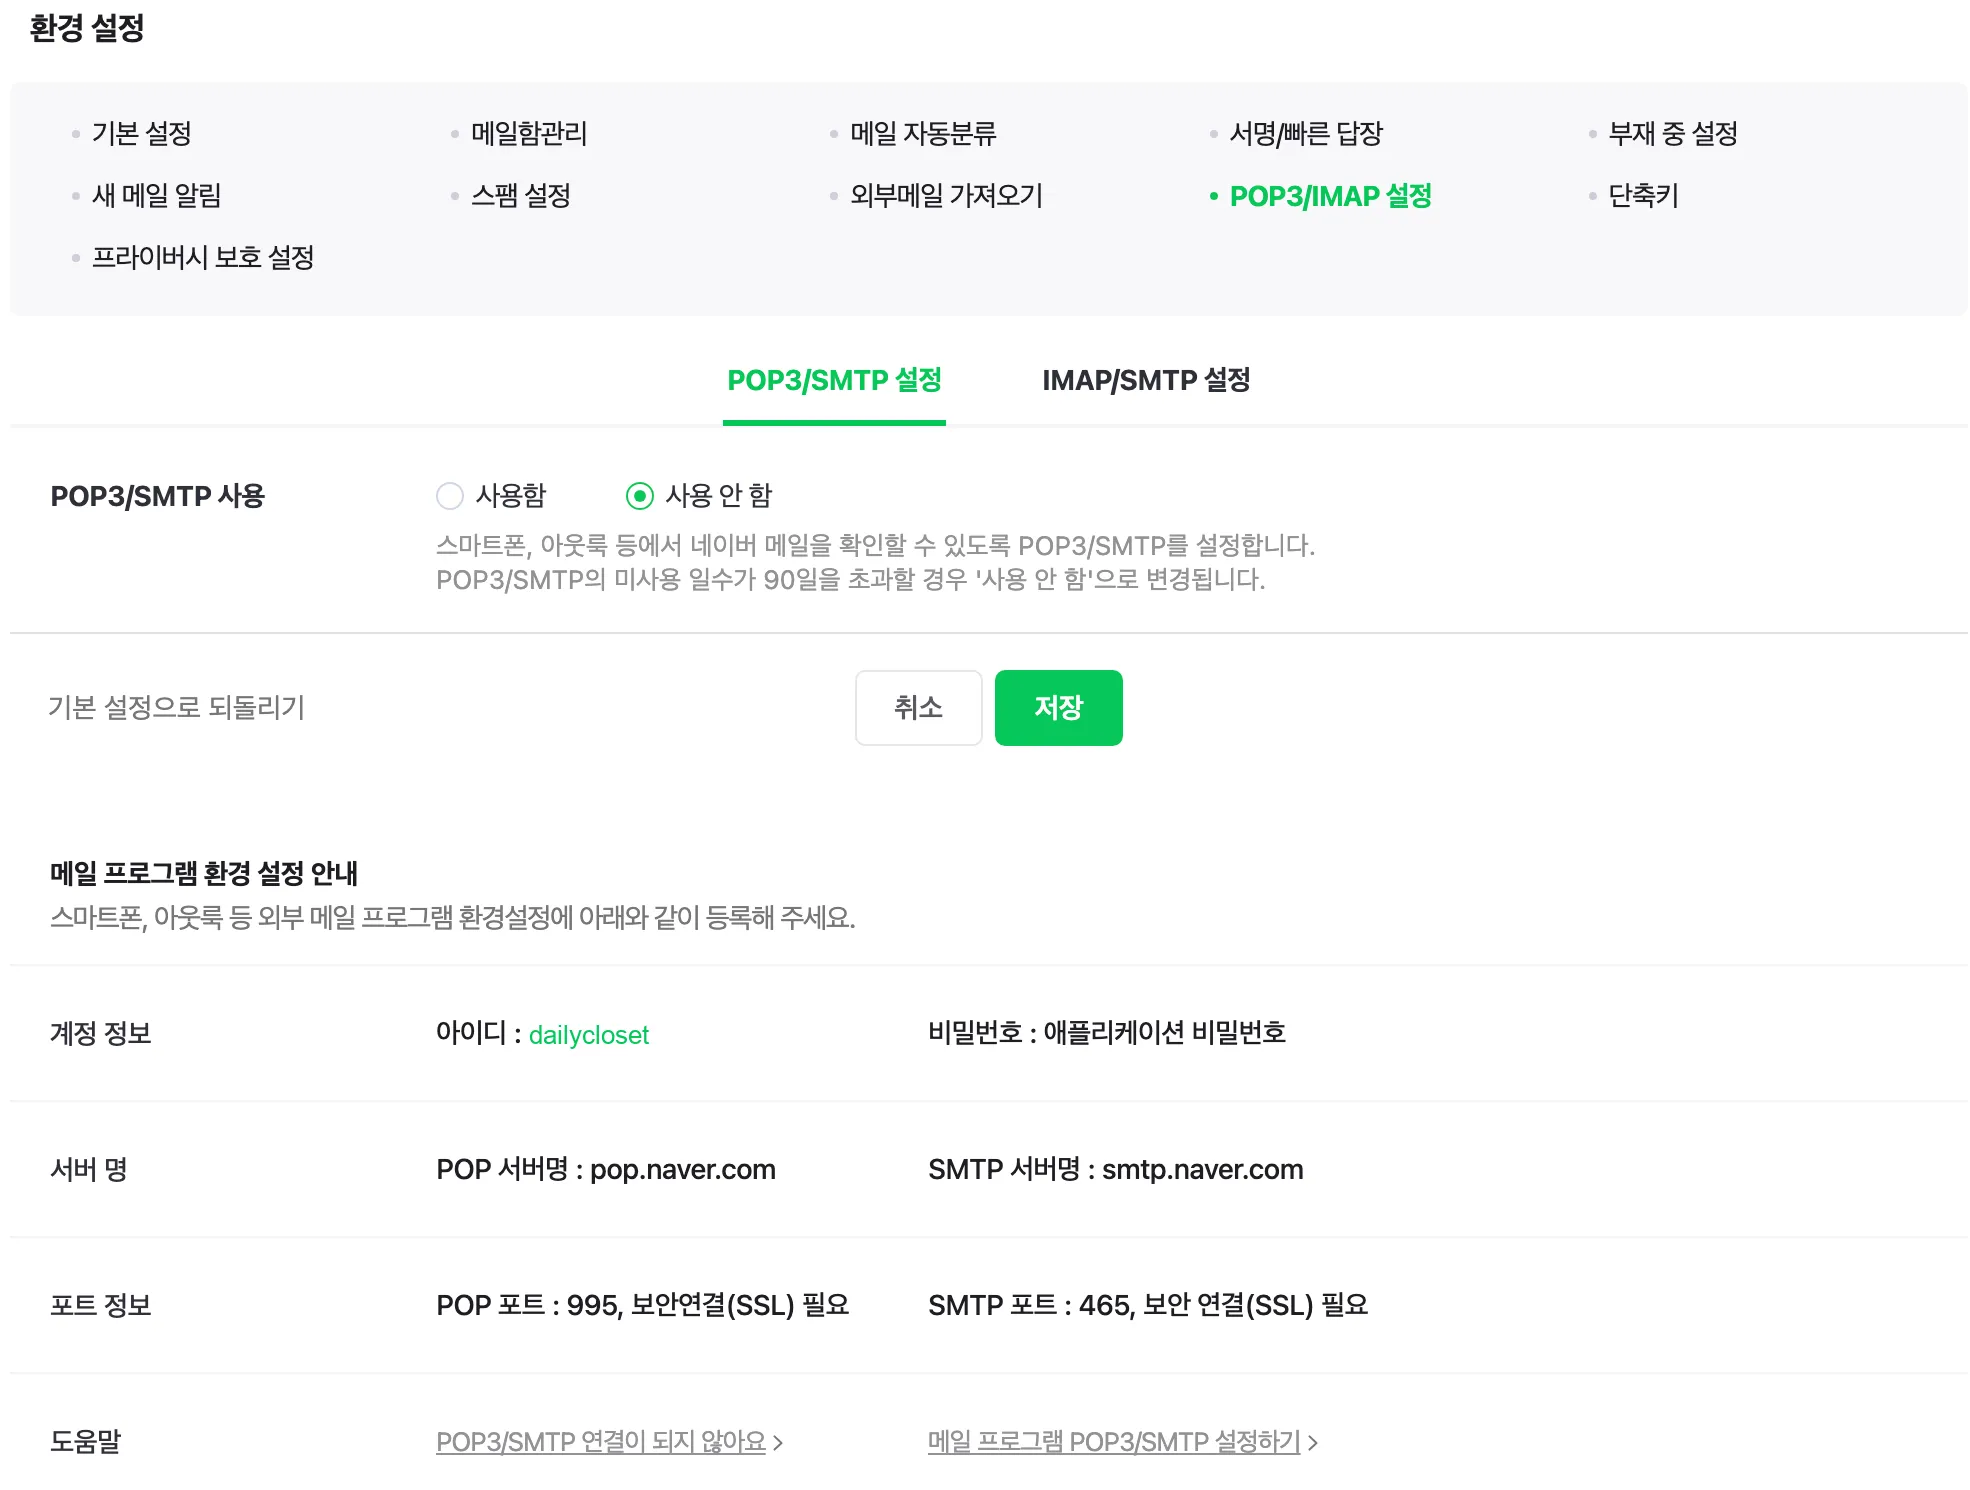
Press the POP3/SMTP 설정 (POP3/SMTP settings) tab.
-
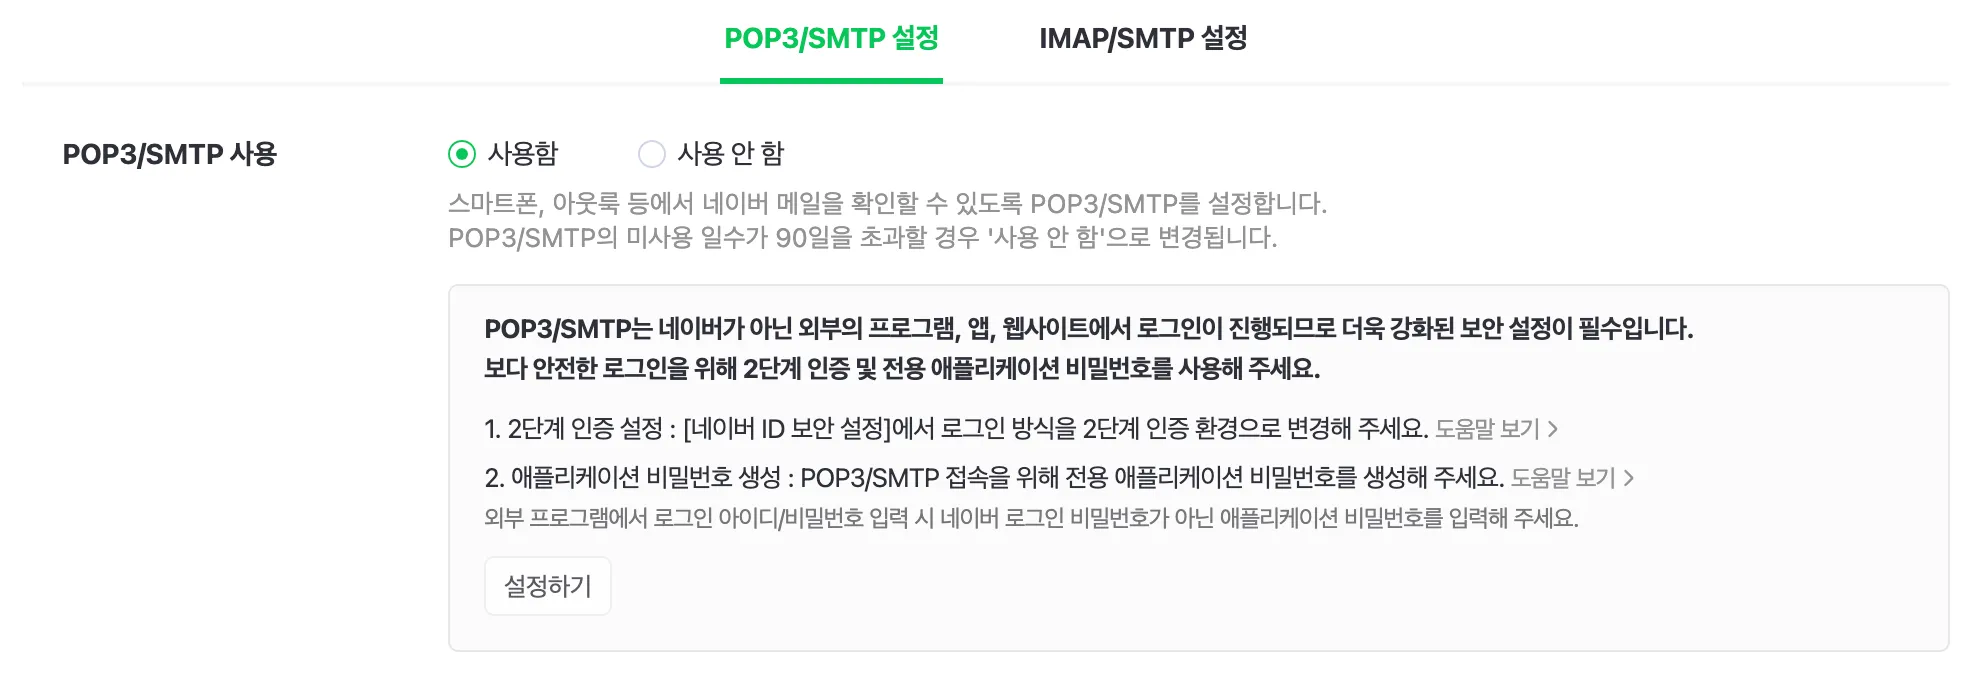
In POP3/SMTP 사용 (Use POP3/SMTP), choose 사용함 (Use).
-
Press 저장 (Save).
-
Write down the ID shown under 계정 정보 (Account information). It is the username you will enter into WEEGLOO later.
The ID under 계정 정보 is the ID alone rather than a mail address, and you use it exactly as it appears.
If you were already using POP3/IMAP before
Change both POP3/SMTP 설정 and IMAP/SMTP 설정 (IMAP/SMTP settings) to 사용 안 함 (Do not use) and save, then change them back to 사용함 and save again. Only then is it handled the same as a fresh setup, so you can connect with the application password.
Turning on two-step verification
You can create an application password only on an account that has two-step verification turned on.
-
Open the Naver ID security settings. Pressing 설정하기 (Set up) in the notice box on the previous screen takes you to the same place.
-
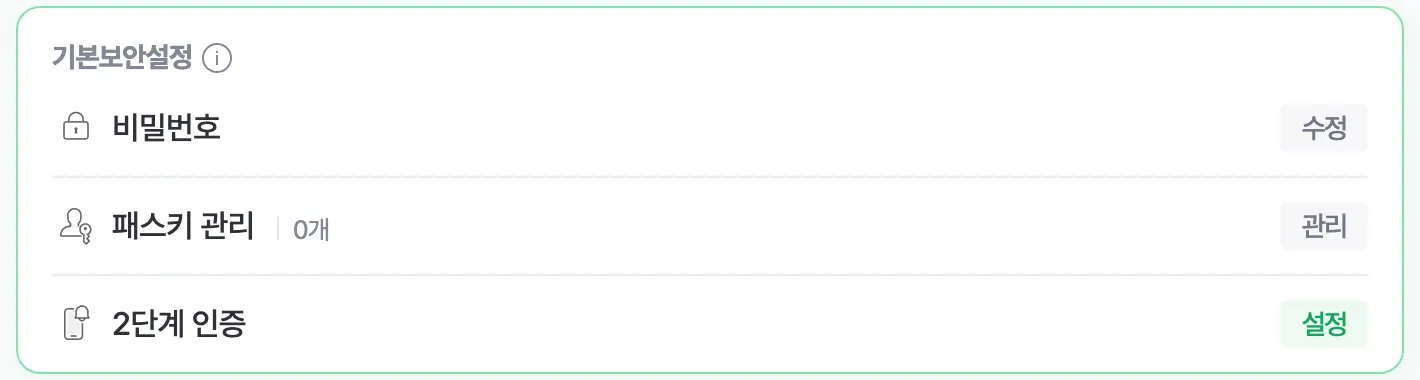
In 기본보안설정 (Basic security settings), press the button next to 2단계 인증 (Two-step verification).
-
Register the smartphone you will use for verification, as the screen asks.
Creating the application password
Once two-step verification is on, a place to create an application password appears on the 2단계 인증 관리 (Two-step verification management) screen.
-
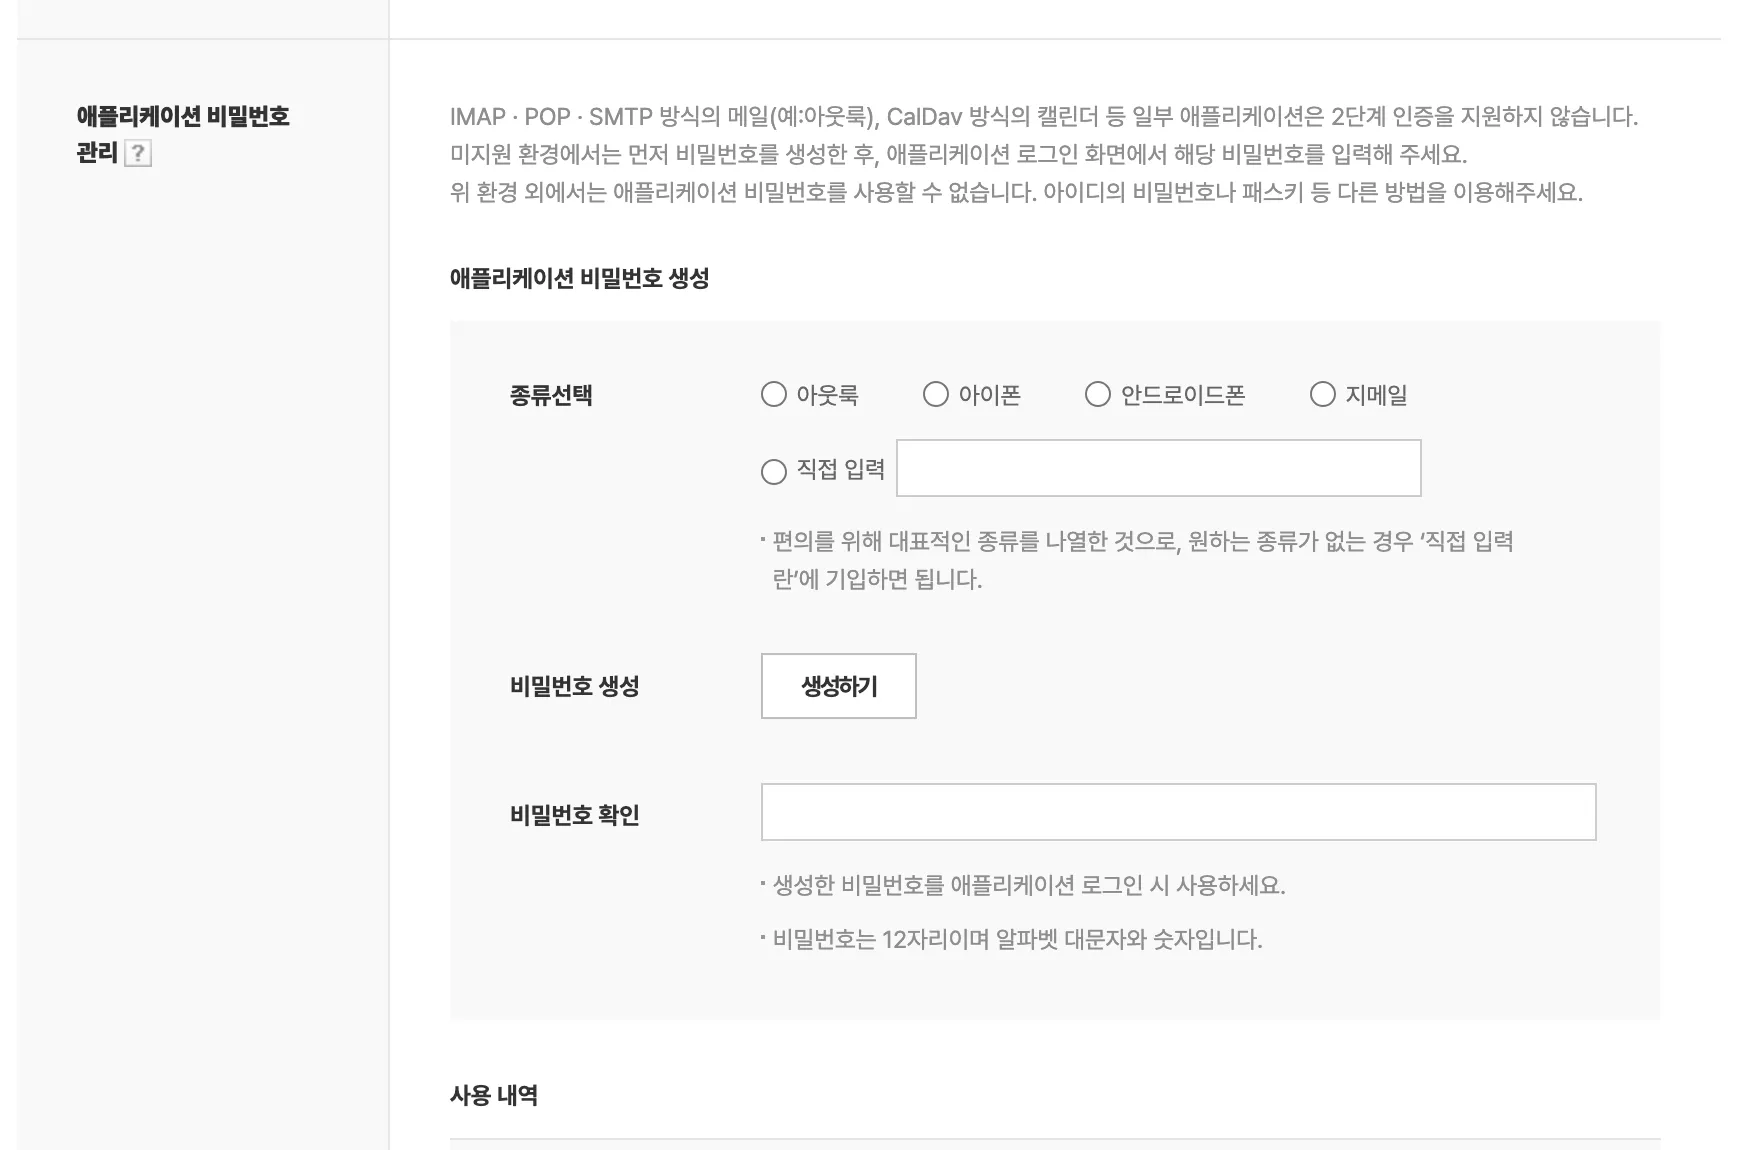
On 2단계 인증 관리, find 애플리케이션 비밀번호 관리 (Application password management).
-
In 종류선택 (Select type), choose 직접 입력 (Enter directly) and enter
Weeglooin the field. -
Press 생성하기 (Create).
-
Copy down the 12-character value that appears in the 비밀번호 확인 (Confirm password) field.
-
Check that the name you just created has been added as one row to 사용 내역 (Usage history).
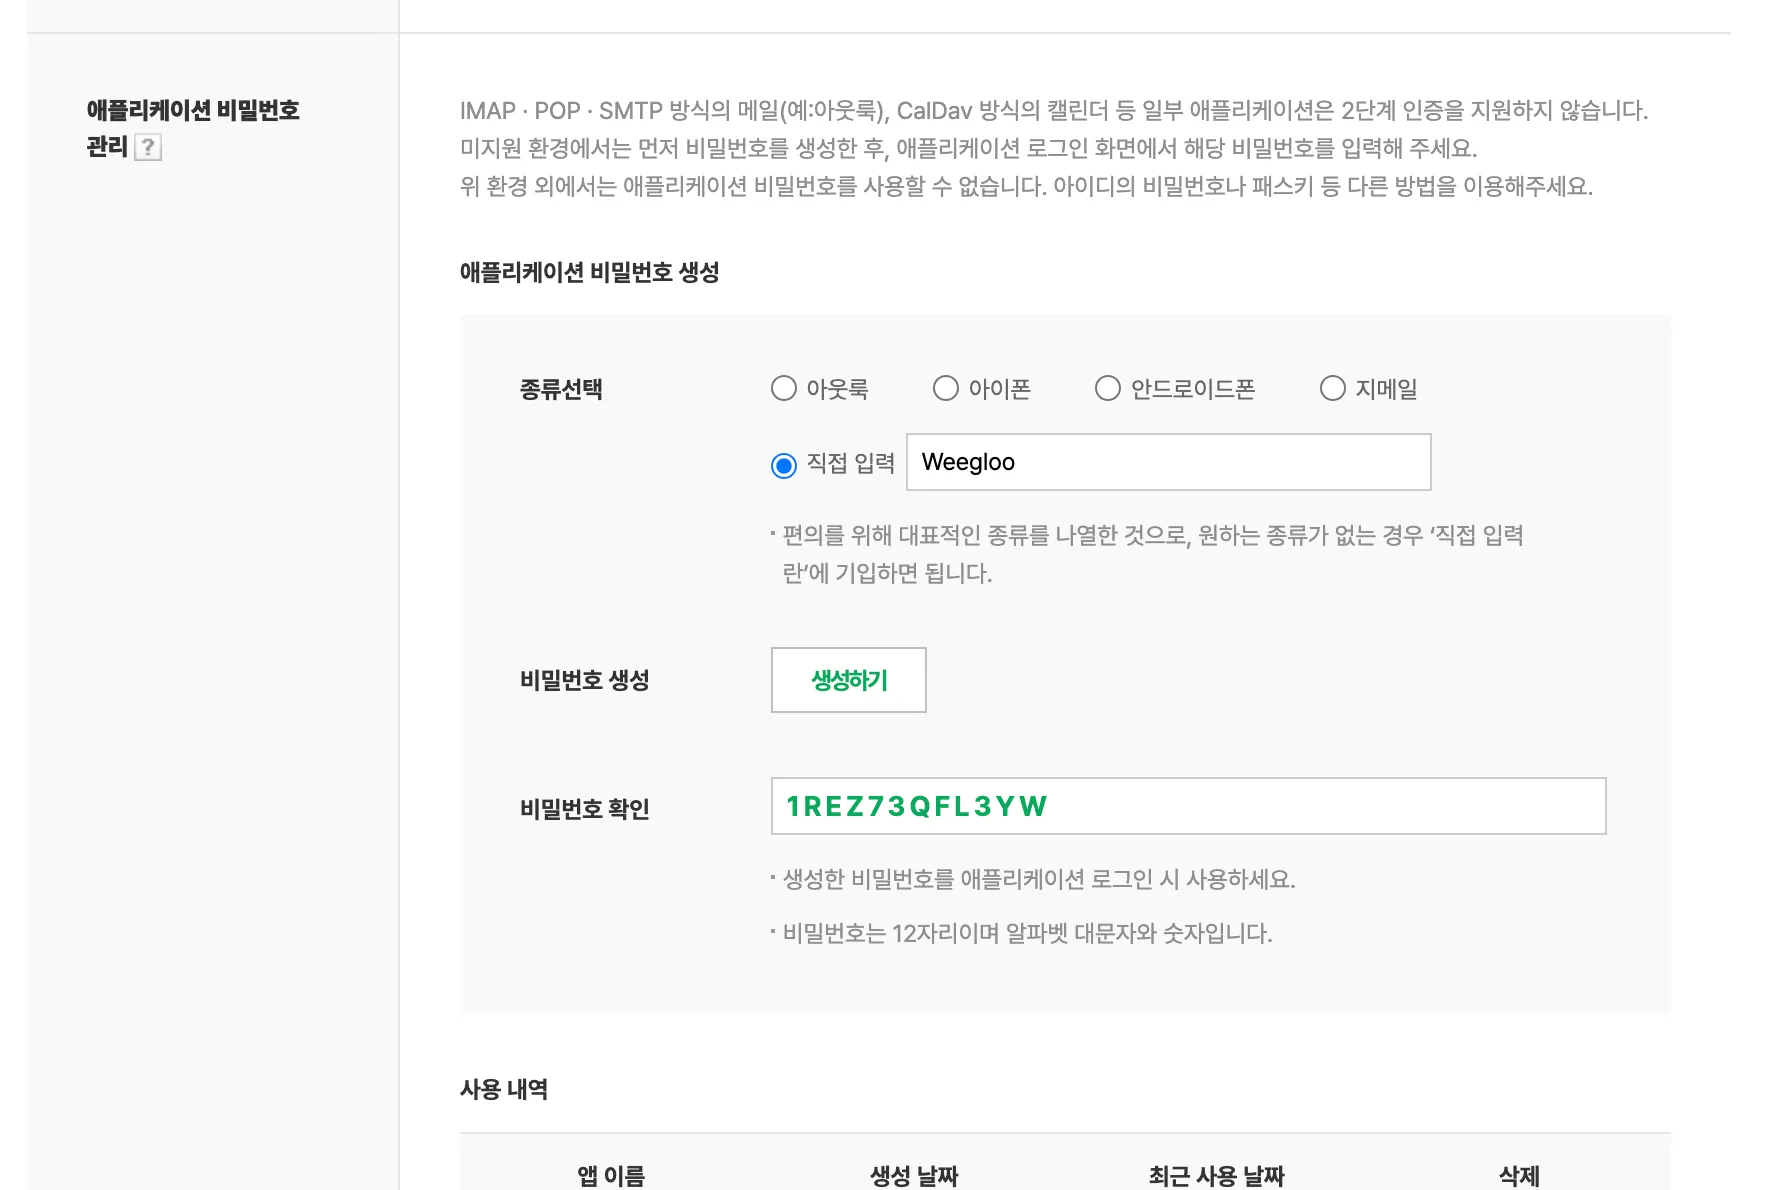
The value is made up of uppercase letters and digits only. This value is a password that can send mail from your Naver account. Treat it with the same weight as your account password, and do not leave it pasted in a chat or in a document that is out in the open. When you stop using it, you can remove it with 삭제 (Delete) in 사용 내역.
Entering the values you received into WEEGLOO
Now you have the ID and the application password in hand. Go back to the registration steps in Sending email. In Provider, choose Custom SMTP and enter the values below.
| Where to enter it | Value |
|---|---|
| SMTP server | smtp.naver.com |
| Port | 587 |
| Username | Your Naver ID (the ID rather than the mail address, like dailycloset) |
| Password | The 12-character application password you just received |
| From address | The mail address for that ID (dailycloset@naver.com) |
The port is 587
The guidance on the Naver screen lists 465 as the SMTP port, but enter 587 in WEEGLOO.
If you left the integration to an AI agent and it told you to go get the values, paste the ID and the 12-character value straight into the chat window and carry on with what you were doing. The agent handles the rest of the setup from there.
What to do next
- Sending email: Covers registering a sender with the values you received, and what you register in an Email Account.
- Script: Covers how to build the task that actually sends mail to customers with the sender you registered.
- Email Account: Covers the request and response formats and field specifications used to register and manage a sender directly from a program.