

Connecting GitLab Login
To let shoppers sign up with a GitLab account, you first register your service with GitLab and receive two values. They are the Application ID and the Secret.
This page covers the order in which you receive those two values. Putting the values you received into WEEGLOO is covered in Putting the values you received into WEEGLOO.
The address to copy first
When a shopper finishes logging in at GitLab, GitLab sends the result back to a set address. You have to register this address with GitLab, so copy it first. You paste it in step 1.
Pick your Space below and you get the address with the identifier filled in.
If you would rather fill it in yourself, put the identifier of your Space in the {spaceId} slot. Open that Space in the content studio and look at the browser address bar. The value that comes after /spaces/ is the identifier.
This address is not your site's address. It is where WEEGLOO receives the login result. So it is settled now even if you have not built your site yet. If you turned on GitLab in the content studio, the same address appears in Step 1, so you can copy it from there.
Getting the two values from GitLab
Sign in to GitLab, then work through the two steps below in order. What you do here costs nothing.
Registering an application
-
Open the applications screen (https://gitlab.com/-/user_settings/applications).
-
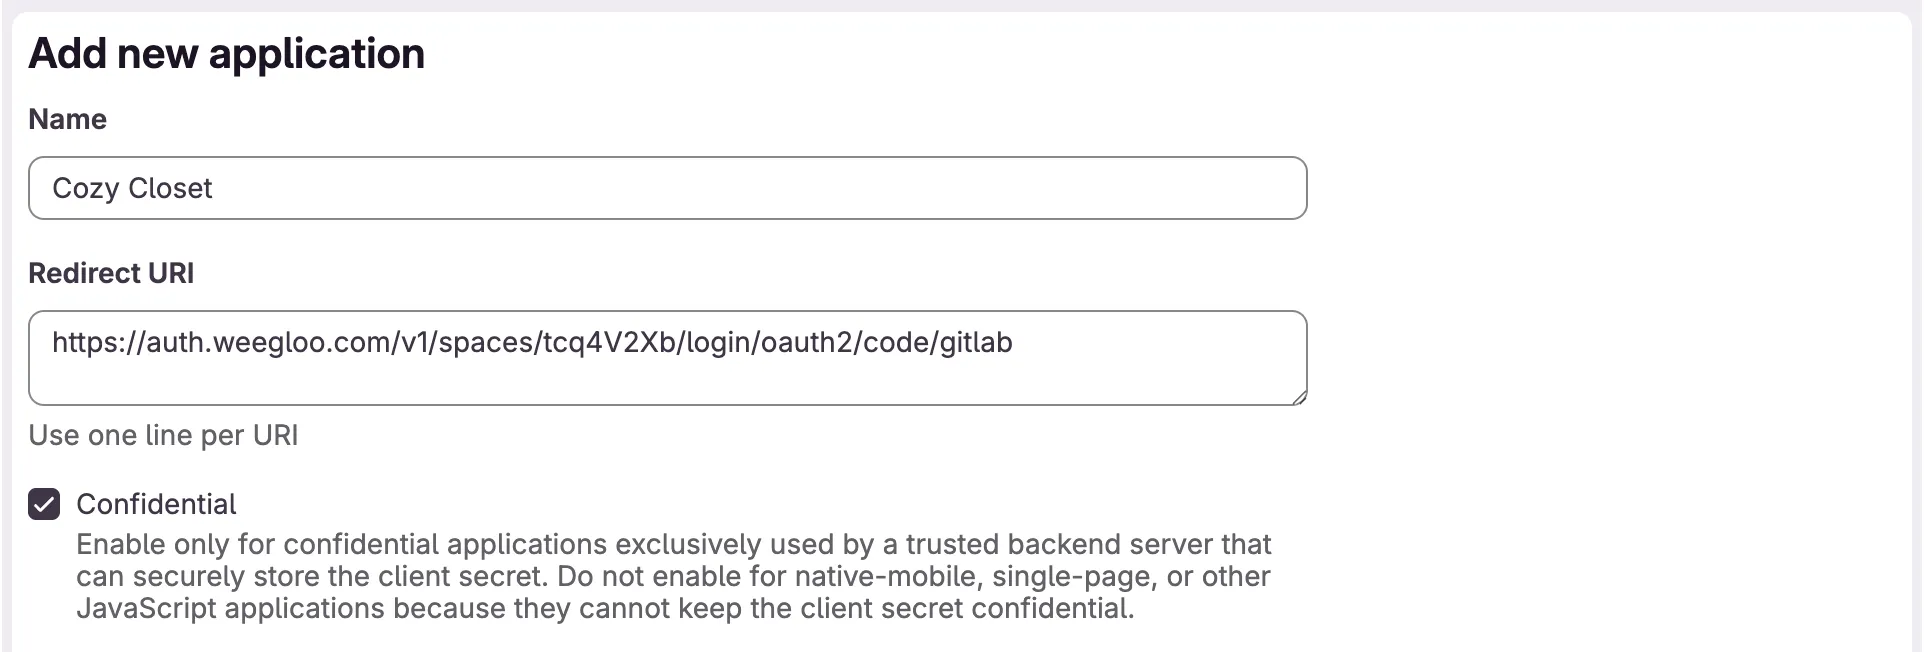
Click Add new application.

-
In Name, enter the name of this application (for example,
Cozy Closet). -
In the Redirect URI box, paste the address you copied in The address to copy first.
-
In Scopes, check only
read_user.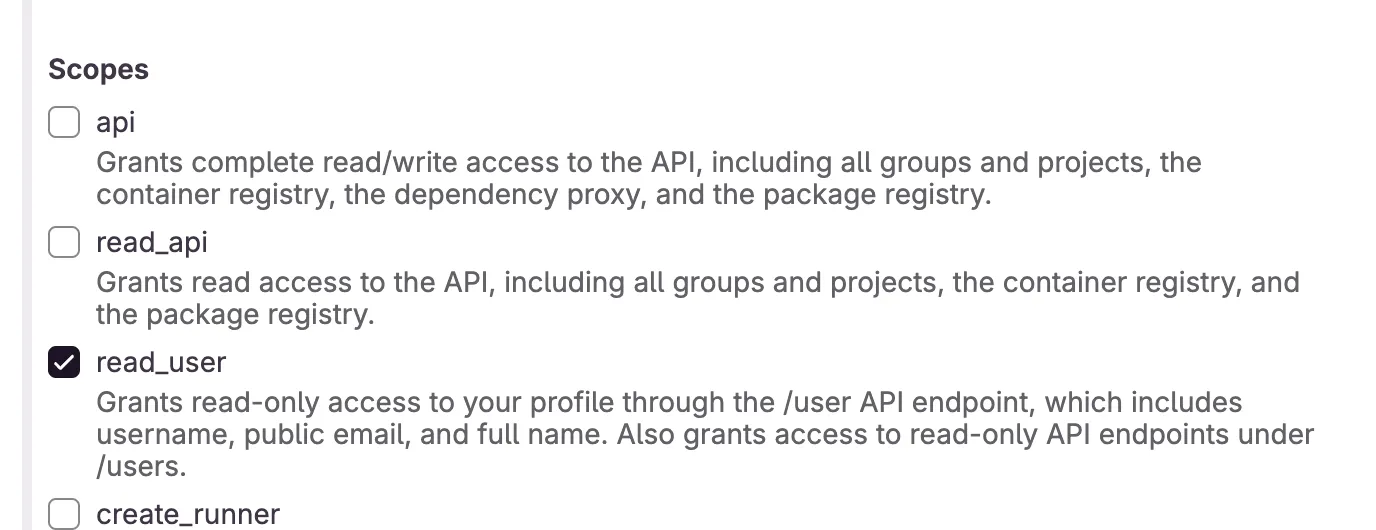
-
Click Save application at the very bottom of the form.
The Redirect URI box takes several lines, but the only thing to enter is the single address you copied above. Confidential below it is on from the start, and WEEGLOO receives and keeps the Secret, so leave it on. You have to choose at least one scope before the form will save.
Copying the Application ID and the Secret
When you click Save application, the screen of the application you just created opens. The two values you will put into WEEGLOO are here.
-
Click the copy icon to the right of Application ID to copy the value.
-
Click the copy icon to the right of Secret to copy the value.

You can see the Secret only this once
Application ID stays on this screen, so you can see it again whenever you want. The Secret does not. If you lose it, create a new one with Renew secret, and put the new value into WEEGLOO again. The Secret is a secret value. Do not tell it to anyone, and do not write it down anywhere public.
Putting the values you received into WEEGLOO
Now you have the two values in hand. From here the path splits depending on how you have been working so far.
If you were configuring this directly in the content studio, follow these steps.
- Go back to turning on social login in Service Member Login.
- Turn on GitLab.
- Enter the Application ID in the Application ID box in Step 2.
- Enter the Secret in the Secret box.
- Click Save.
If you handed the integration to an AI agent and were told to go and get the values, paste the two values you received into the chat as they are and carry on with what you were doing. The agent handles the rest of the configuration from there.
What to do next
- Service Member Login: put the values you received into the content studio and finish the rest of the member login configuration.
- Member Roles and Permissions: create the ServiceUserRole that decides what a signed-up member can see and use.
- Auth API: covers technical specifications such as the request format you need when wiring login into your own site's code.