

Connecting Naver Login
To let shoppers sign up with a Naver account, you first register your service with Naver and receive two values. They are the client ID and the client secret.
This page covers the order in which you receive those two values. Putting the values you received into WEEGLOO is covered in Putting the values you received into WEEGLOO.
The address to copy first
When a shopper finishes logging in at Naver, Naver sends the result back to a set address. You have to register this address with Naver, so copy it first. You paste it in step 1.
Pick your Space below and you get the address with the identifier filled in.
If you would rather fill it in yourself, put the identifier of your Space in the {spaceId} slot. Open that Space in the content studio and look at the browser address bar. The value that comes after /spaces/ is the identifier.
This address is not your site's address. It is where WEEGLOO receives the login result. So it is settled now even if you have not built your site yet. If you turned on Naver in the content studio, the same address appears in Step 1, so you can copy it from there.
Getting the two values from Naver
Sign in to Naver, then work through the two steps below in order. What you do here costs nothing.
Registering an application
-
Open the application registration screen (https://developers.naver.com/apps/#/register).
-
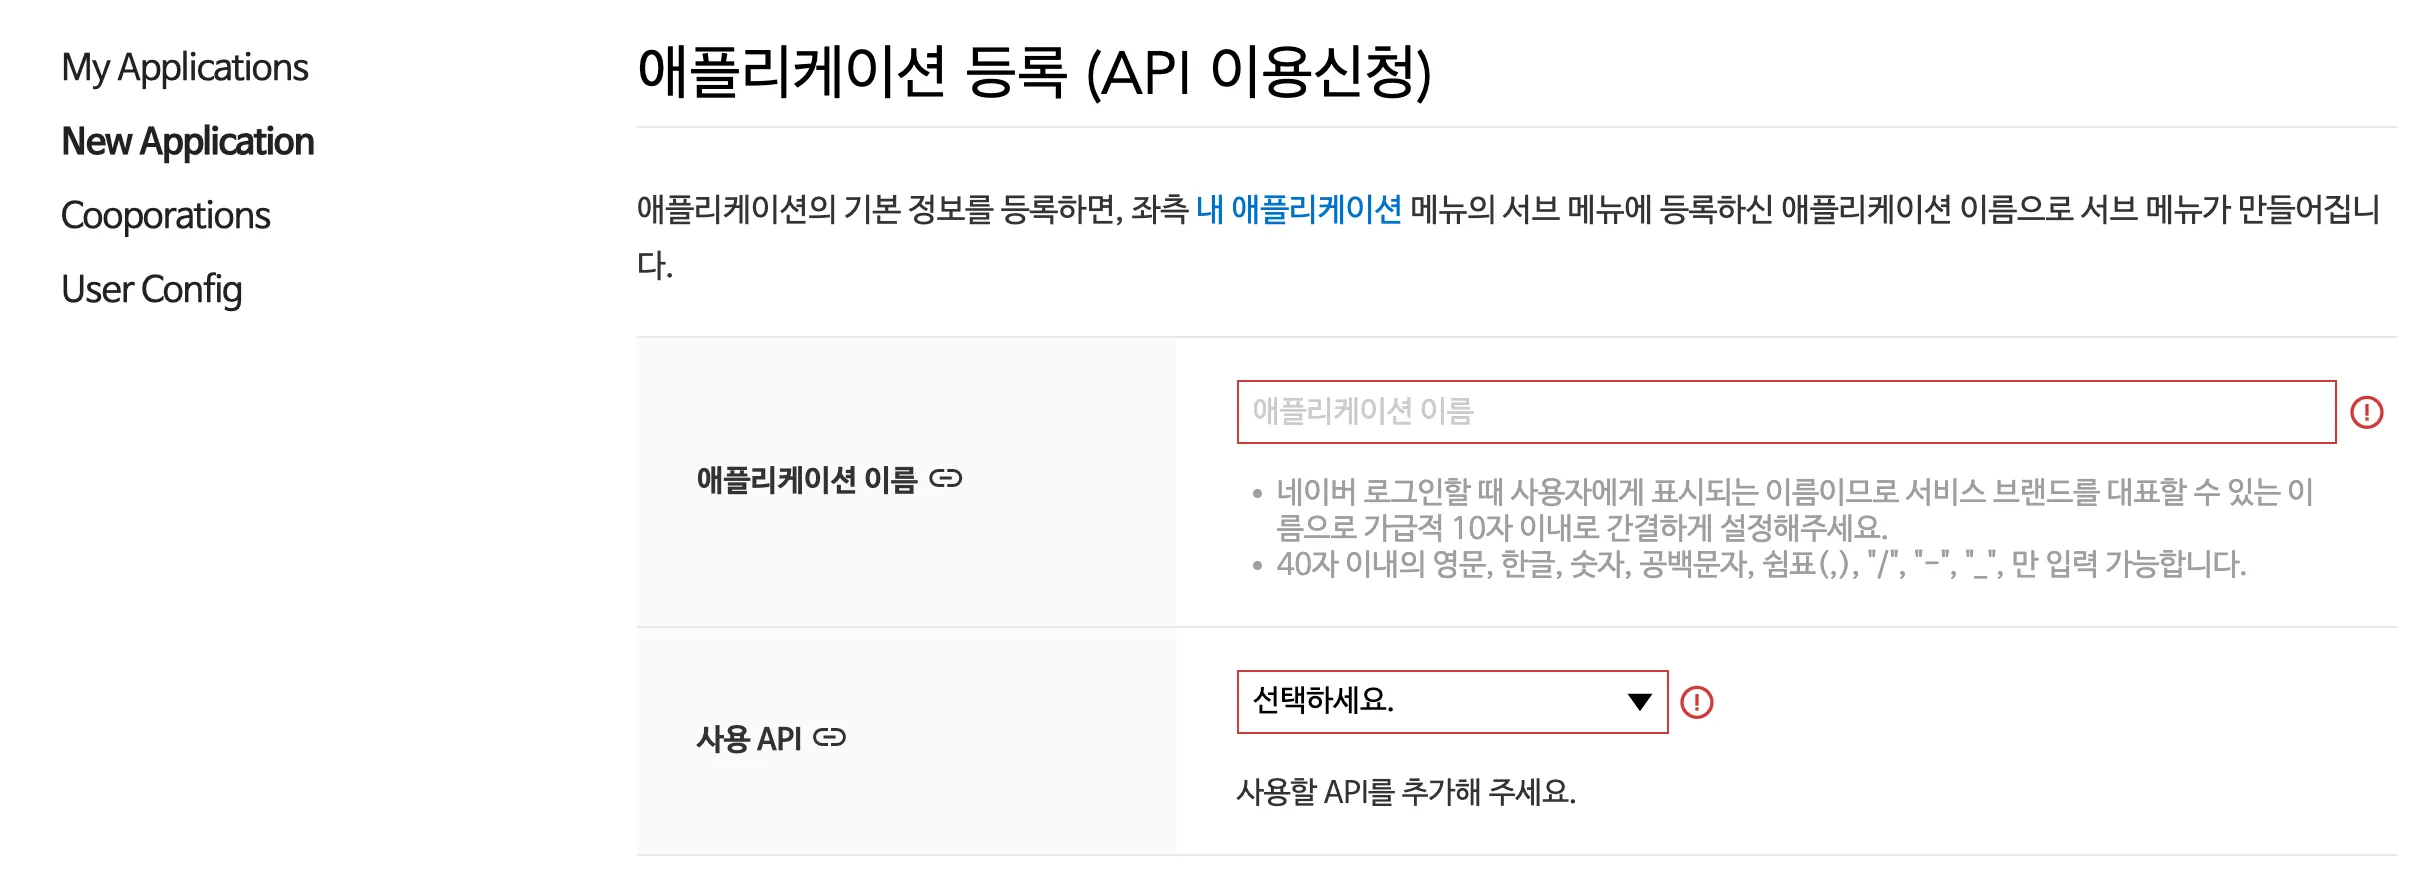
In 애플리케이션 이름(Application Name), enter the name shoppers will see (for example,
Cozy Closet). -
In 사용 API(Use API), choose 네이버 로그인(Naver Login).
-
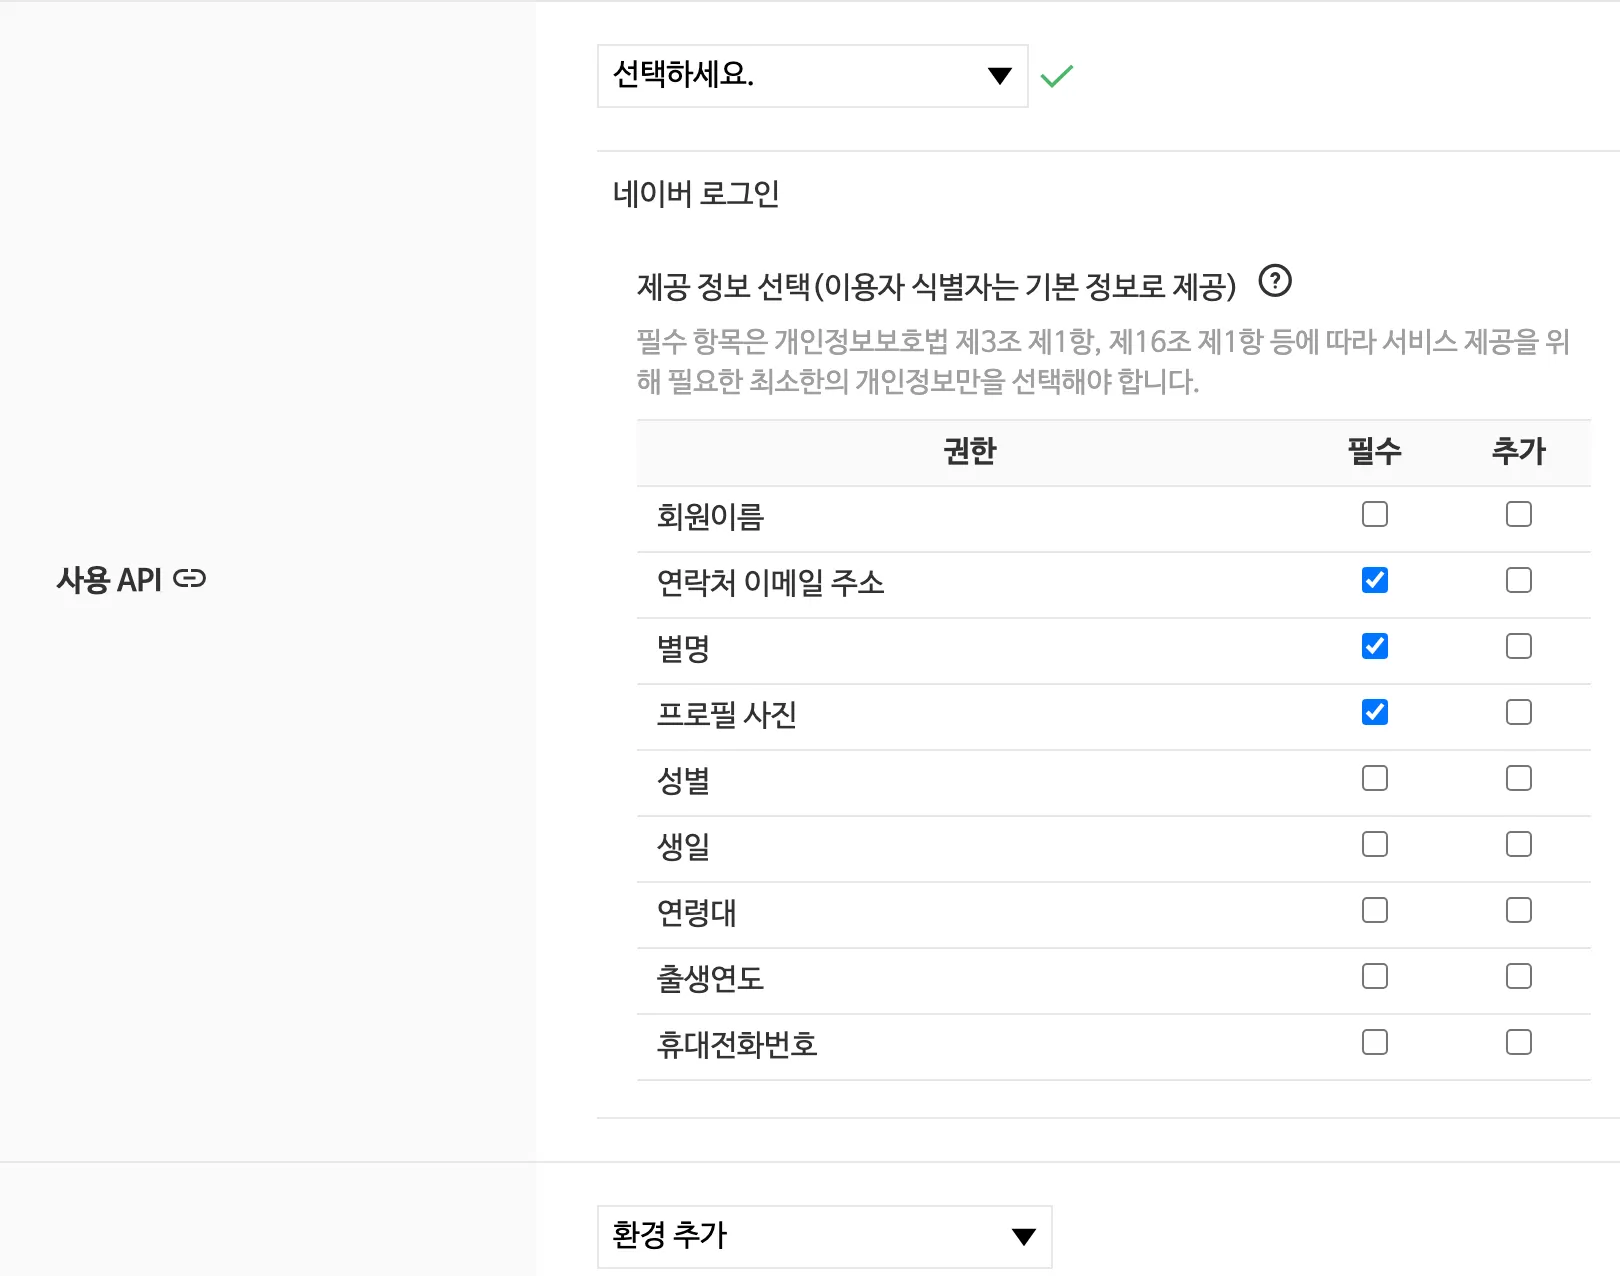
In the 제공 정보 선택(Select Provided Information) table, check 필수(Required) on these three rows only: 연락처 이메일 주소(Contact Email Address), 별명(Nickname), and 프로필 사진(Profile Picture).
-
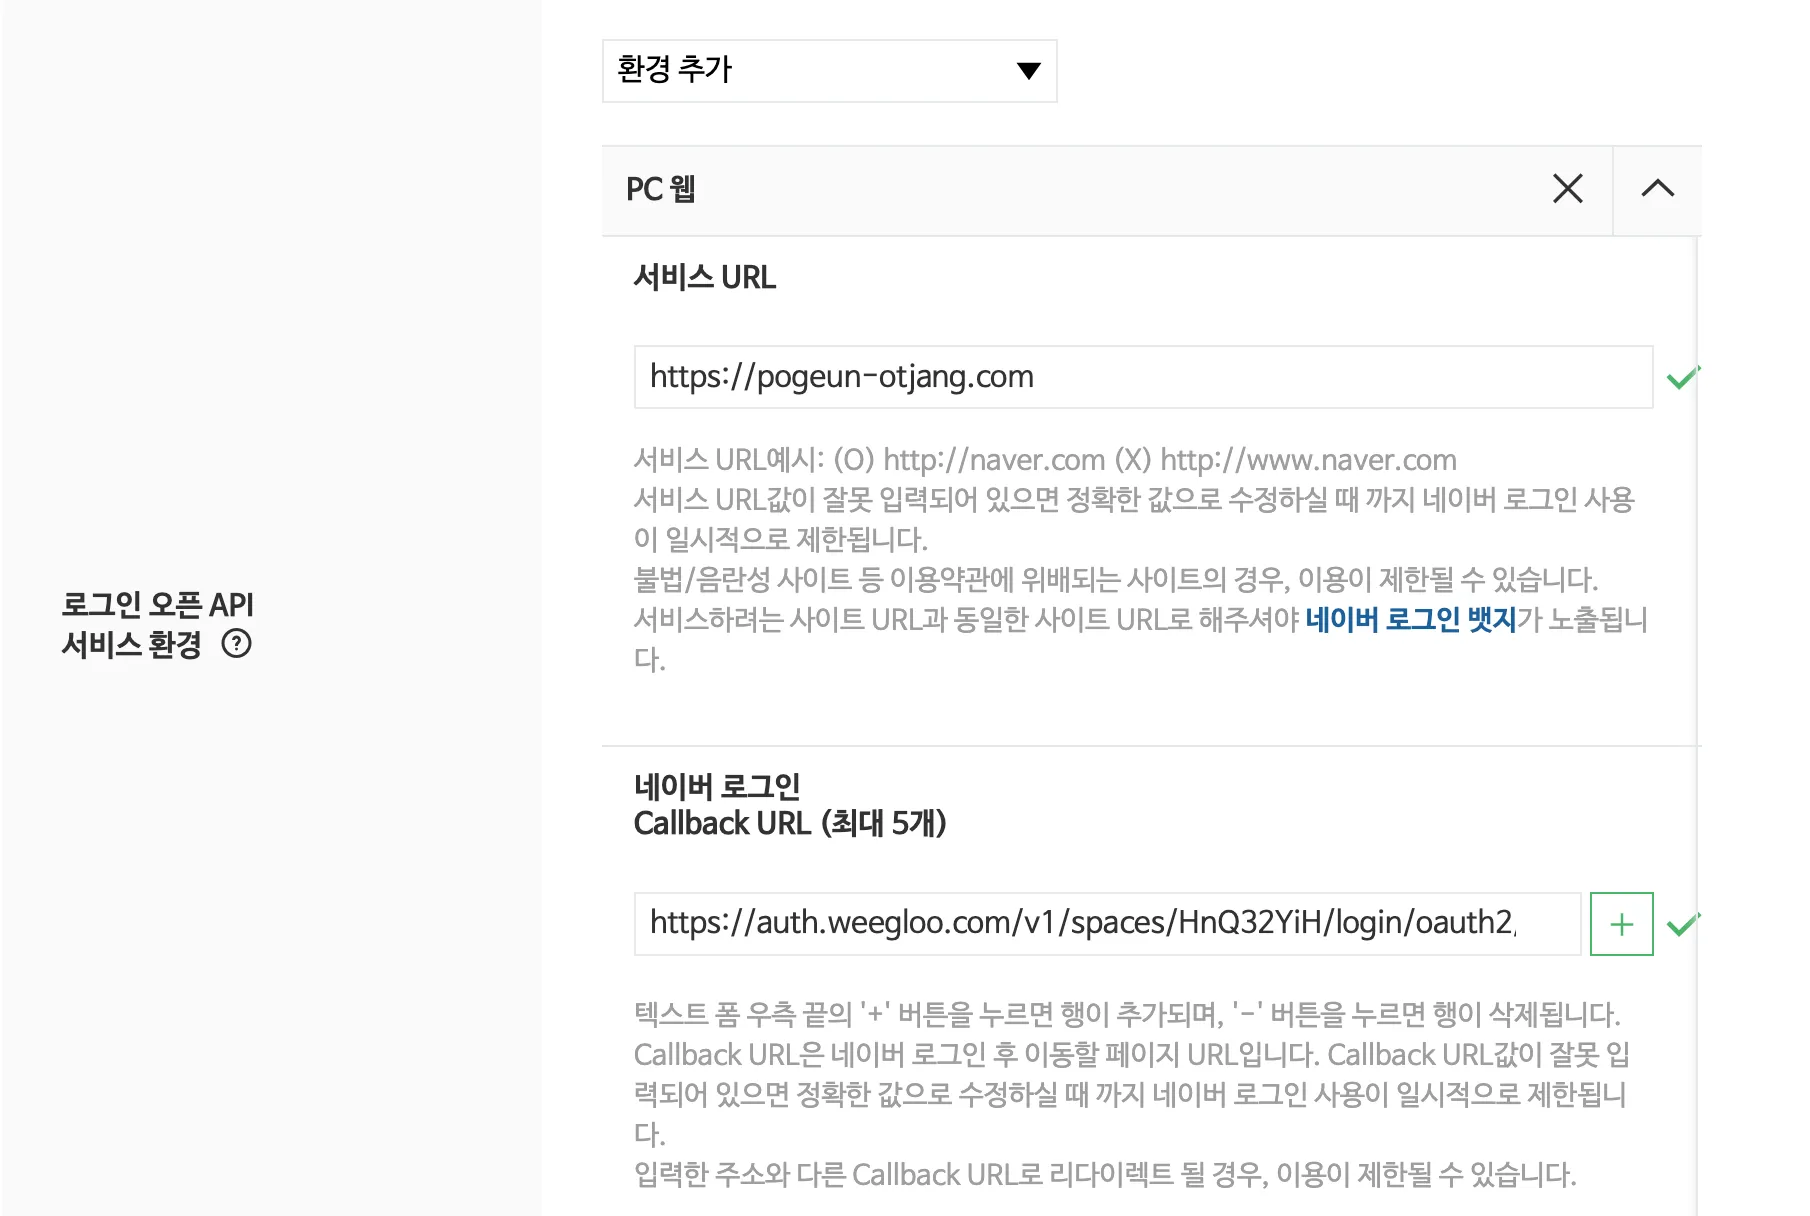
In 환경 추가(Add Environment), choose PC 웹(PC Web).
-
In 서비스 URL(Service URL), enter your site's address (for example,
https://cozy-closet.com). -
In the first box of 네이버 로그인 Callback URL, paste the address you copied in The address to copy first.
-
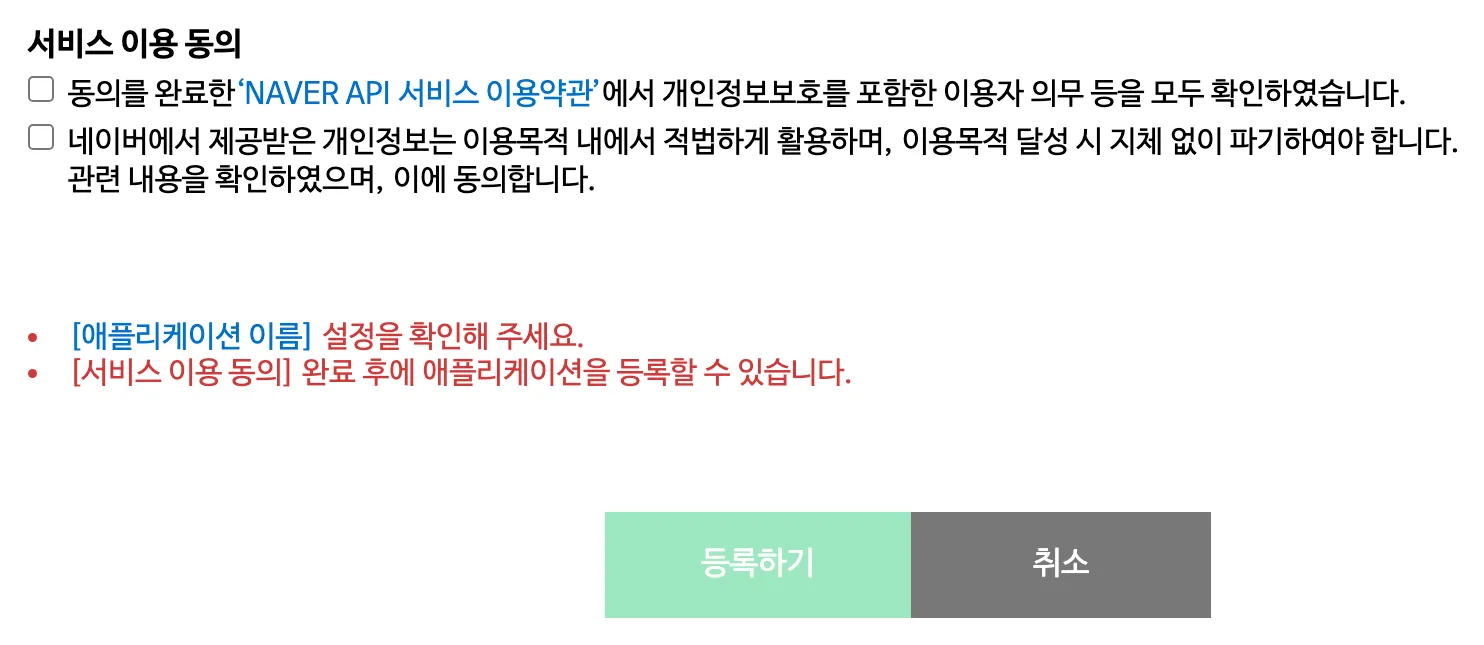
At the very bottom of the form, check the two checkboxes in 서비스 이용 동의(Agree to the Terms of Service).
-
Click 등록하기(Register).
You have to fill in the two address boxes exactly
For 서비스 URL, write only the domain without www, and write the same domain as your site. For Callback URL, enter only the single address you copied above and do not add more boxes. If either of the two boxes is off, Naver login is restricted until you fix it.
Do not choose the remaining items in 제공 정보 선택. One environment, PC 웹, is enough.
Copying the client ID and the client secret
When you click 등록하기, the 개요(Overview) tab of the application you just registered opens. The two values are in 애플리케이션 정보(Application Information).
-
Copy the value written in Client ID.
-
Click 보기(View) next to Client Secret.
-
Copy the value that appears.
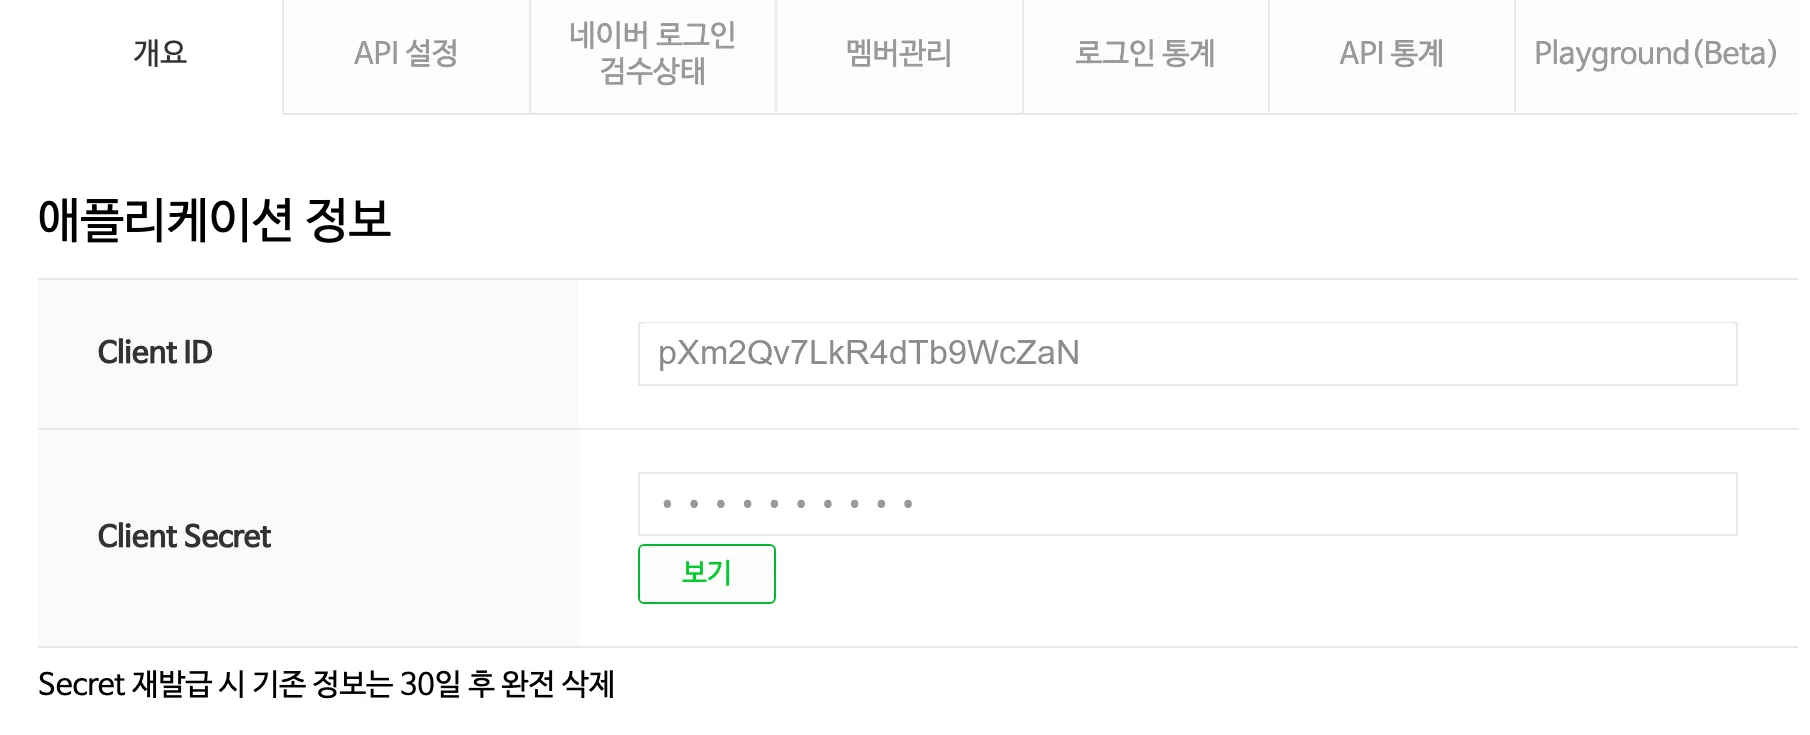
Client ID stays on this screen, and you can see Client Secret again whenever you click 보기. That said, the secret is a secret value. Do not tell it to anyone, and do not write it down anywhere public.
Every shopper can log in only after you pass the review
The application you registered has a 개발 상태(Development Status) of 개발 중(In Development). The WEEGLOO connection does not have to wait for the review. Once you put the two values in, login works right away.

While it is 개발 중, only the IDs registered on the 멤버관리(Member Management) tab can log in. You do not have to register your own ID. To test with another account, enter that ID in 테스터 ID 등록(Register Tester ID) on that tab.
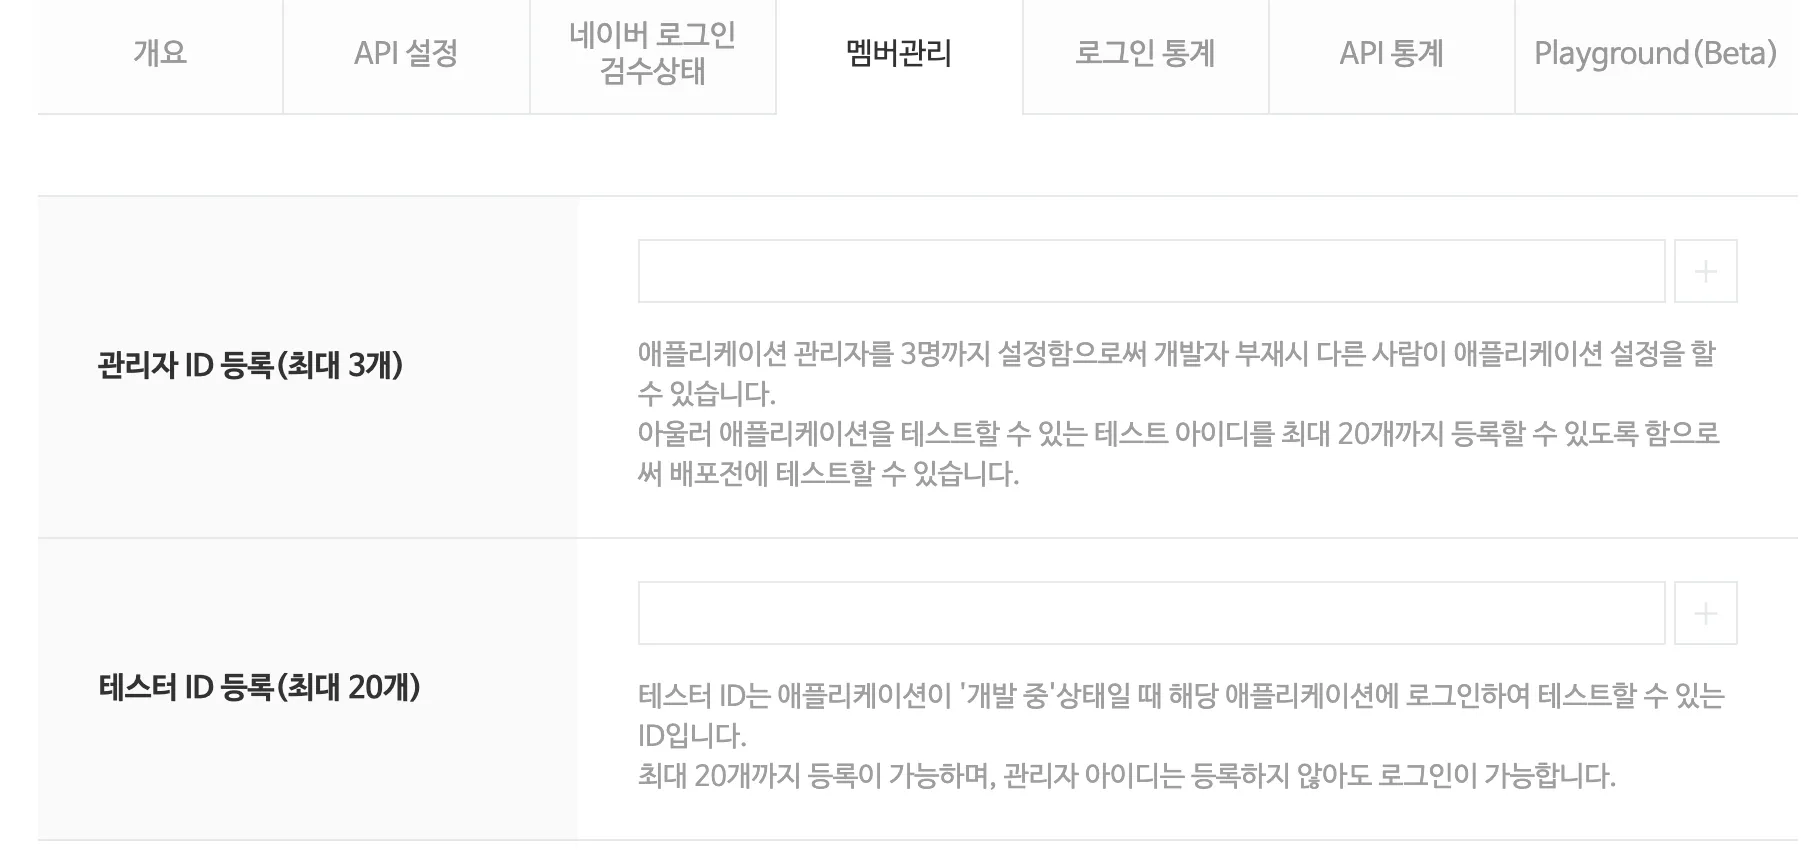
When you are ready to open it to every shopper, click 네이버 로그인 검수요청(Request Naver Login Review) on the 개요 tab. The materials you need and the review criteria are in the Naver docs.
Putting the values you received into WEEGLOO
Now you have the two values in hand. From here the path splits depending on how you have been working so far.
If you were configuring this directly in the content studio, follow these steps.
- Go back to turning on social login in Service Member Login.
- Turn on Naver.
- Enter the client ID in the Client ID box in Step 2.
- Enter the client secret in the Client Secret box.
- Click Save.
If you handed the integration to an AI agent and were told to go and get the values, paste the two values you received into the chat as they are and carry on with what you were doing. The agent handles the rest of the configuration from there.
What to do next
- Service Member Login: put the values you received into the content studio and finish the rest of the member login configuration.
- Member Roles and Permissions: create the ServiceUserRole that decides what a signed-up member can see and use.
- Auth API: covers technical specifications such as the request format you need when wiring login into your own site's code.