

Webhook
Imagine you run a clothing store. Every time you register a new product, there is follow-up work you have to take care of yourself. Things like translating the product description into other languages, or letting your team know about the new product through your company messenger. Instead of doing this follow-up work by hand every time, you can have an outside program handle it for you, automatically notified the moment a product is registered. This "device that automatically notifies a place you have decided on in advance whenever something happens" is a Webhook.
You can think of it like a doorbell mounted on your shop's door. When a customer opens the door and walks in (a product is registered), the doorbell rings on its own, and the staff inside (the outside program) immediately starts moving, thinking "a customer is here." No one needs to keep watching the door. Like that doorbell, a Webhook automatically starts an action you have decided on the moment a thing you have decided on happens.
This page first looks at what a Webhook is and when you use it, then walks through creating a Webhook in your clothing store Space.
What a Webhook does
A Webhook is made up of three things you decide in advance.
- When: You decide what has to happen for it to react. For example, you can set it to "when a product (Content) is newly registered."
- What to do: You decide one of two things. Either send a request to an outside program's internet address (URL), or run a Script you created inside your Space.
- On or off: You decide whether to keep this Webhook on now (Active) or turn it off for the time being (Inactive). While it is off, nothing happens even when the thing you decided on happens.
When the thing you decided on actually happens, the Webhook performs the action you decided on. When it sends to an outside address, the request carries information such as what happened and which product it happened on. The outside program that receives the request looks at that information and does its own job.
Which changes send a request
The "thing" that triggers a request is a change to a resource inside your Space. You can choose a moment when something happens to a Content such as a product, a Media (an uploaded file), or a Content Type (the form template).
The changes you can choose differ by resource, as follows.
| Change | When it happens | Clothing store example |
|---|---|---|
| Create | When something is newly created | A new product is registered |
| Save | When the content is edited and saved | A product description is edited and saved |
| Delete | When something is deleted | A discontinued product is removed |
| Publish | When something is published and made public | A product is made public on the site |
| Unpublish | When publication is canceled | An out-of-stock product is taken down from the site |
| Archive | When something is archived | A past-season product is archived |
| Unarchive | When something is restored from the archive | An archived product is brought back |
For example, "send a request every time a product is newly registered" means choosing "Create of a product (Content)."
You can also choose several changes together in one Webhook. If you choose both "when a product is registered" and "when a product is edited," a request goes out whenever either one happens.
Narrowing it down with conditions
There are times when you do not want to send a request every time the change you chose happens. For example, you may want to receive a request "only when a Content made with the 'Product' form was registered, not every Content." In this case, you add a filter to narrow down when a request is sent.
A single filter is made of one line: "what to compare against, and how to compare it." You choose what to filter by from four options.
- Which form an item was made with: For example, send a request only for a Content made with the "Product" Content Type. This is the most frequently used condition.
- Whether it is one specific item: Send a request only for changes that happen on that one item you decided on.
- Who made the item: Send a request only for items made by a specific person.
- Who last edited the item: Send a request only for items that a specific person edited last.
You also choose how to compare. You can narrow it down to: only when it equals the value you set, only when it differs, only when it matches one of several values you decided on, only when it matches none of them, or only when it matches (or does not match) a format (pattern) you set.
In the trigger settings of the content studio, you add conditions one line at a time with Add Filter. If you add several filters, a request goes out only when all of those conditions are met; if you add none, a request goes out every time the change you chose happens.
Sending it in the shape the outside program wants
Unless you specify otherwise, the request carries the full information of the item that changed. For example, when the product "Stainless Tumbler 500ml" is registered, the content carried in the request looks roughly like this.
{
  "sys": { "id": "3trmXRM3RqbgSnifyg7OGhwhlqvAvq", "type": "Content" },
  "fields": {
    "productName": { "ko-KR": "스테인리스 텀블러 500ml" }
  }
}
(In practice, more information is included; the above is only a trimmed subset.) The outside program can pick out the values it needs from this. But some programs have a fixed format and "will only accept data in this shape." In that case, in the payload section of the content studio, you choose Customize the Webhook payload and write the shape to send yourself.
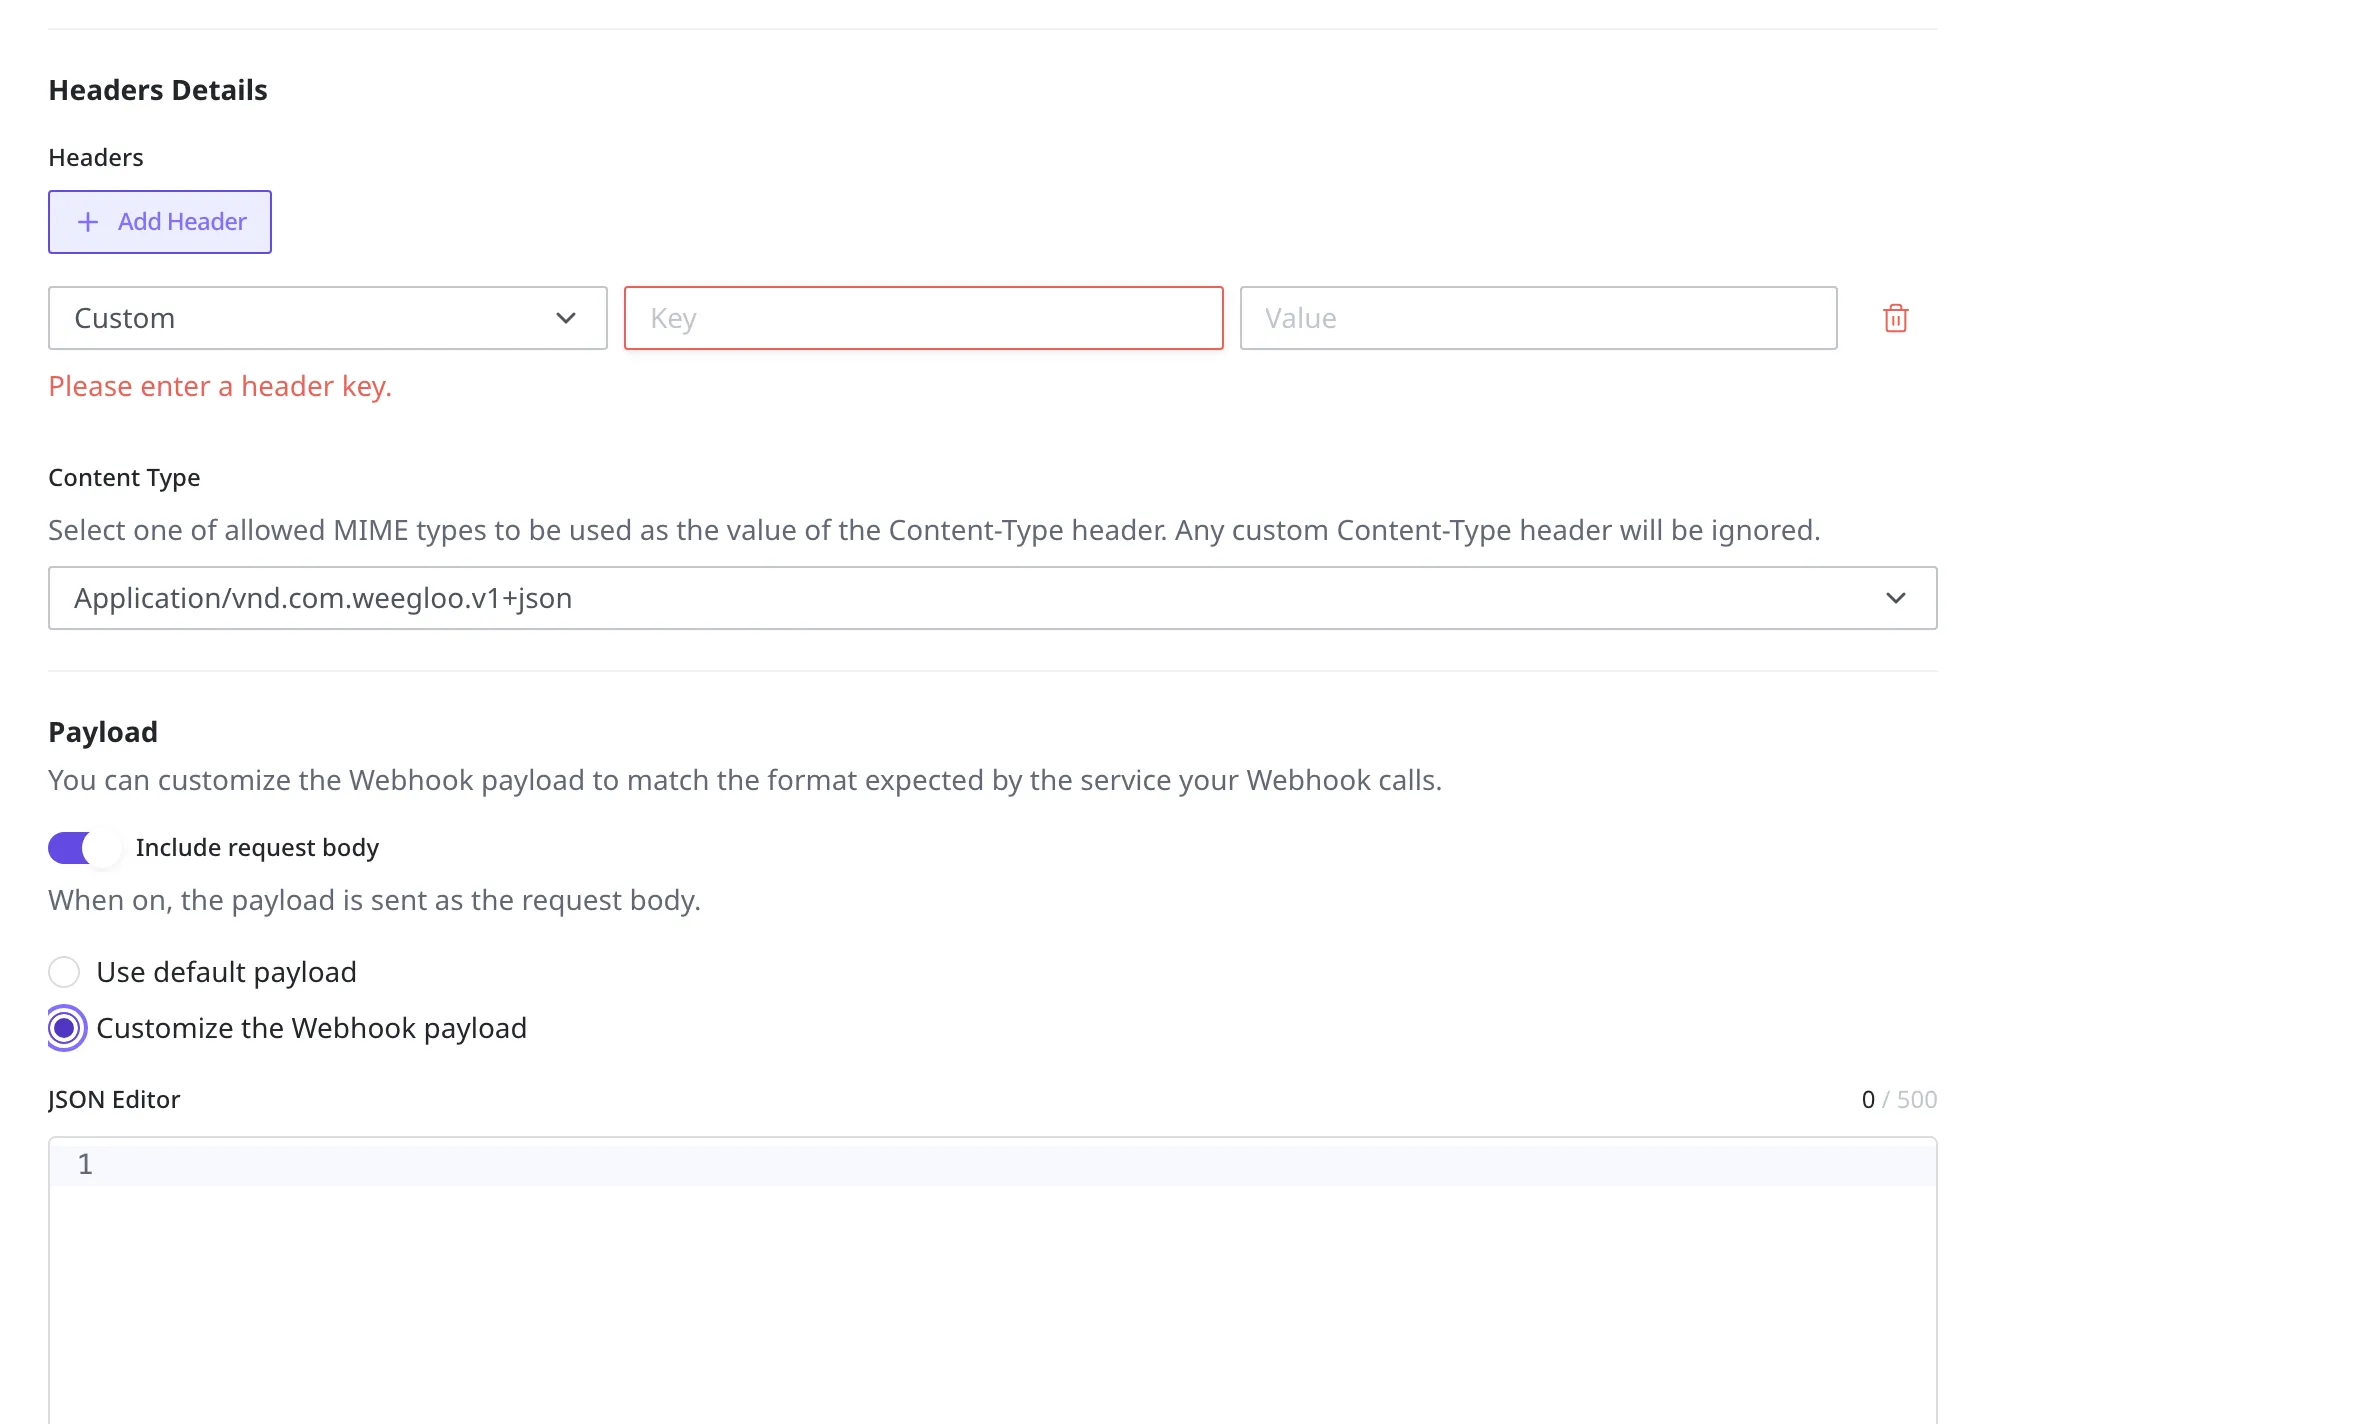
When you write the shape to send, you use a placeholder in the spots where you want to pull a value from the data above. A placeholder has the form { /payload/… }. Here payload refers to that whole item shown above, and the path after it pinpoints the value you want.
{ /payload/sys/id }→idinsidesysin the data above (the product's unique number){ /payload/fields/productName/ko-KR }→ theko-KRofproductNameinsidefields(the Korean product name). Afterfields/, you append the Field's ID (productNamefor the product name) and the language code (ko-KRfor Korean) in turn.
For example, if a translation program asks for "the text to translate and the product number in this shape," you write the payload like this.
{
  "id": "{ /payload/sys/id }",
  "text": "{ /payload/fields/productName/ko-KR }"
}
Then, the moment the tumbler product is registered, the placeholders are replaced with the actual values and delivered like this.
{
  "id": "3trmXRM3RqbgSnifyg7OGhwhlqvAvq",
  "text": "스테인리스 텀블러 500ml"
}
The same placeholders can also go in the sending address (URL) or in header values, and you can also choose the sending method (method) and the format (JSON or form format). If there is no value at the path you pointed to, that spot becomes an empty value.
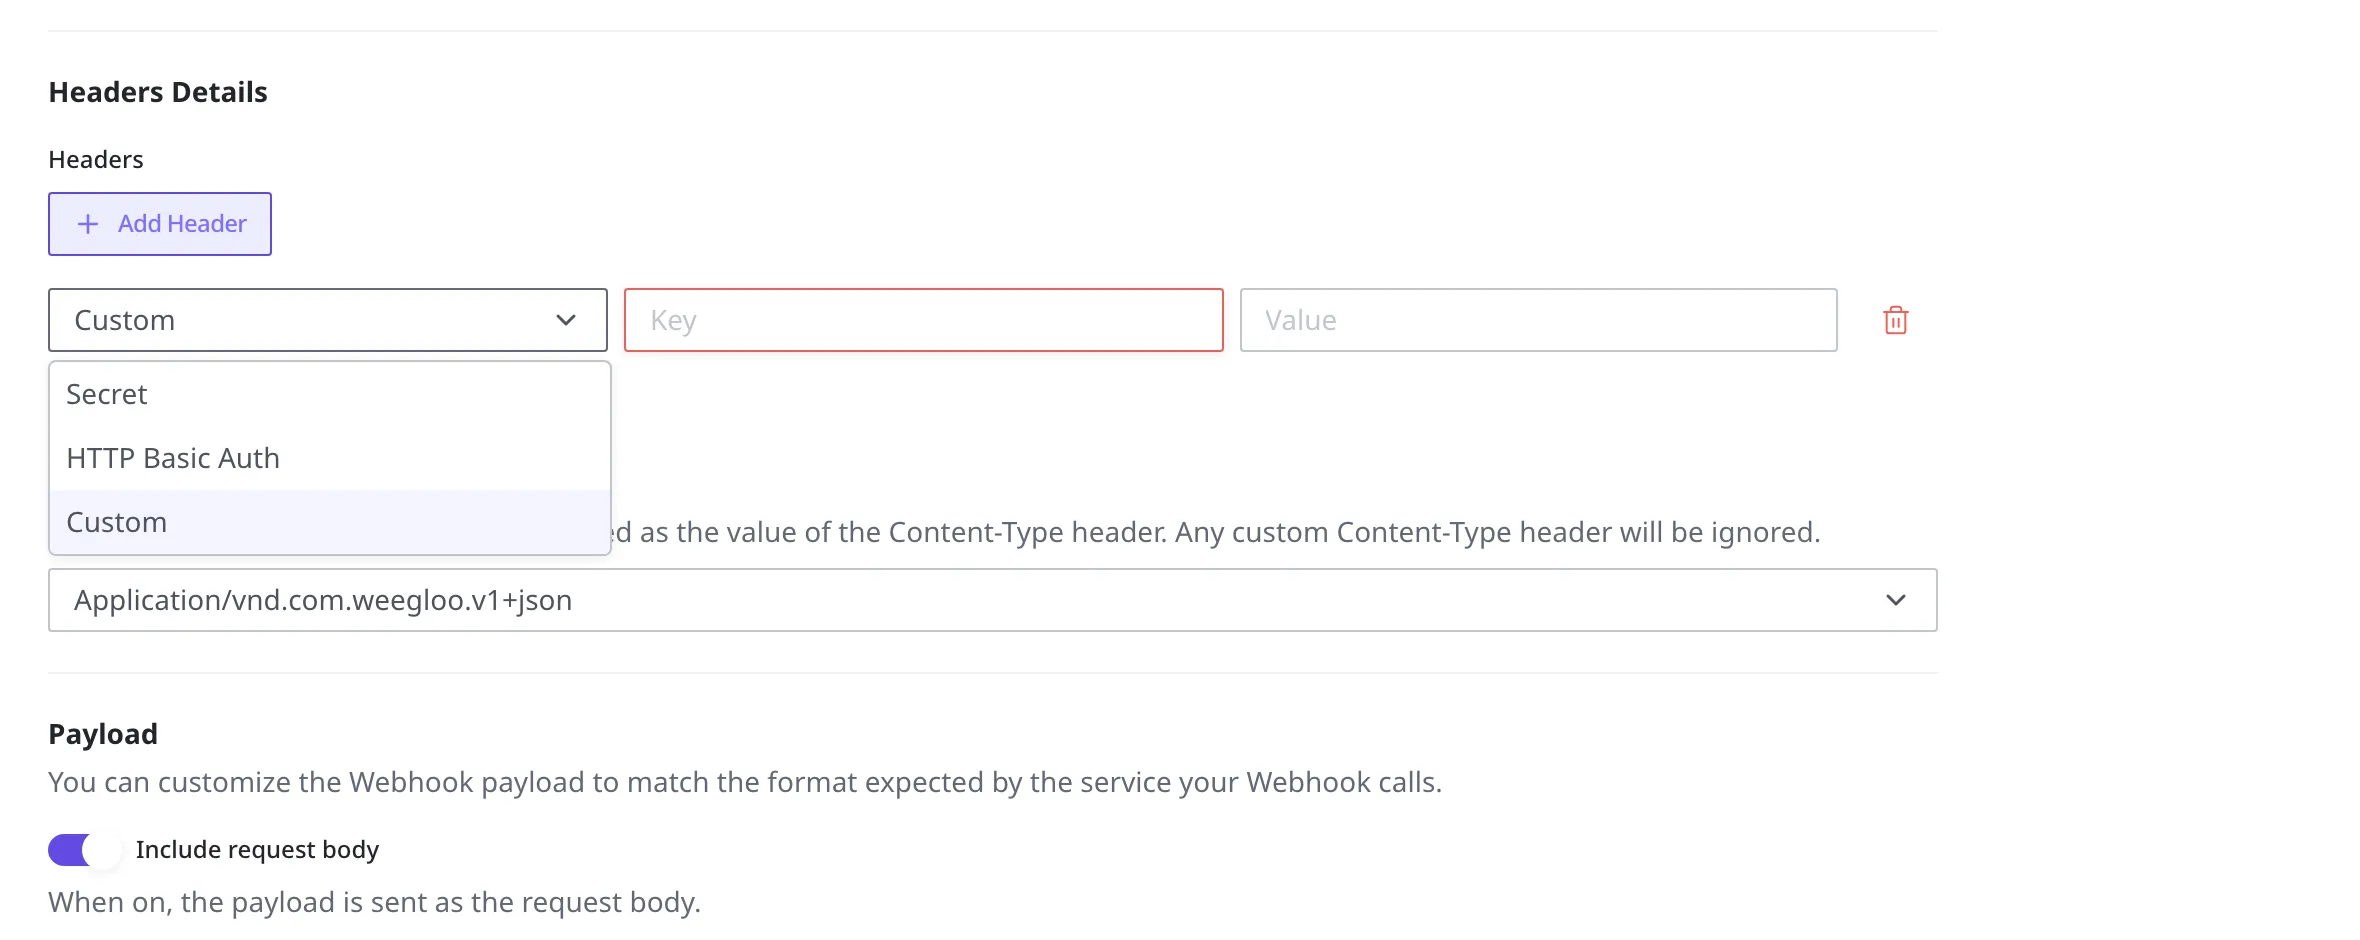
For values that must not be exposed to others, such as an external API key, set the header's type to Secret when you add it. The value is then stored masked and is not exposed to the end user.
Running a Script instead of a URL
So far the Webhook has been sending a request to an outside address (URL). Instead, a Webhook can run a Script you created inside your Space. A Script is a device that carries out work you have defined (creating and editing resources, and so on) inside your Space, without going outside. You use this approach when you want to finish the follow-up work inside your Space without going through an outside program.
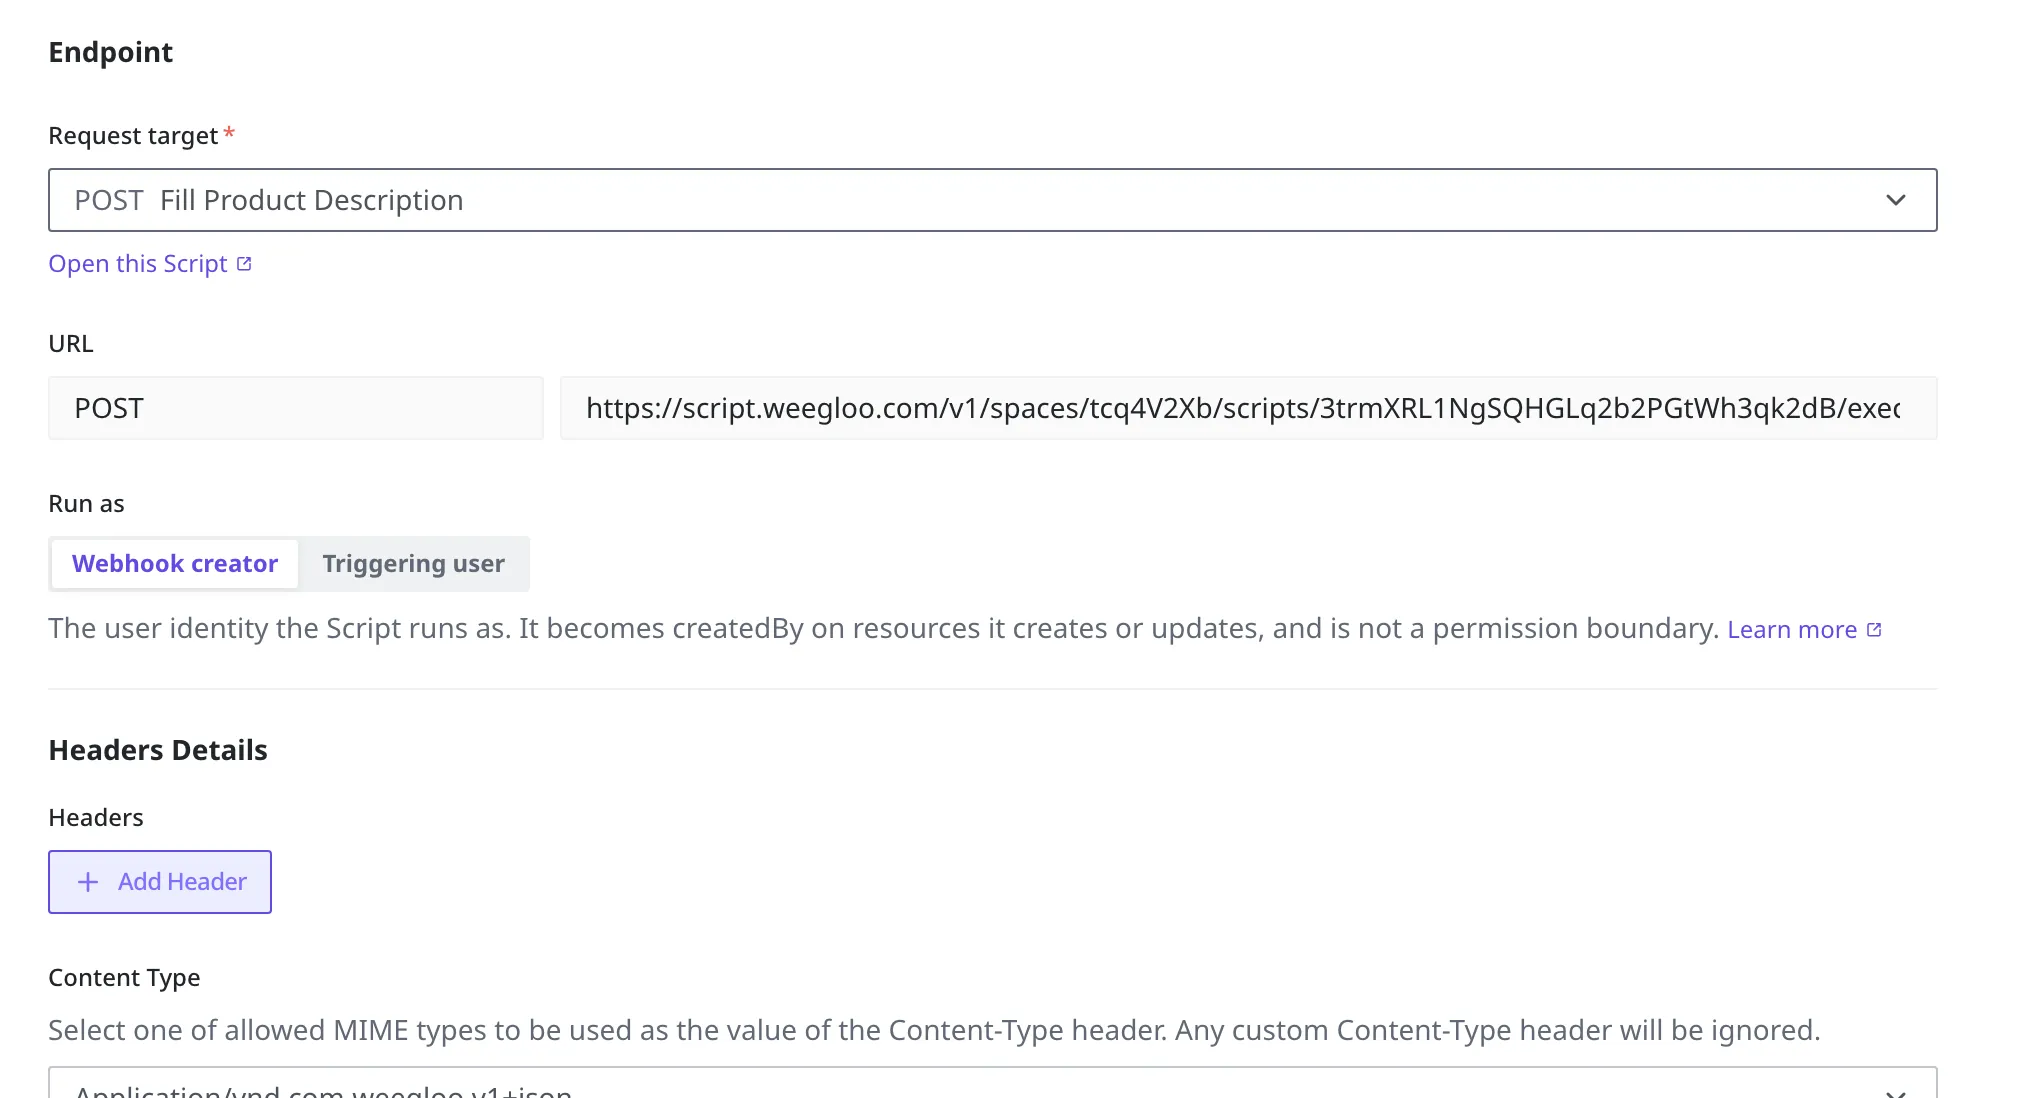
A single Webhook does exactly one of the two: sending to an outside address, or running a Script. You decide this in the Request target on the create screen. If you choose Enter URL, it sends a request to the address as before; if you instead choose a Script from the list, it runs that Script.
When you choose a Script, a Run as setting also appears, which decides whose identity the Script runs as. You choose one of two.
- Webhook creator (default): The "created by" of any resource created or changed during the run is recorded as the person who created the Webhook.
- Triggering user: It is recorded as the user who caused the change.
This setting only decides the "who did it" mark left on resources; it does not widen or narrow what the Script can do. What a Script is allowed to do is already decided when you create it.
The order for actually choosing is as follows.
- On the create screen, click Request target.
- Choose the Script to run from the list. This means choosing a Script instead of Enter URL.
- Choose the identity under Run as. The default is Webhook creator.
What a Script is and how you create one is covered in Script.
Creating the clothing store Webhook
Now create one Webhook in your clothing store Space. It is a Webhook that "notifies a pre-prepared outside translation program whenever a new product is registered." Suppose the address of the outside program that will receive the request is https://example.com/translate.
- In your clothing store Space's settings, open the Webhook screen.
- Click the Create button at the top right.
- Enter
New product translation noticein the name field. This name is for recognizing later which Webhook it is. - Decide which change sends the request. To send for a specific change only, choose Select specific triggering events and then specify the change you want (here,
Createof a product (Content)); to send for every change, choose Trigger for all events. - Enter the address of the outside program that will receive the request,
https://example.com/translate, in the URL field. - If you turn Active on, it sends requests as soon as you create it (Active). To only test for a while, turn it off (Inactive).
- Click the Create button to create the Webhook.
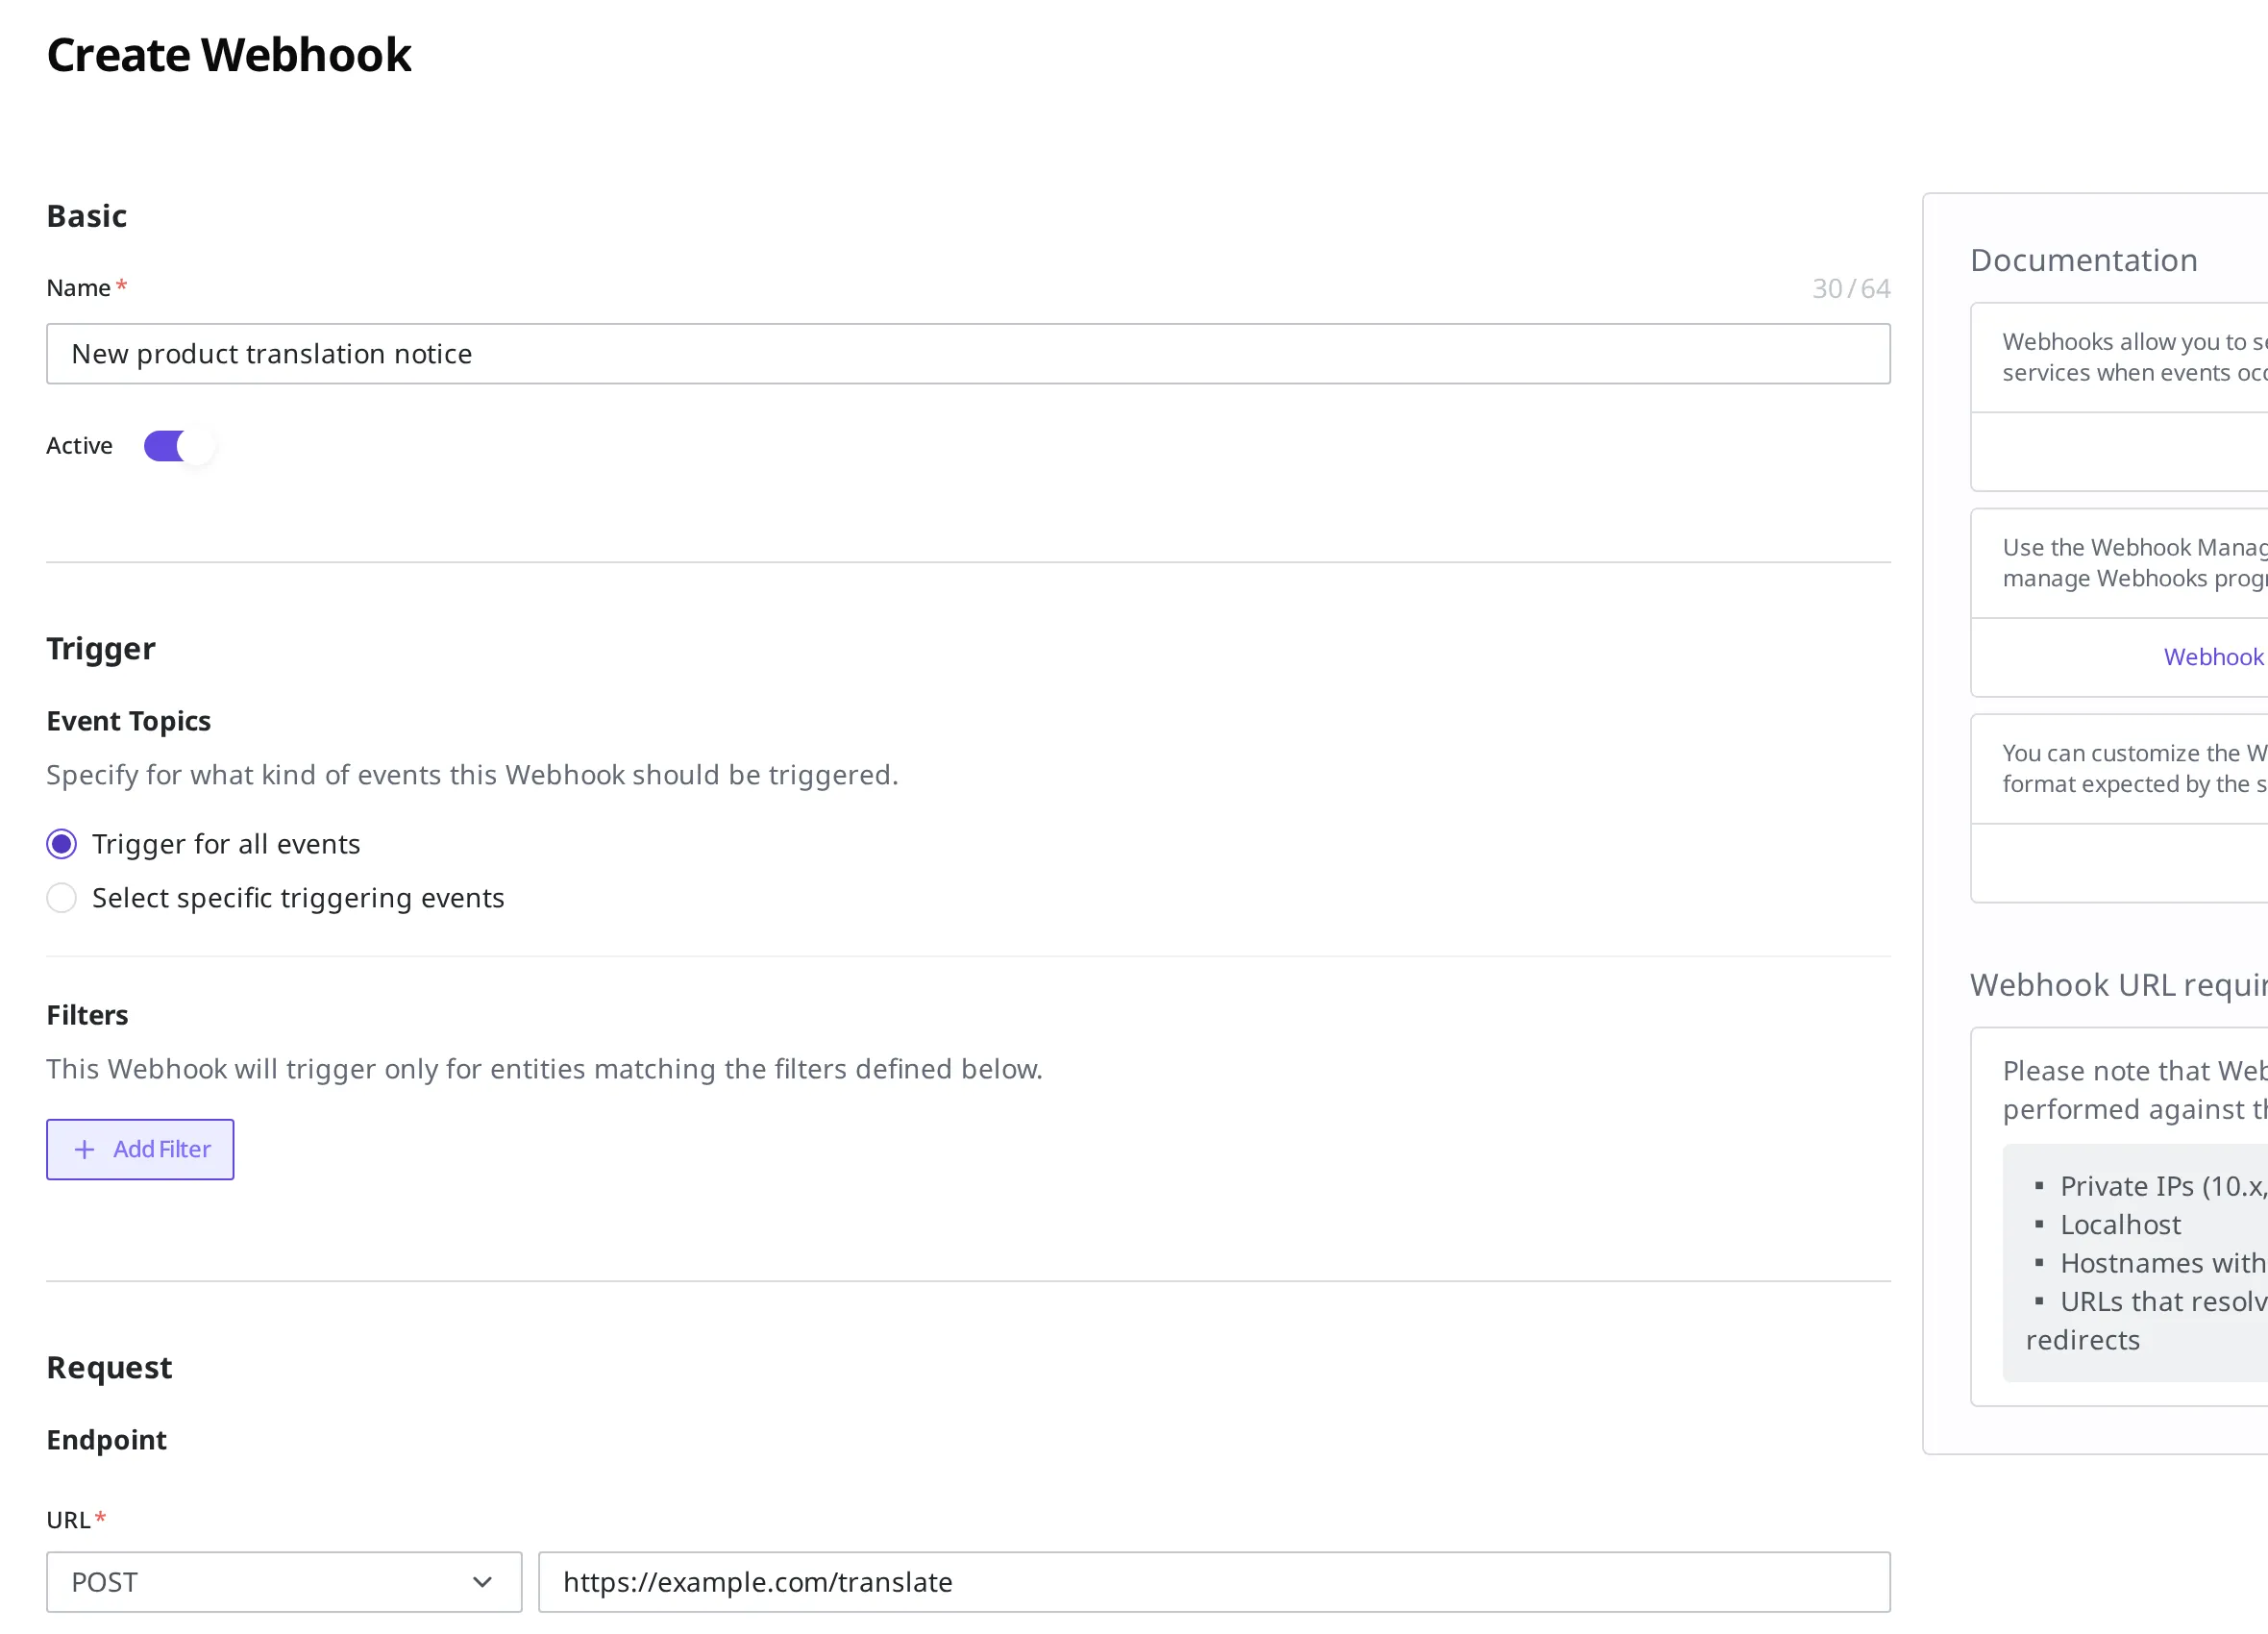
When New product translation notice appears in the list in the Active state, the Webhook has been created.
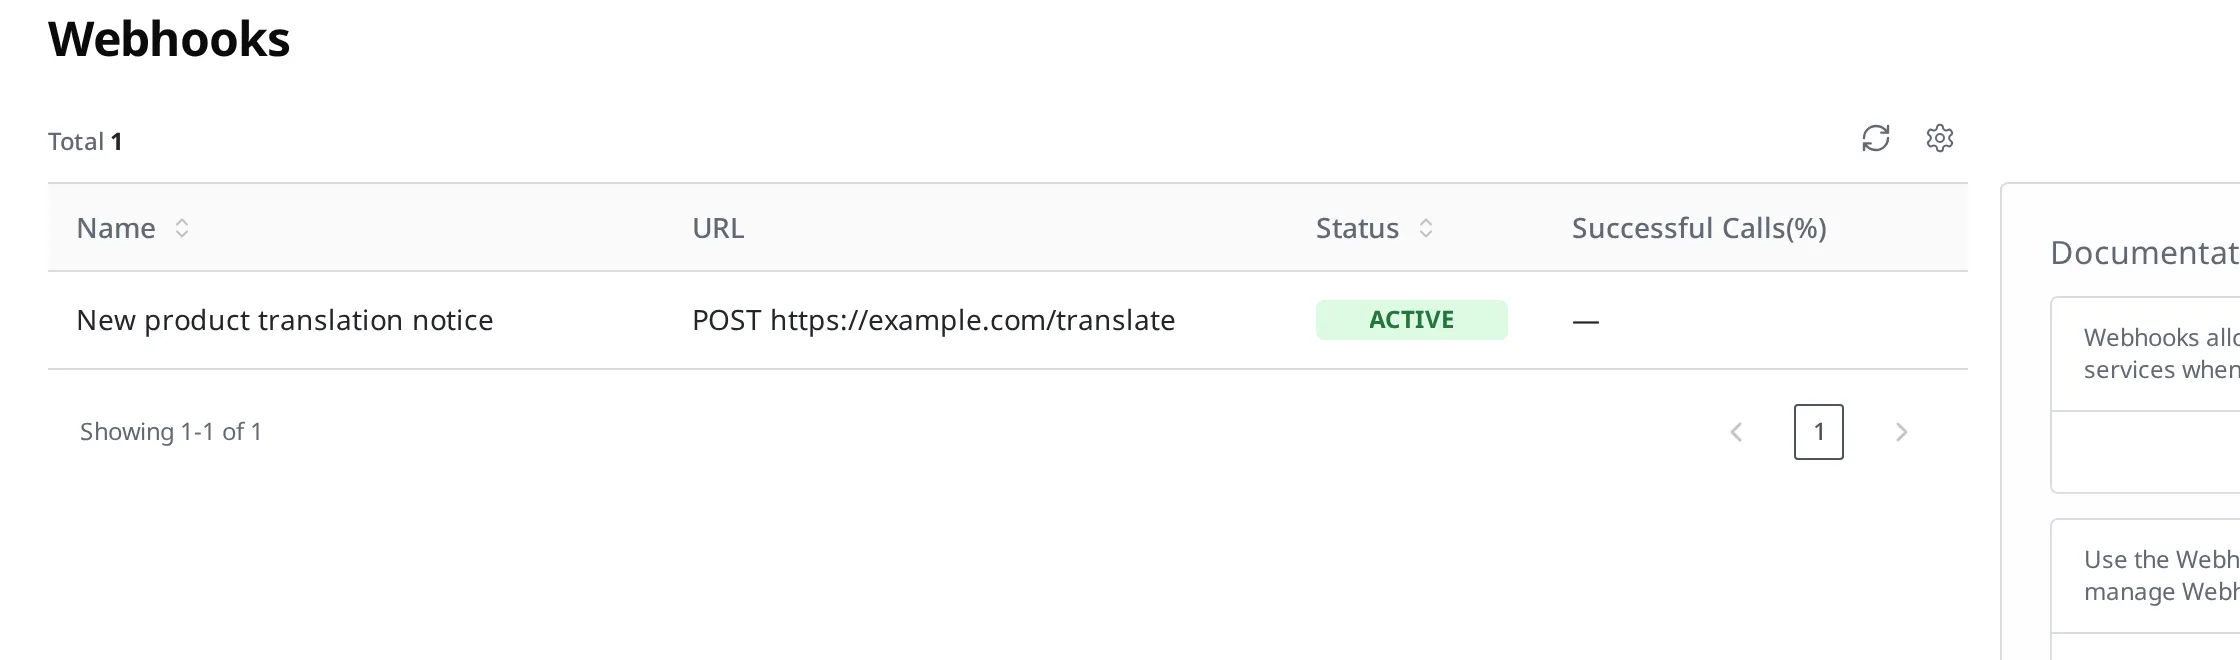
After creating it, try actually registering a new product in your clothing store. The moment you register it, the Webhook sends a request to the address you wrote down. You can check whether the request went out properly and how the outside program responded in the Webhook's call log.
Turning it on and off, and editing
You can turn a Webhook on and off at any time, even after creating it. When you want to pause requests for a while, do not delete it; turn it off to Inactive. While it is off, no request goes out even if you register a new product. When you turn it back on to Active, it starts sending requests again from then on.
When you reopen a Webhook you created, you can turn Active off or back on. You can also edit the name, the address to send requests to, and the changes to call later, and you can delete a Webhook you no longer use.
What to do next
- Content Modeling: Covers how to make the form template for a Content such as a "product," which is what a Webhook sends requests for.
- Authoring Content: You can register an actual product and check that the Webhook works.
- Script: Covers how to create the work that runs inside your Space, which a Webhook can run instead of a URL.
- API Reference: Covers the request and response formats and field specs used when you create and manage Webhooks directly from a program.