

Roles and Permissions
Imagine you have added your colleague minji.kim@example.com to the Space for your clothing store. You want to let them register and edit products, but you are not comfortable letting them delete products or make them publicly available. A SpaceRole is the bundle of permissions that decides exactly this: "what a member can and cannot do within a single Space."
Instead of assigning permissions to each member one by one, a SpaceRole lets you prepare a bundle of permissions in advance and attach it to members. For example, once you create a role that "can only read and edit products," you can attach that one role to every colleague you want to handle product registration. Even as your team grows, you do not have to define permissions from scratch each time.
This page first looks at what a SpaceRole is and what permissions it holds, and then walks through creating a "Product Editor" role directly in your clothing store Space.
Space roles are different from Organization roles
WEEGLOO has two places where permissions are decided. They are easy to confuse, so let's draw the boundary first.
- Organization roles (Owner, Admin, Member) are your rank across the whole company. They decide who can do things that span the entire Organization, such as inviting members or creating a new Space.
- A SpaceRole is a permission within one specific Space. It decides how far a member can go in handling content inside that workspace, such as creating, editing, and publishing products.
You can give the same colleague a different SpaceRole in each Space. For example, you can let them edit products in your shopping mall Space, while letting them only read in an internal-announcements Space. This page covers only SpaceRole. Organization roles, member invitations, and assignment are covered in Organizations and Spaces.
What a role holds: which actions, on what
A single SpaceRole holds "which action, on what target, to allow or deny."
First, there are four kinds of target a permission can be set on. Three of them share the same set of actions and are listed below; the fourth, Script, has different actions and is covered separately further down.
- Content Type: the form template for things like products or announcements
- Content: each individual product made from that template
- Media: uploaded files such as photos and videos
The actions you can allow or deny for each target are as follows.
The actions are shown in English on screen. Here is what each action means.
| Action (on-screen label) | What it does |
|---|---|
| Read | Views the list and the contents |
| Create | Makes a new one |
| Edit | Changes something that already exists and saves it |
| Delete | Deletes it |
| Publish | Publishes it so it becomes publicly available (delivered) |
| Unpublish | Takes down the publication and stops making it publicly available |
| Archive | Moves it into an archived state |
| Unarchive | Restores it from the archive |
| All actions | Allows all of the above actions at once |
In the clothing store example, the "Product Editor" role allows Read, Create, and Edit on Content (products) while leaving out Delete and Publish. That way your colleague can create and edit products, but cannot delete them or make them publicly available.
What Publish is, and how publishing makes something publicly available (delivered) externally, is covered in detail in States and Publishing.
Allow and Deny
The role screen has a separate Allowed list and Denied list. You add the actions you want to permit, one rule per line, to the Allowed list. The important part is that any action you do not add to the allow list is automatically denied. So if you put only the actions you want to give your colleague into the allow list, the rest are blocked without you having to block them separately.
The Denied list is a safeguard for when you want to "allow broadly but make an exception that blocks just one specific part." When a single action is caught by both allow and deny, deny always wins.
Narrowing the scope to a specific kind or a specific person
When you allow an action, you can narrow that permission down to a single kind or a specific condition. For example, the following kinds of narrowing are possible.
- To one kind only: applies only to the "Product" Content Type, and not to other Content Types.
- To only what they created: lets the member handle only the Content they created themselves, so they cannot touch what others made.
- To only what carries a specific Tag: applies only to Content or Media that has a chosen Tag.
If you do not narrow the scope, the action applies to the entire target. For example, if you allow reading Content without narrowing it, the member can read all Content; if you narrow it to the "Product" Content Type, they can read only products.
What a Tag is is covered in Tag.
Script execution and management permissions
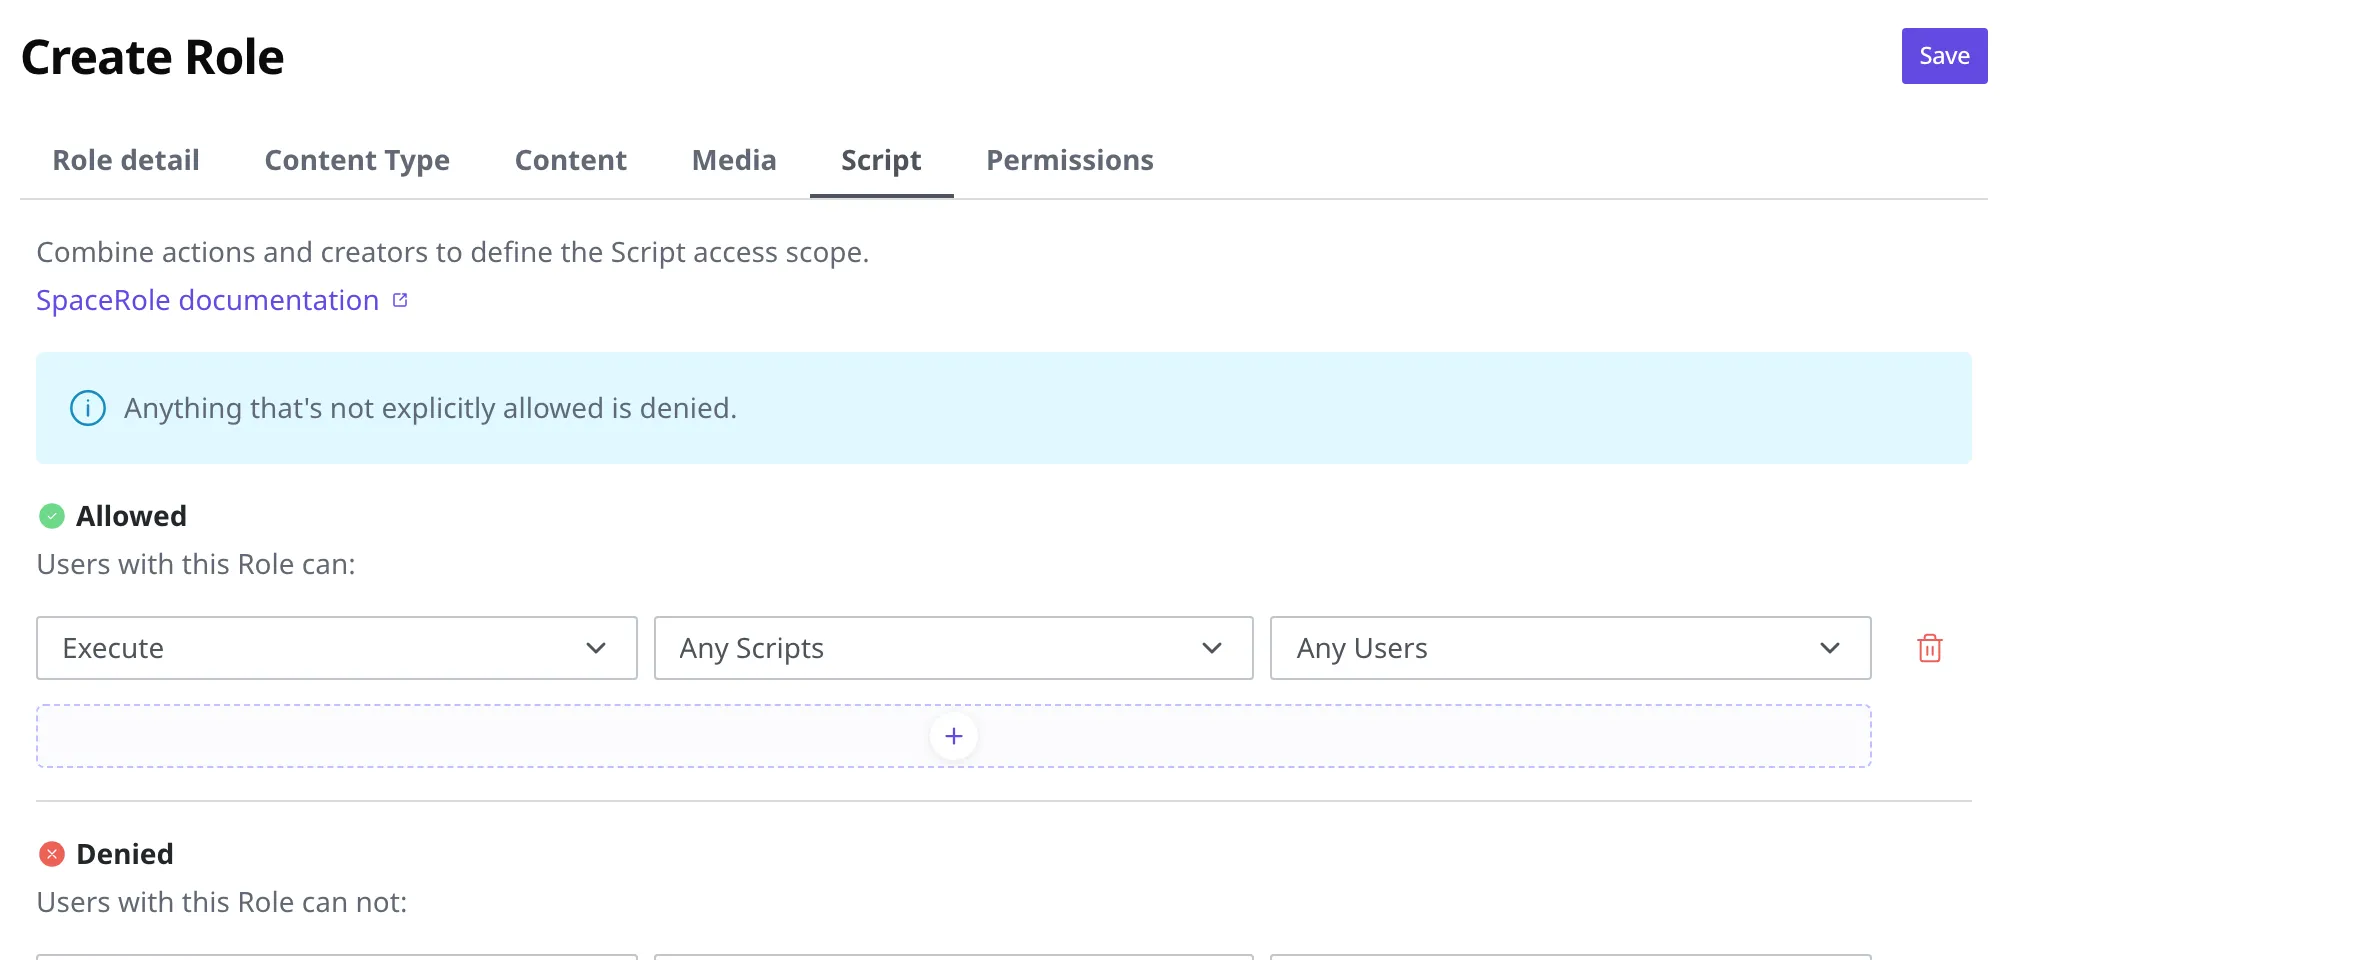
Beyond the three targets above, a SpaceRole also holds permissions for Script. A Script is a backend endpoint that your frontend calls, built with no server code (see Script). It has an Execute action that Content and Media do not have.
- Execute: Lets someone run (call) that Script. Your frontend, or a signed-up member, needs this permission to call a Script.
- Read, Create, Edit, Delete: The management permissions for viewing, creating, changing, and deleting a Script.
You can narrow this down by author, so a member handles "only the Scripts they created themselves." There is no publish action, because a Script is not a resource you publish. For members who sign up to your product (ServiceUser), you usually open only Execute, since authoring, that is, creating and changing Scripts, is handled by content studio users.
The exact format of the permission rules is covered in the SpaceRole and ServiceUserRole API references.
A role also decides whether Space settings can be changed
Everything up to here has been about permissions for handling content and Scripts. A role holds one more list, and it is different in kind. It is about whether Space settings can be changed.
Coming back to the clothing store example, you probably want to leave product registration to your colleague, but not adding a new Locale or issuing a token for an external site to use. This list is what decides who can do that kind of Space setting work.
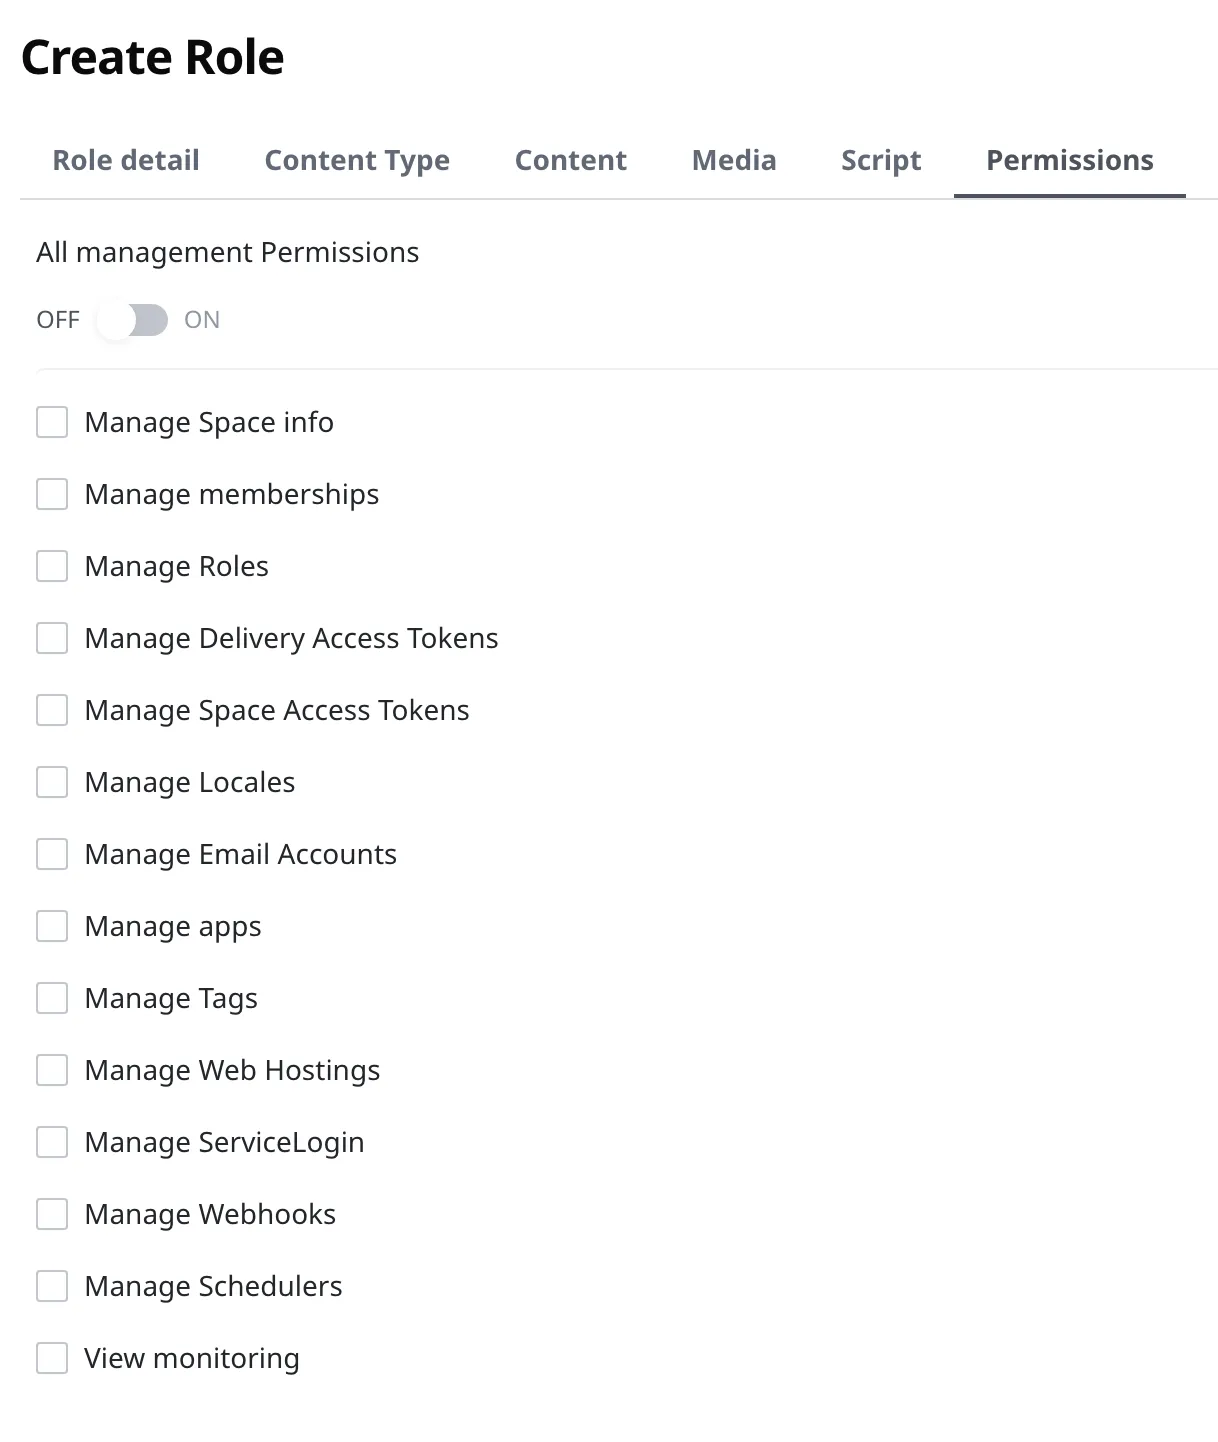
Unlike the permissions above, this list has neither actions nor scope narrowing. If an item is turned on, that setting can be handled; if it is not, it cannot. You switch them on and off on the Permissions tab of the screen where you create or edit a role. Turning on All management Permissions at the top switches on every entry below it at once, and switching the entries on one by one also shows this toggle as on. The items you can turn on are as follows.
| Item | What turning it on allows |
|---|---|
| Manage Space info | Edits the Space's name and description |
| Manage memberships | Adds members to this Space, removes them, and changes a member's role |
| Manage Roles | Creates and edits roles, as you do on this page |
| Manage Delivery Access Tokens | Issues and manages read-only tokens |
| Manage Space Access Tokens | Issues and manages read-and-write tokens |
| Manage Locales | Adds a language or changes the default language |
| Manage Email Accounts | Registers the sender account used when sending mail |
| Manage apps | Brings an app in from the market and installs it |
| Manage Tags | Creates, edits, and deletes Tags |
| Manage Web Hostings | Deploys a site and connects a domain |
| Manage ServiceLogin | Sets up sign-in and member permissions for the people who sign up to your product |
| Manage Webhooks | Creates Webhooks and views their call history |
| Manage Schedulers | Creates Schedulers and views their execution history |
| View monitoring | Views the storage and traffic this Space has used |
Note that the two kinds of token are separate items. You can let someone issue only the read-only Delivery Access Token while blocking them from issuing the read-and-write Space Access Token. You split them this way when you want your colleague to issue the read token that goes into a public site themselves, while only an administrator creates the token that can write as well.
Manage Schedulers does not end with this item alone. When you create or edit a Scheduler, you also need the Execute permission on the Script it will run (see Whose authority it runs under).
If you turn none of the items on, the role becomes a role that handles content only. The "Product Editor" role we will create further down is exactly that: it can register and edit products, but cannot touch a single Space setting.
The Administrator role that comes with every Space
When you create a new Space, a role called Administrator is automatically created along with it. This role is the highest-privilege role that can handle everything inside that Space. The person who creates the Space starts out holding this Administrator role.
The Administrator role is a role the system provides, so it cannot be edited or deleted. If you want to give a colleague a narrower set of permissions, instead of editing Administrator, create a new role separately as shown below and give them that.
Creating the "Product Editor" role
Now let's create the "Product Editor" role directly in your clothing store Space to give to your colleague. This role will be able to Read, Create, and Edit products (Content), but will not be able to delete or publish them.
- In the left menu, click Roles & Permissions.
- Click the Create button at the top right of the list.
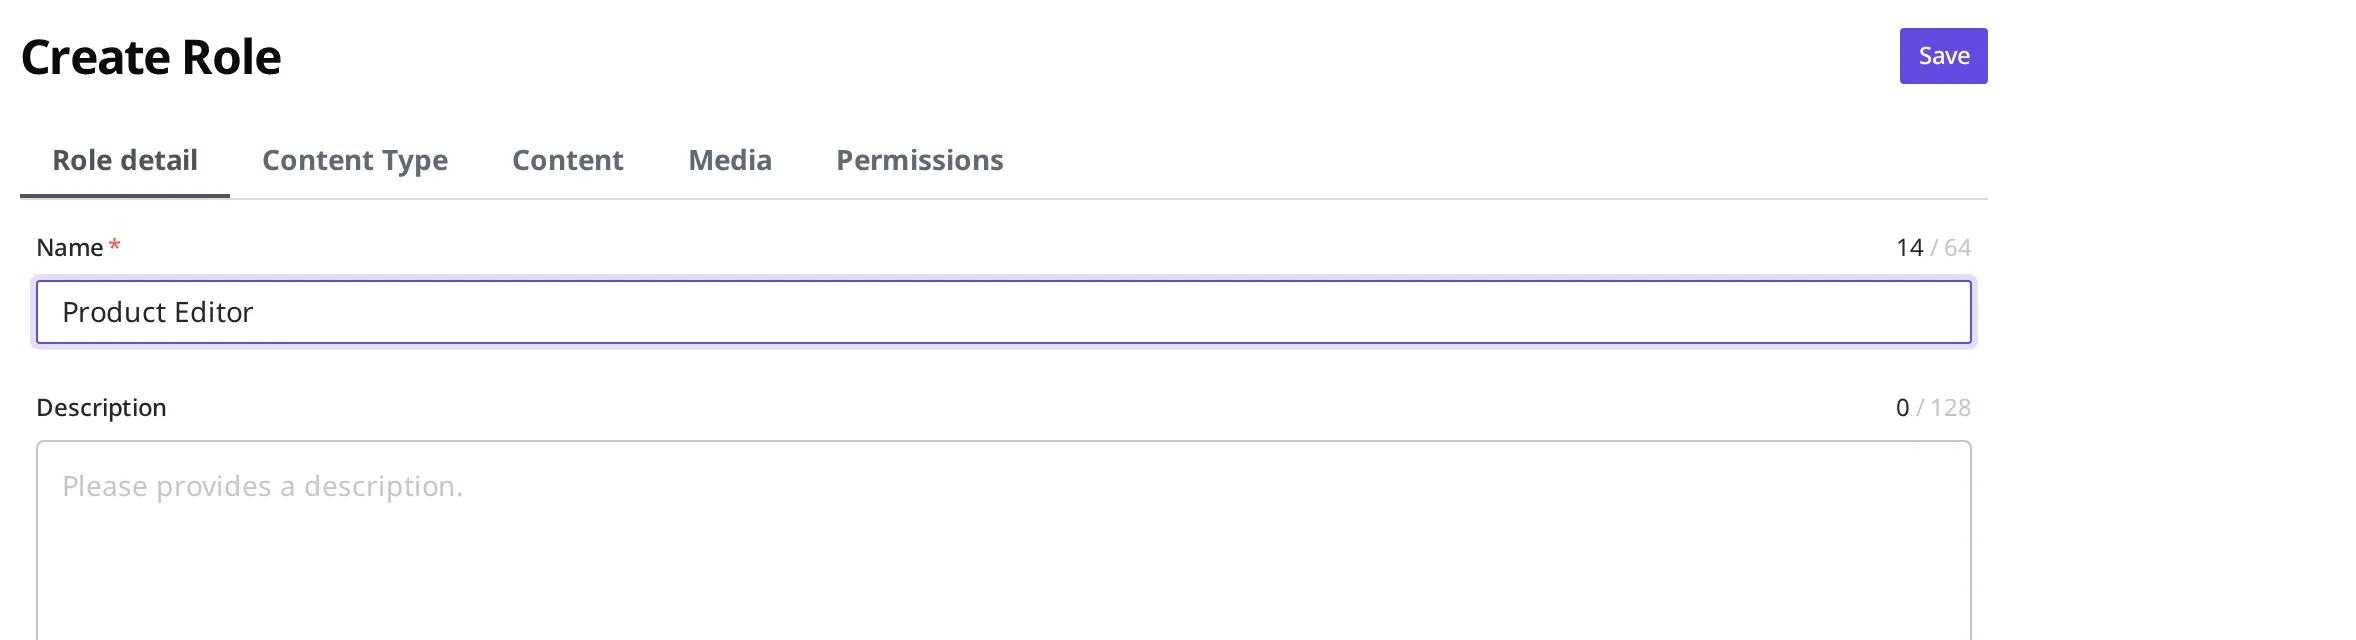
- In the name box on the Role detail tab, enter
Product Editor. You may leave the description box empty.
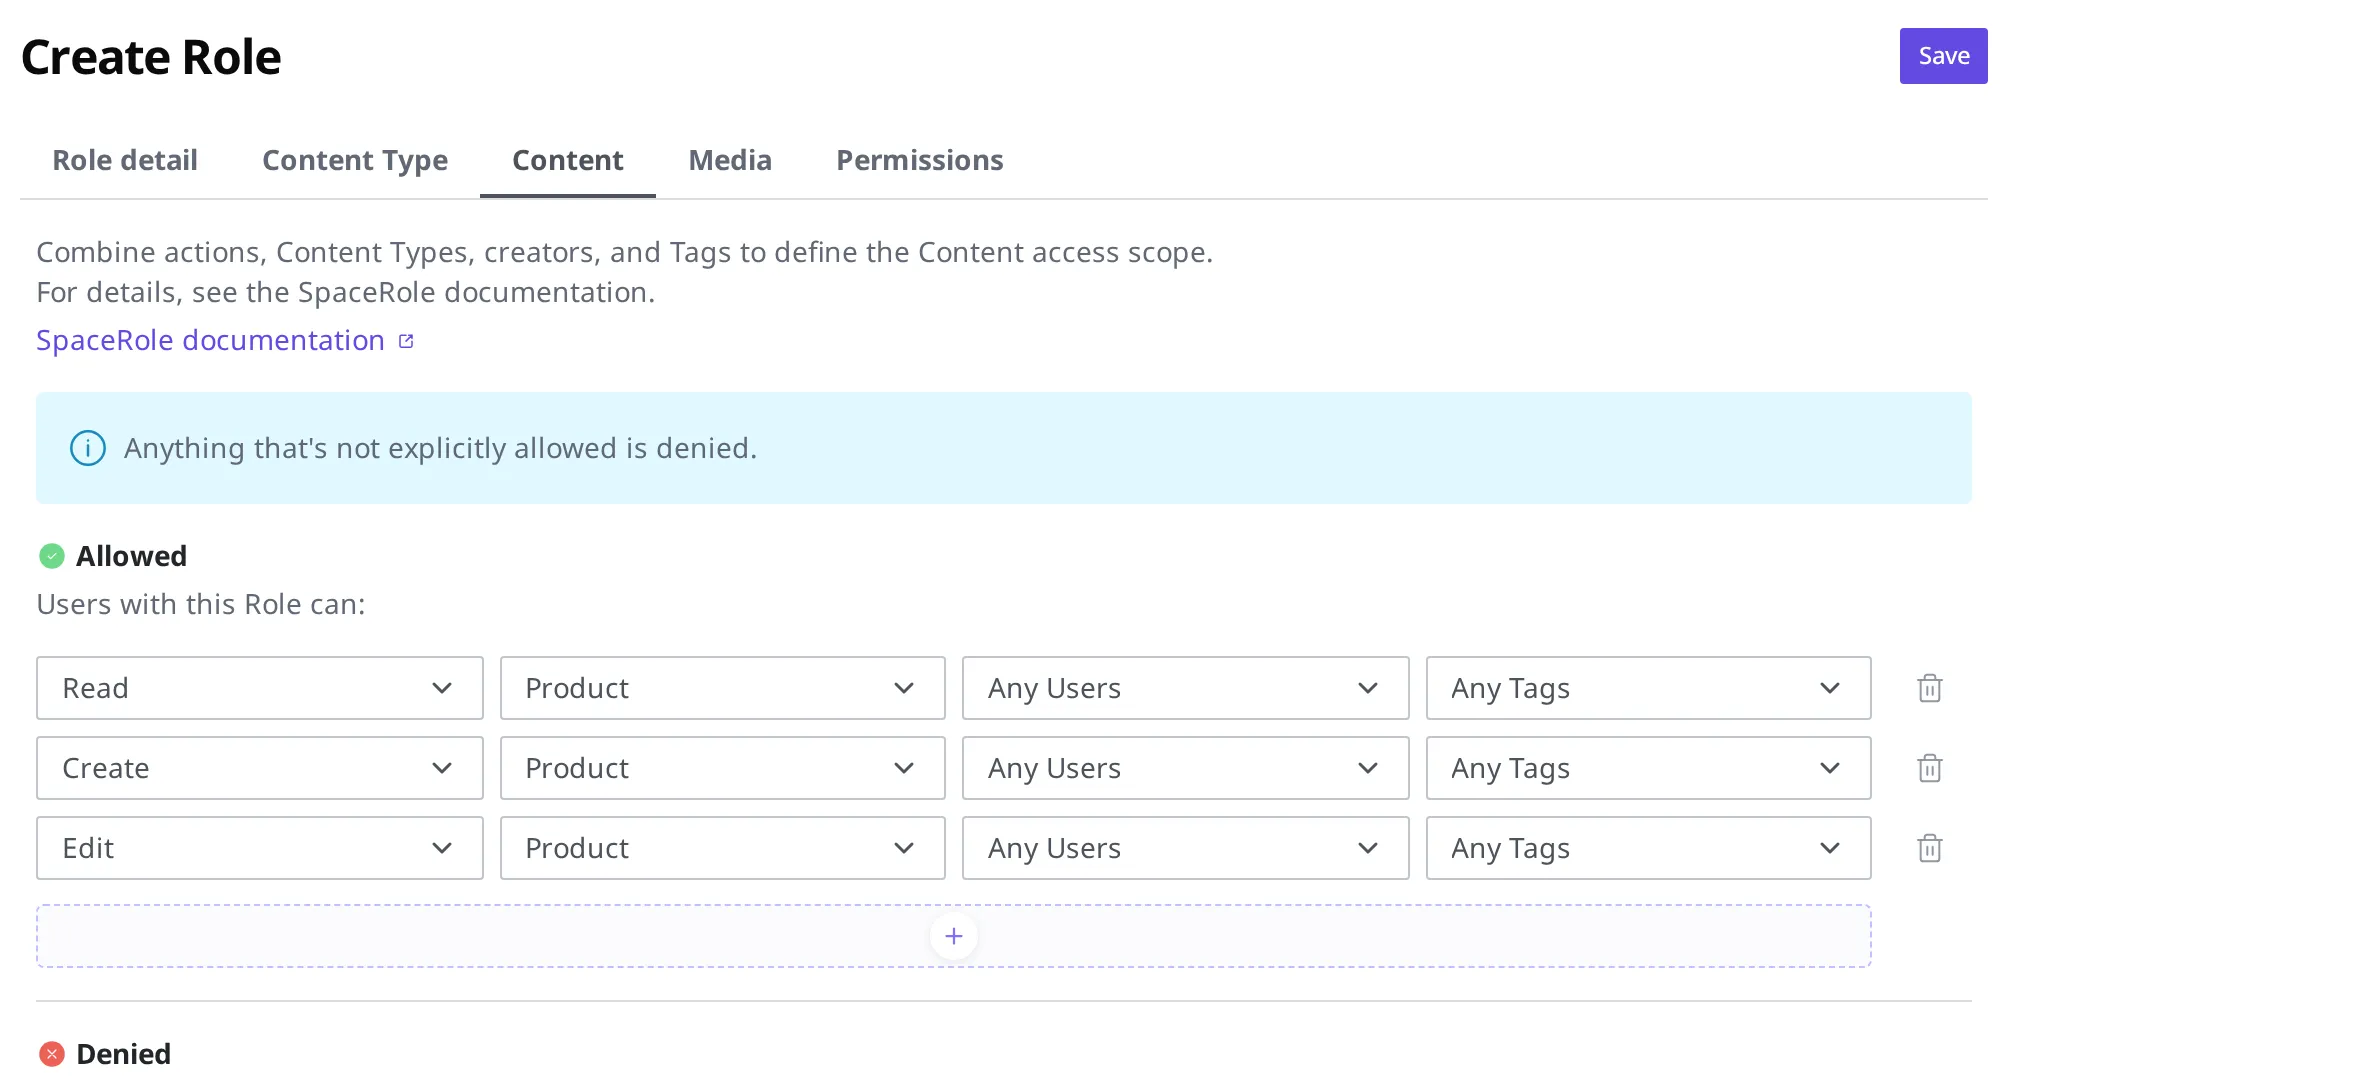
Next, decide what this role can do with products (Content). You add actions as rules, one per line, in the Allowed list, and on the same line you also choose the scope (Content Type) to apply them to.
- Go to the Content tab.
- Click the + under Allowed to add one rule line.
- On that line, set the action to Read and set the Content Type to apply it to as "Product." (Leave the author and Tag boxes at "Any…" to apply to everything.)
- In the same way, add Create and Edit rules, one line each. Keep the Content Type as "Product" on all three lines.
- Do not add Delete or Publish to the allow list. Because any action not added to the allow list is automatically denied, your colleague will be unable to delete products or make them publicly available.
- Click the Save button at the top right.
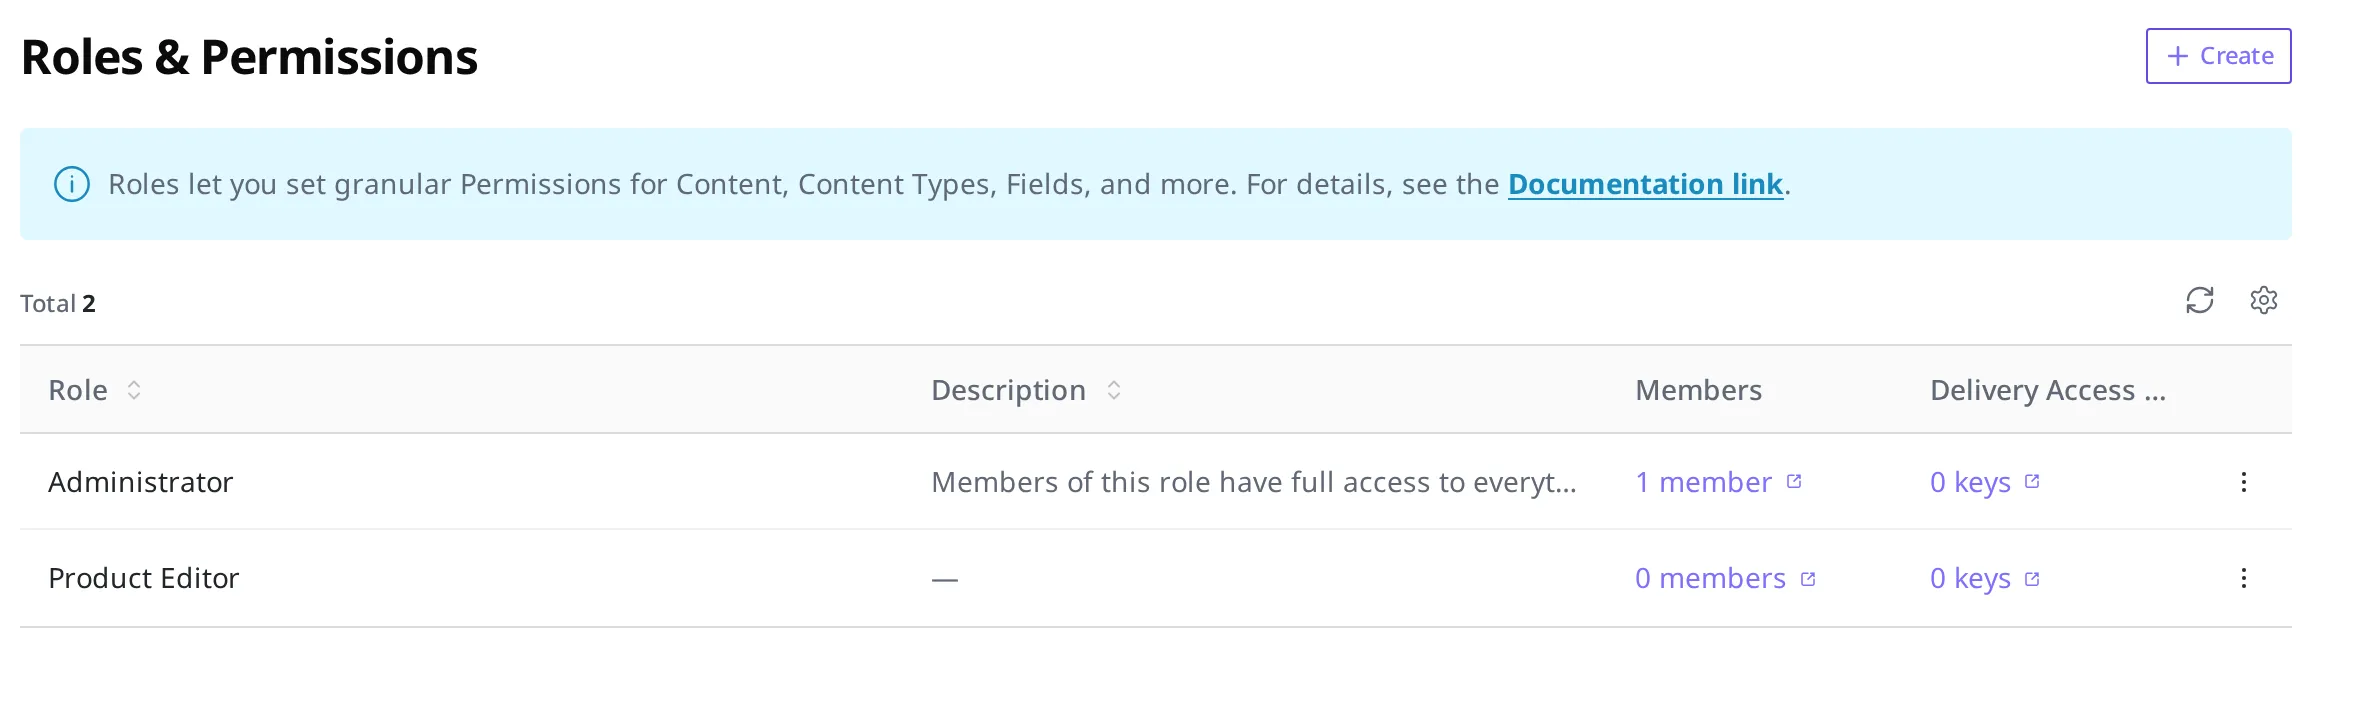
Once Product Editor appears in the list, the role has been created. It shows up alongside the Administrator that was there from the start.
Giving the role you made to a colleague
Creating a role does not automatically apply it to anyone. A role you created takes effect only once you attach it to a member.
When you assign a colleague to a Space, you also choose the role they will hold inside that Space, and that is when you can choose the Product Editor you just made. If the colleague is already in the Space, you can also change their role from the member list to apply it. You can also give a single member several roles at once. In that case the actions allowed by each role are combined, and the member can do any action that is allowed by at least one of the roles. (Deny overriding allow happens only within the same role. Even if one role denies an action, the member can still do it if another role allows it.)
The specific steps for assigning a member to a Space and choosing their role are covered in Organizations and Spaces.
What to do next
- Organizations and Spaces: assign a colleague to a Space and attach the role you just made.
- Tokens: covers the access tokens that let an external site or program, rather than a person, read or write content. The role you create here attaches to tokens too. Attached to a Delivery Access Token, the role sets that token's read scope; attached to a Space Access Token, it sets its read-and-write scope. The permission to issue and manage them is separate for each of the two tokens, so you can turn on just one of them in the Space settings list above.
- API Reference: covers the technical specifications, such as request formats, that you need when creating roles or handling permission rules directly from a program.