

Finding the content you need
Last updated: July 6, 2026
Imagine you run "Cozy Closet," an online clothing store. When you have ten products, just skimming the list shows you the one you want. But once you have more than 300 products, the story changes. For questions like "I want to gather up just the sold-out products and take them down" or "Which product did I edit last week?", scanning the list by eye, page by page, no longer works.
This page walks through, situation by situation, how to pick out just the Content you want from the Content list in the content studio. Searching by name, filtering down to what matches your conditions, changing the order with sorting, choosing which information is shown with column settings, and saving the conditions you use often as a View: it brings the everyday work of finding things together in one place.
All the finding tools live in the Content list
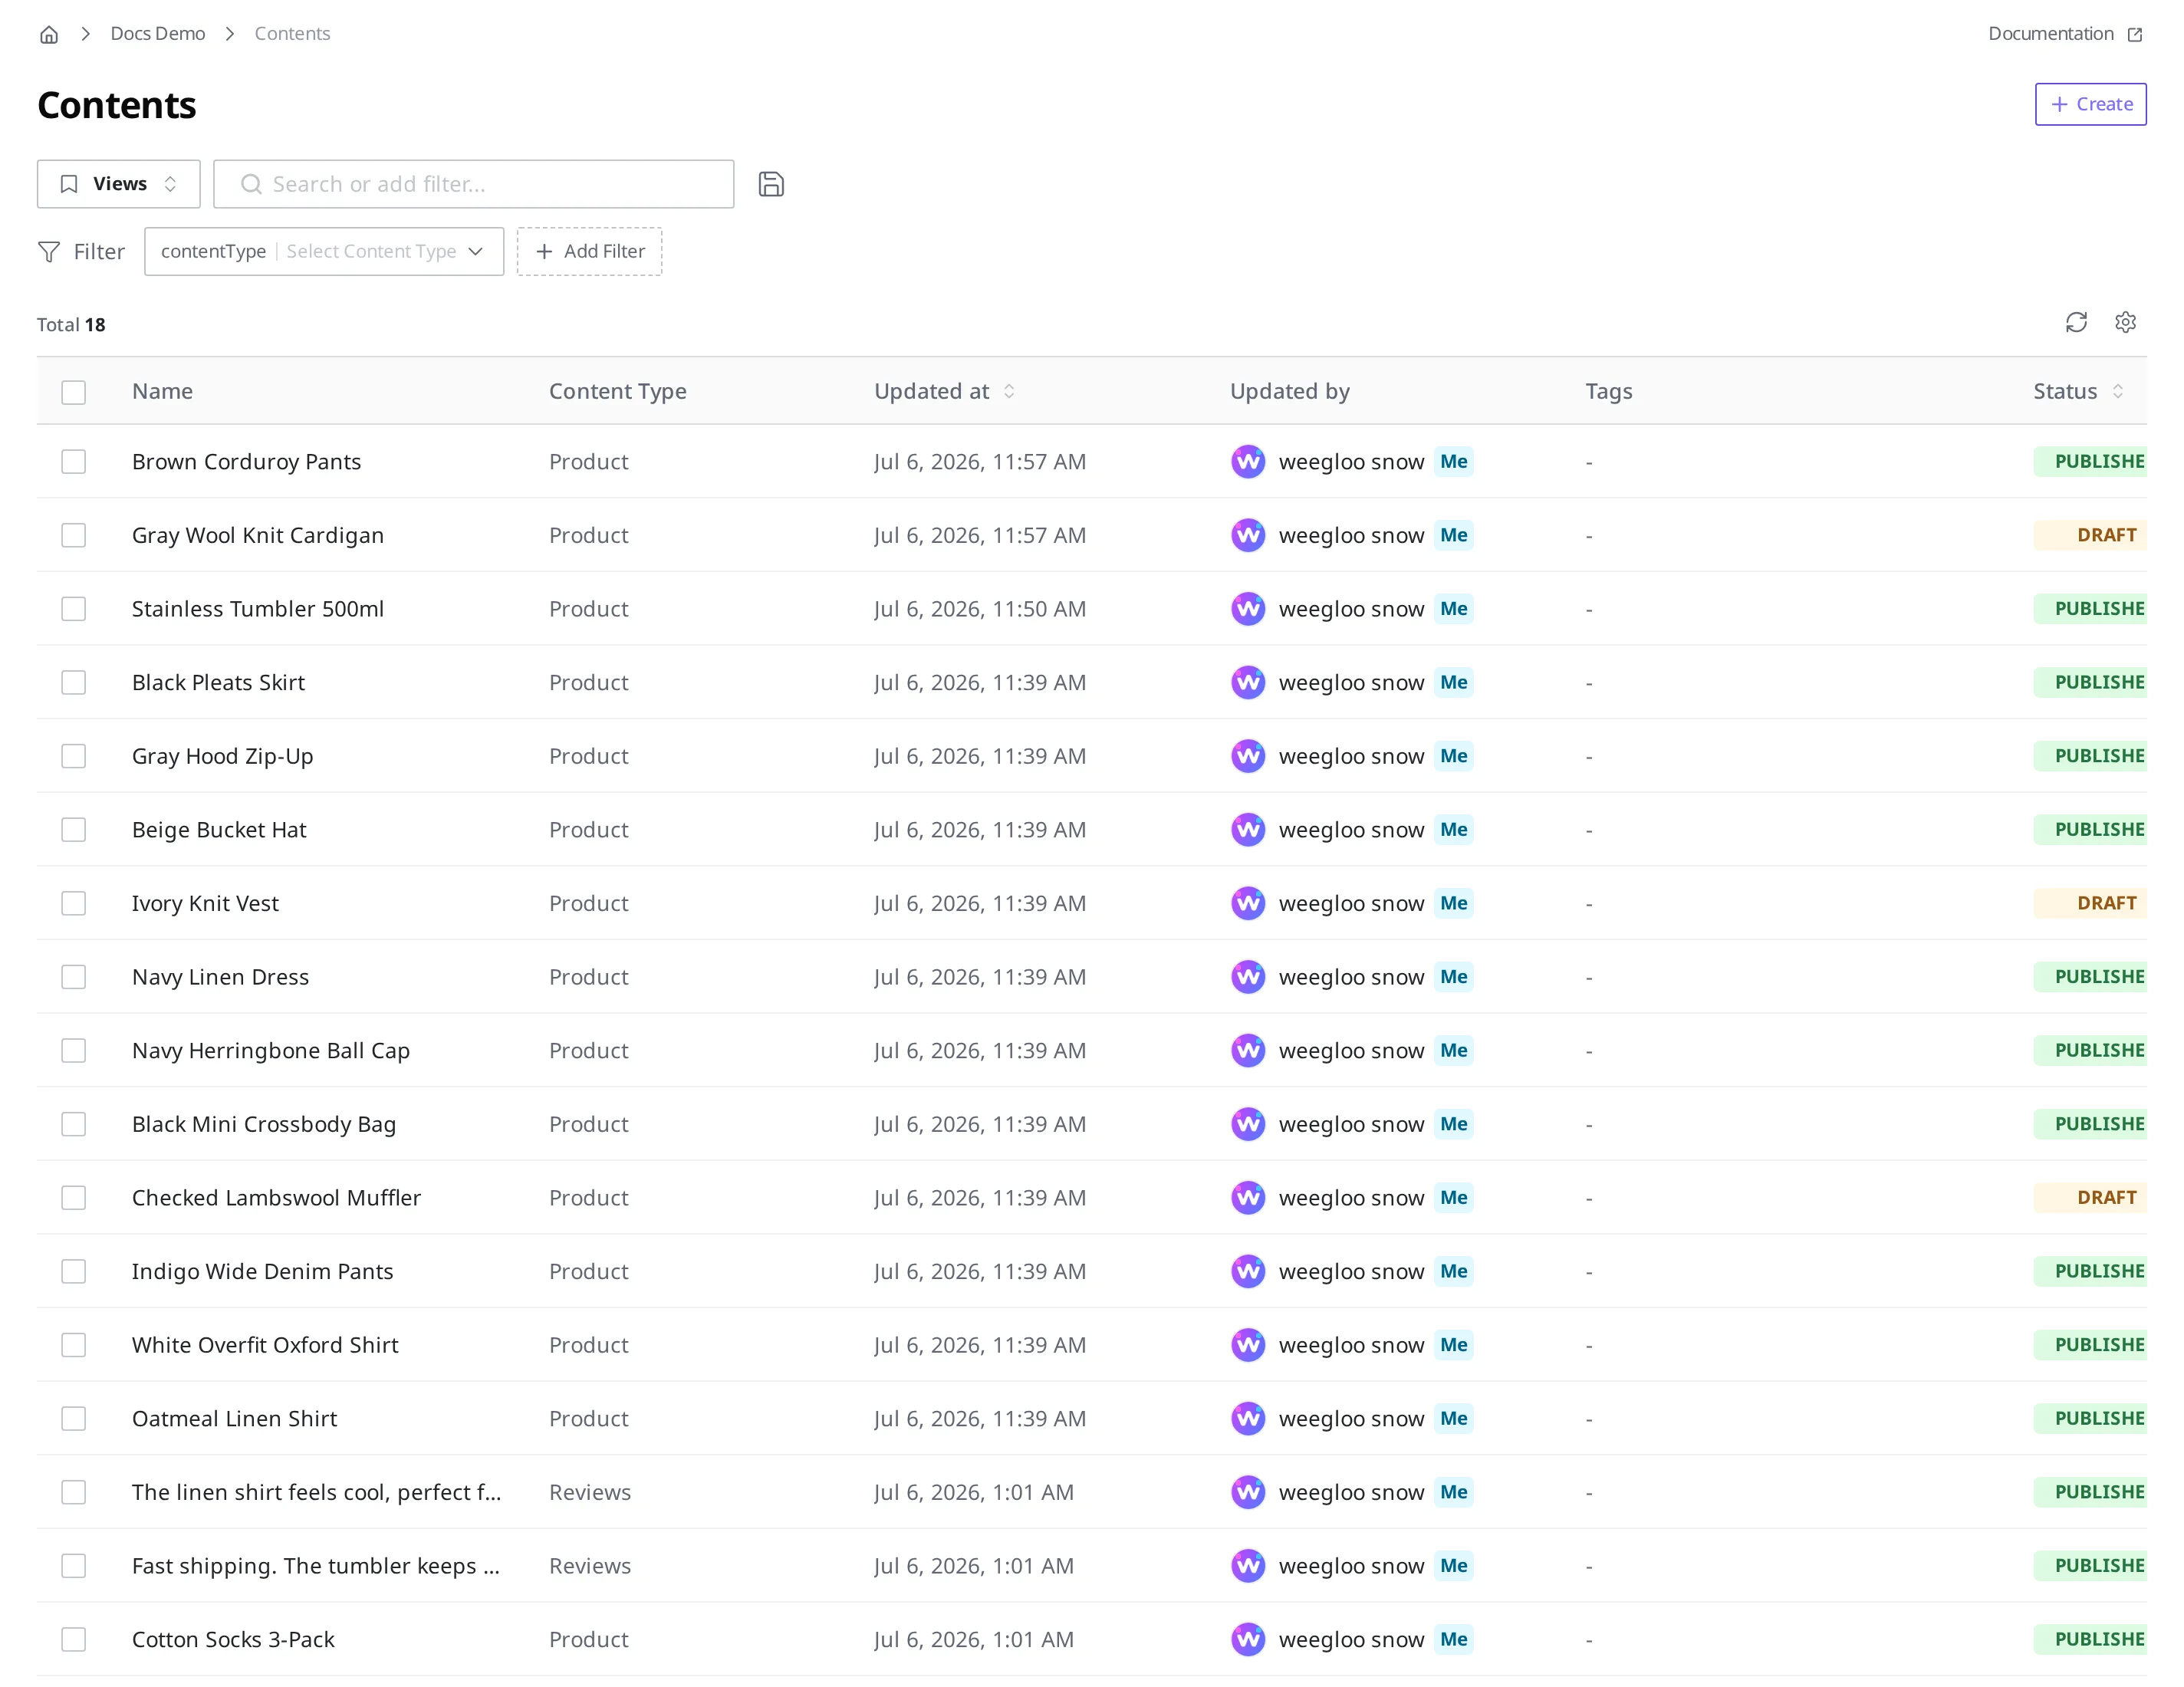
Clicking Content in the left menu opens the Content list screen. This screen is where the tools this page covers are gathered.
| Tool | What it does |
|---|---|
| Search box | Narrows the list by the keyword you enter. The box reads "Search or add filter..." |
| Add Filter button | Applies conditions such as status or Field values to keep only the Content that matches |
| View selection and the Save Current As View button | Saves a search-and-filter combination you use often so you can recall it all at once |
| Column Settings button | Chooses which information (columns) to show in the list table |
| Refresh button | Reloads the list |
| Page navigation | Choose how many items to show per page, and move to the previous or next page |
At the top left of the screen, the Views button and the search box sit side by side, with a save icon to their right. On the line below are a "Filter" label, a Content Type condition chip, and the Add Filter button. At the top right of the table are the Refresh and Column Settings icons, and below the table is the page-navigation area.
Find by keyword when you remember the name
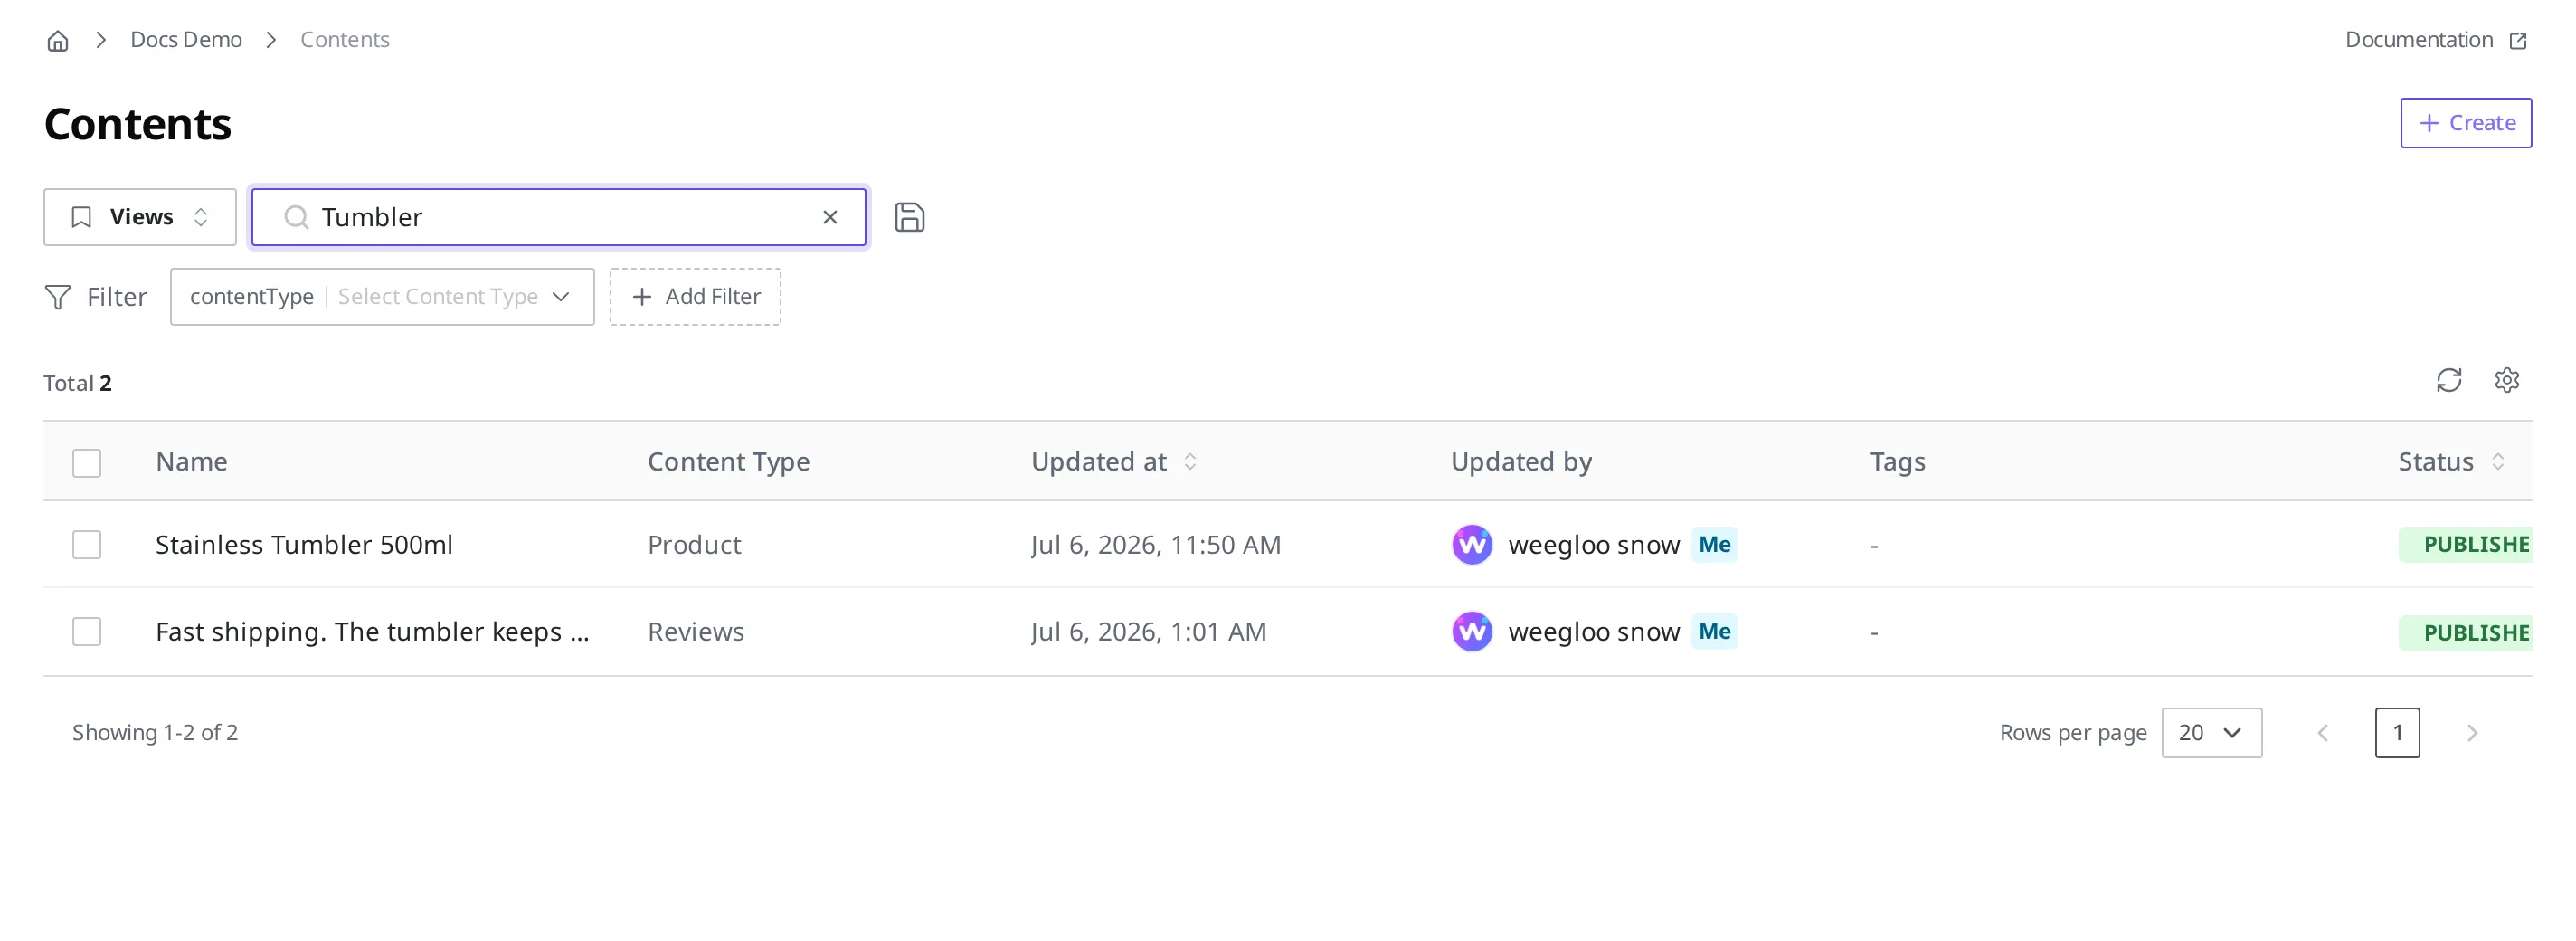
When you know the name of the product you are looking for, like "I need to fix the tumbler's price," search is fastest.
- Click the search box in the Content list.
- Type
Tumbler. - Press the Enter key.
Search looks not only at the name but also at the values inside a Content. If the list keeps not just "Stainless Tumbler 500ml," a product with "Tumbler" in its name, but also reviews that mention "Tumbler" in their body text, it worked.
Filter down to just the matching items
When you do not know the name, or you need to see several matching items at once, use filters. You set conditions with the Add Filter button next to the search box. The criteria you can use as conditions are as follows.
- Content Type: which template a Content was made from (for example, only those made as "Product")
- Status: states like Draft or Published (for example, only those not yet published)
- Author: who created it
- Field value: the value held in a Field defined on the template (for example, only those whose sales status is "Sold out")
- Tag: a Tag you have attached (for example, only those with the "Summer sale" Tag)
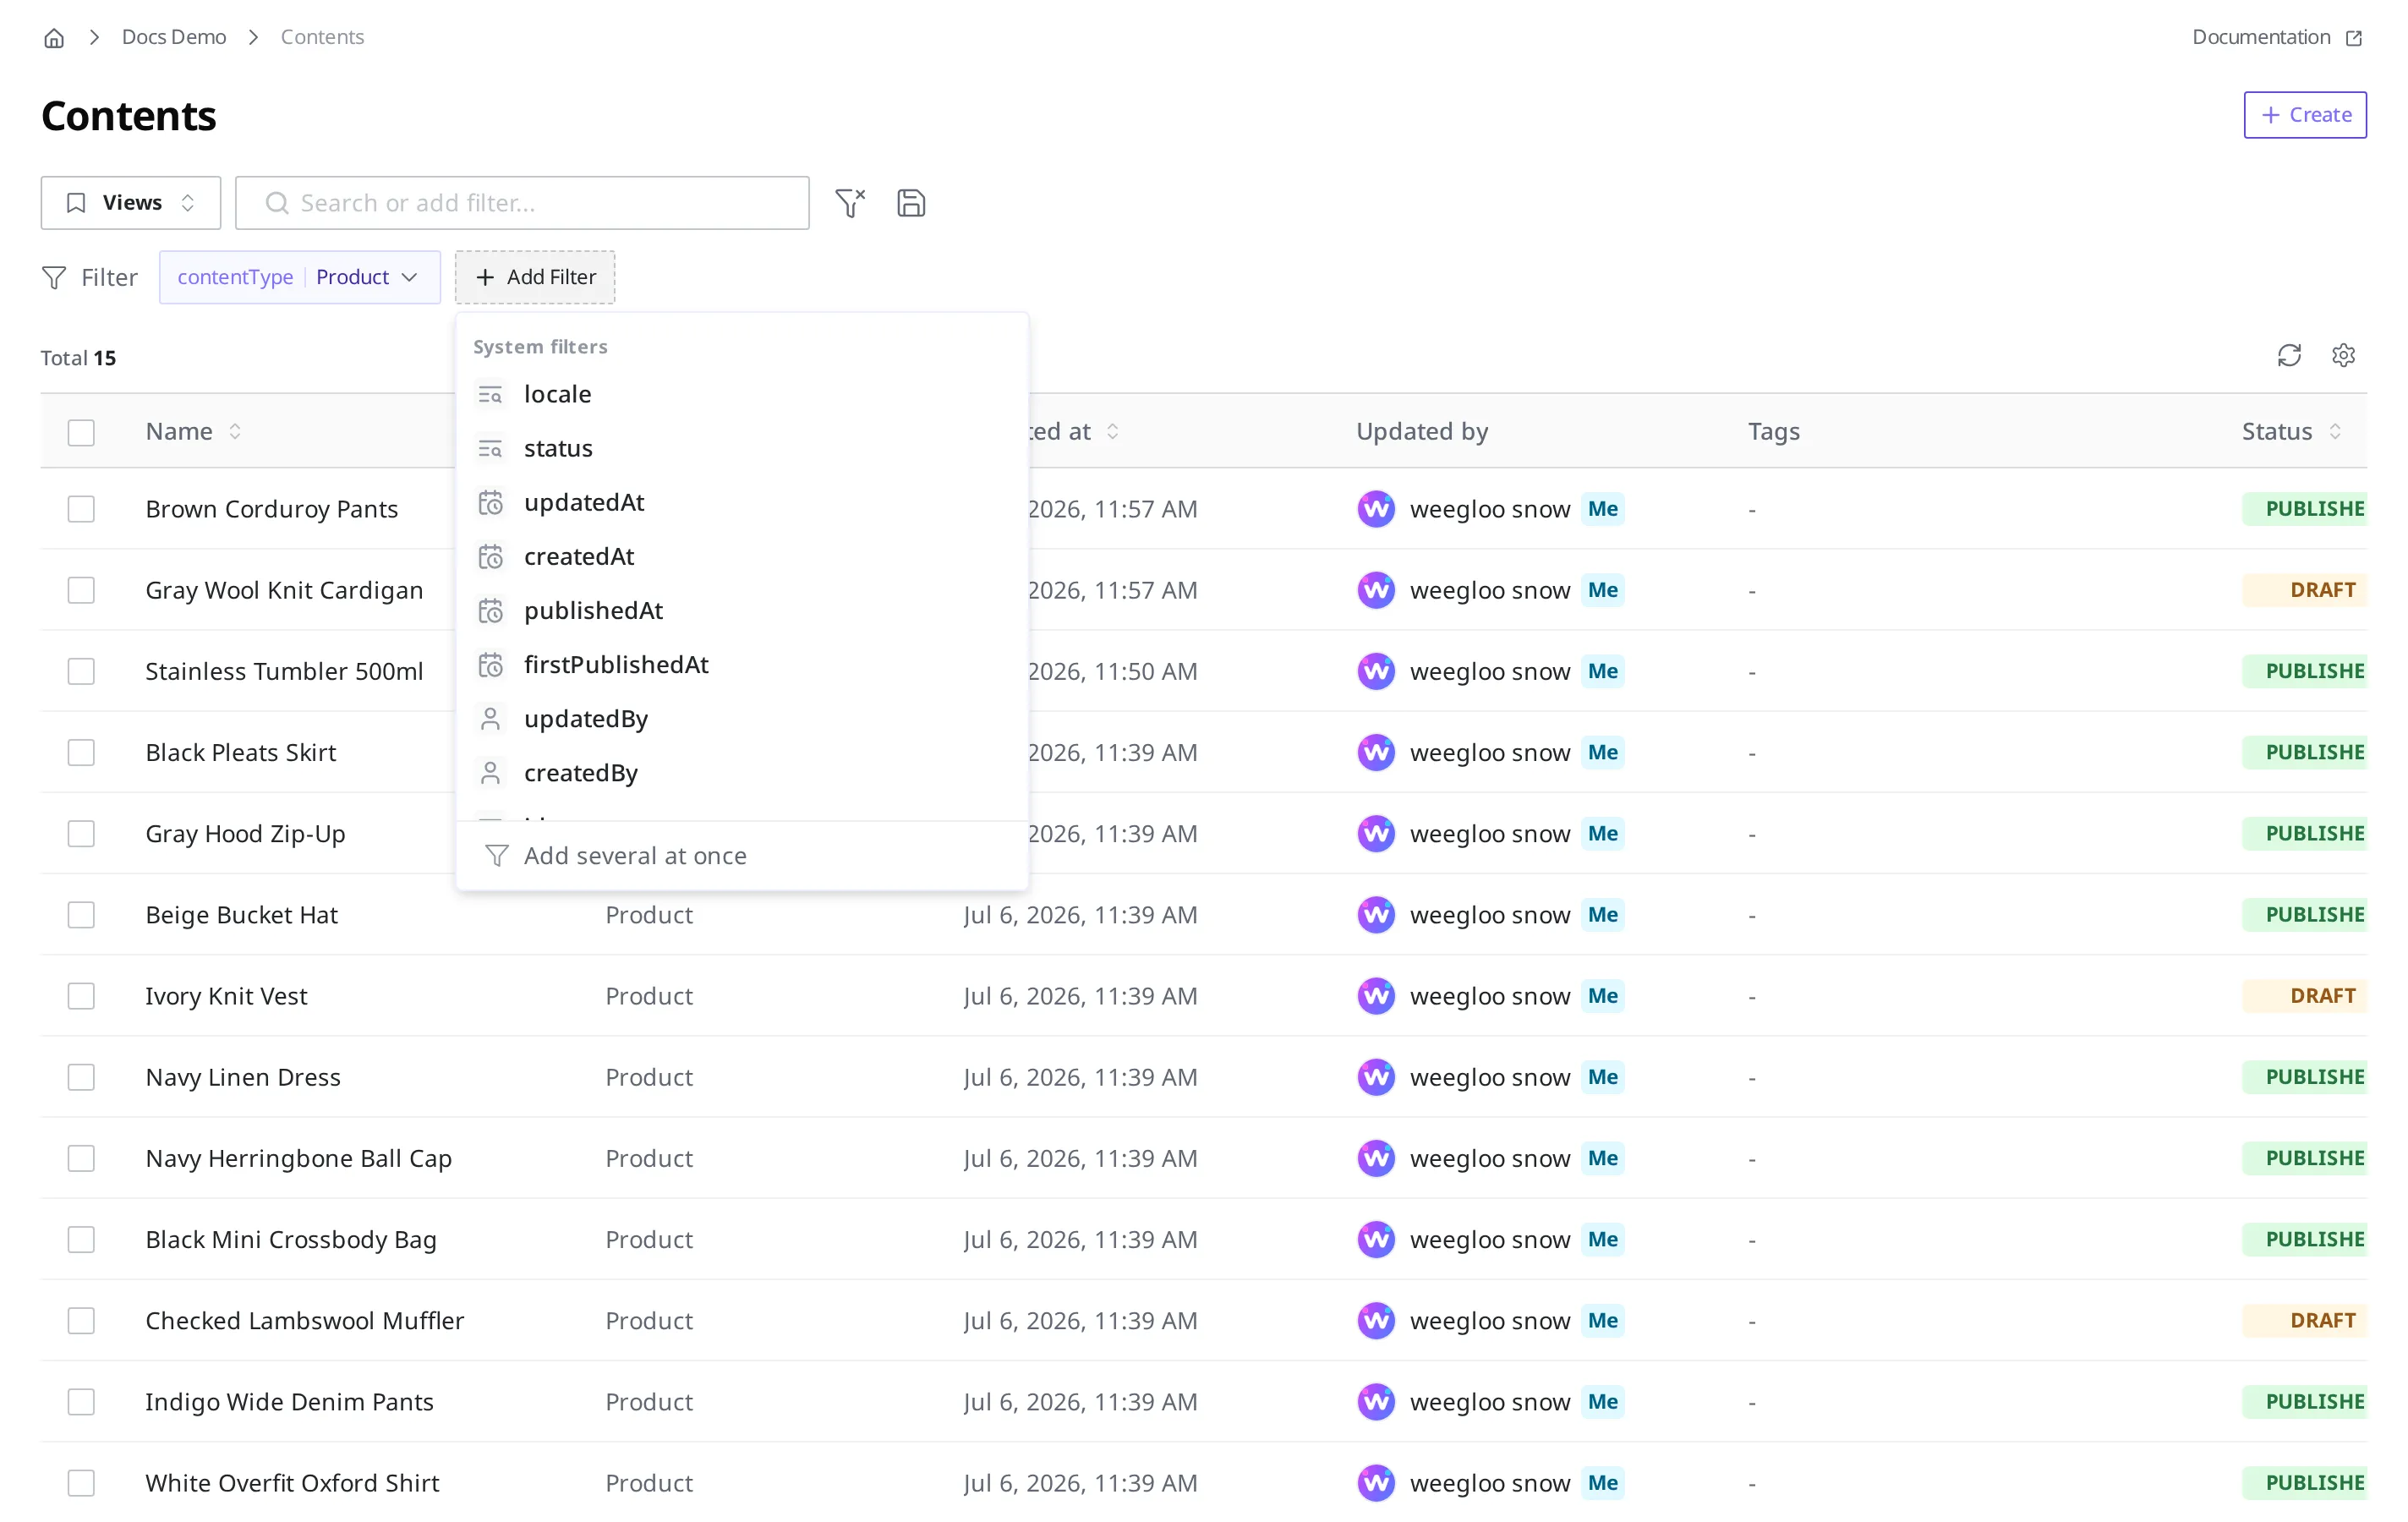
When you click the Add Filter button, a list of system filters expands. You can choose system-managed values as conditions, such as status (status), last-modified date (updatedAt), created date (createdAt), published date (publishedAt), language (locale), last editor (updatedBy), and creator (createdBy); and if you choose a Content Type first, the Fields defined on that template are added as conditions too. Clicking "Add several at once" below the list lets you apply several conditions at once.
See only the sold-out products
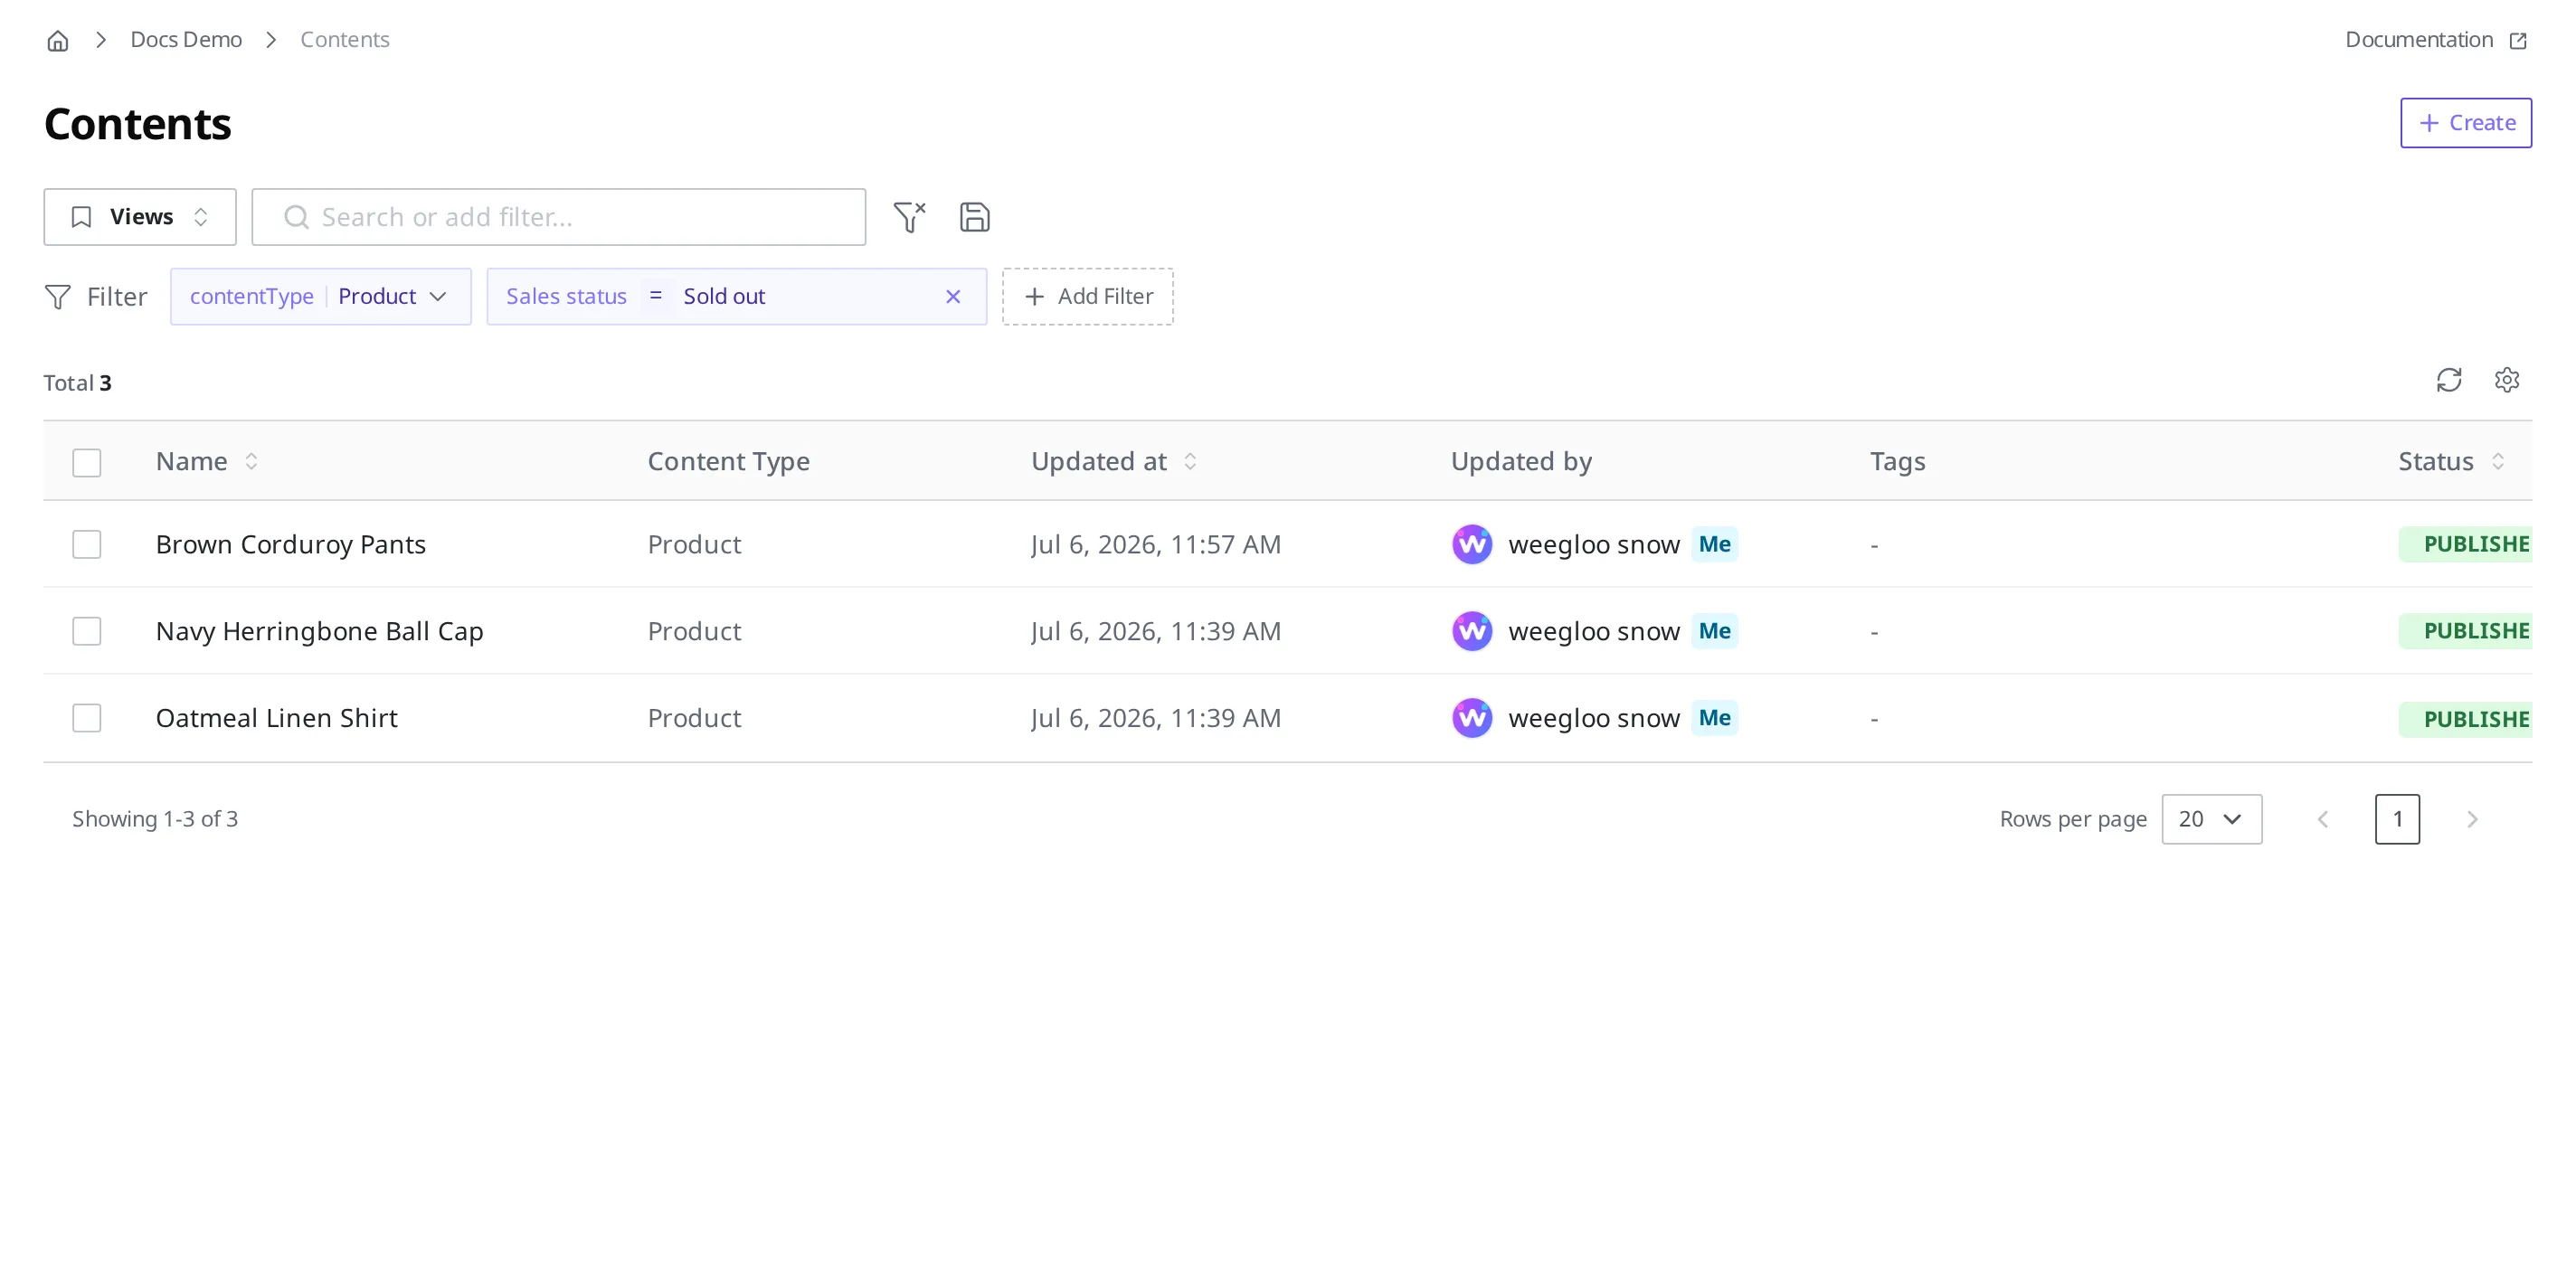
Say the "Product" Content Type has a Sales status Field, and it uses the values "On sale" and "Sold out." When a season ends and you want to clean up the sold-out products, you set a filter that keeps only the ones whose Sales status Field value is "Sold out."
- Click the Add Filter button and choose the Sales status Field.
- In the value box, type
Sold out.
The filter condition shows as a "Sales status = Sold out" chip. If only the matching products remain in the list, it worked. You see only sold-out products, like "Navy Herringbone Ball Cap," "Brown Corduroy Pants," and "Oatmeal Linen Shirt." Now you can go down the list, opening and taking down or tidying each one.
Find products you haven't published yet
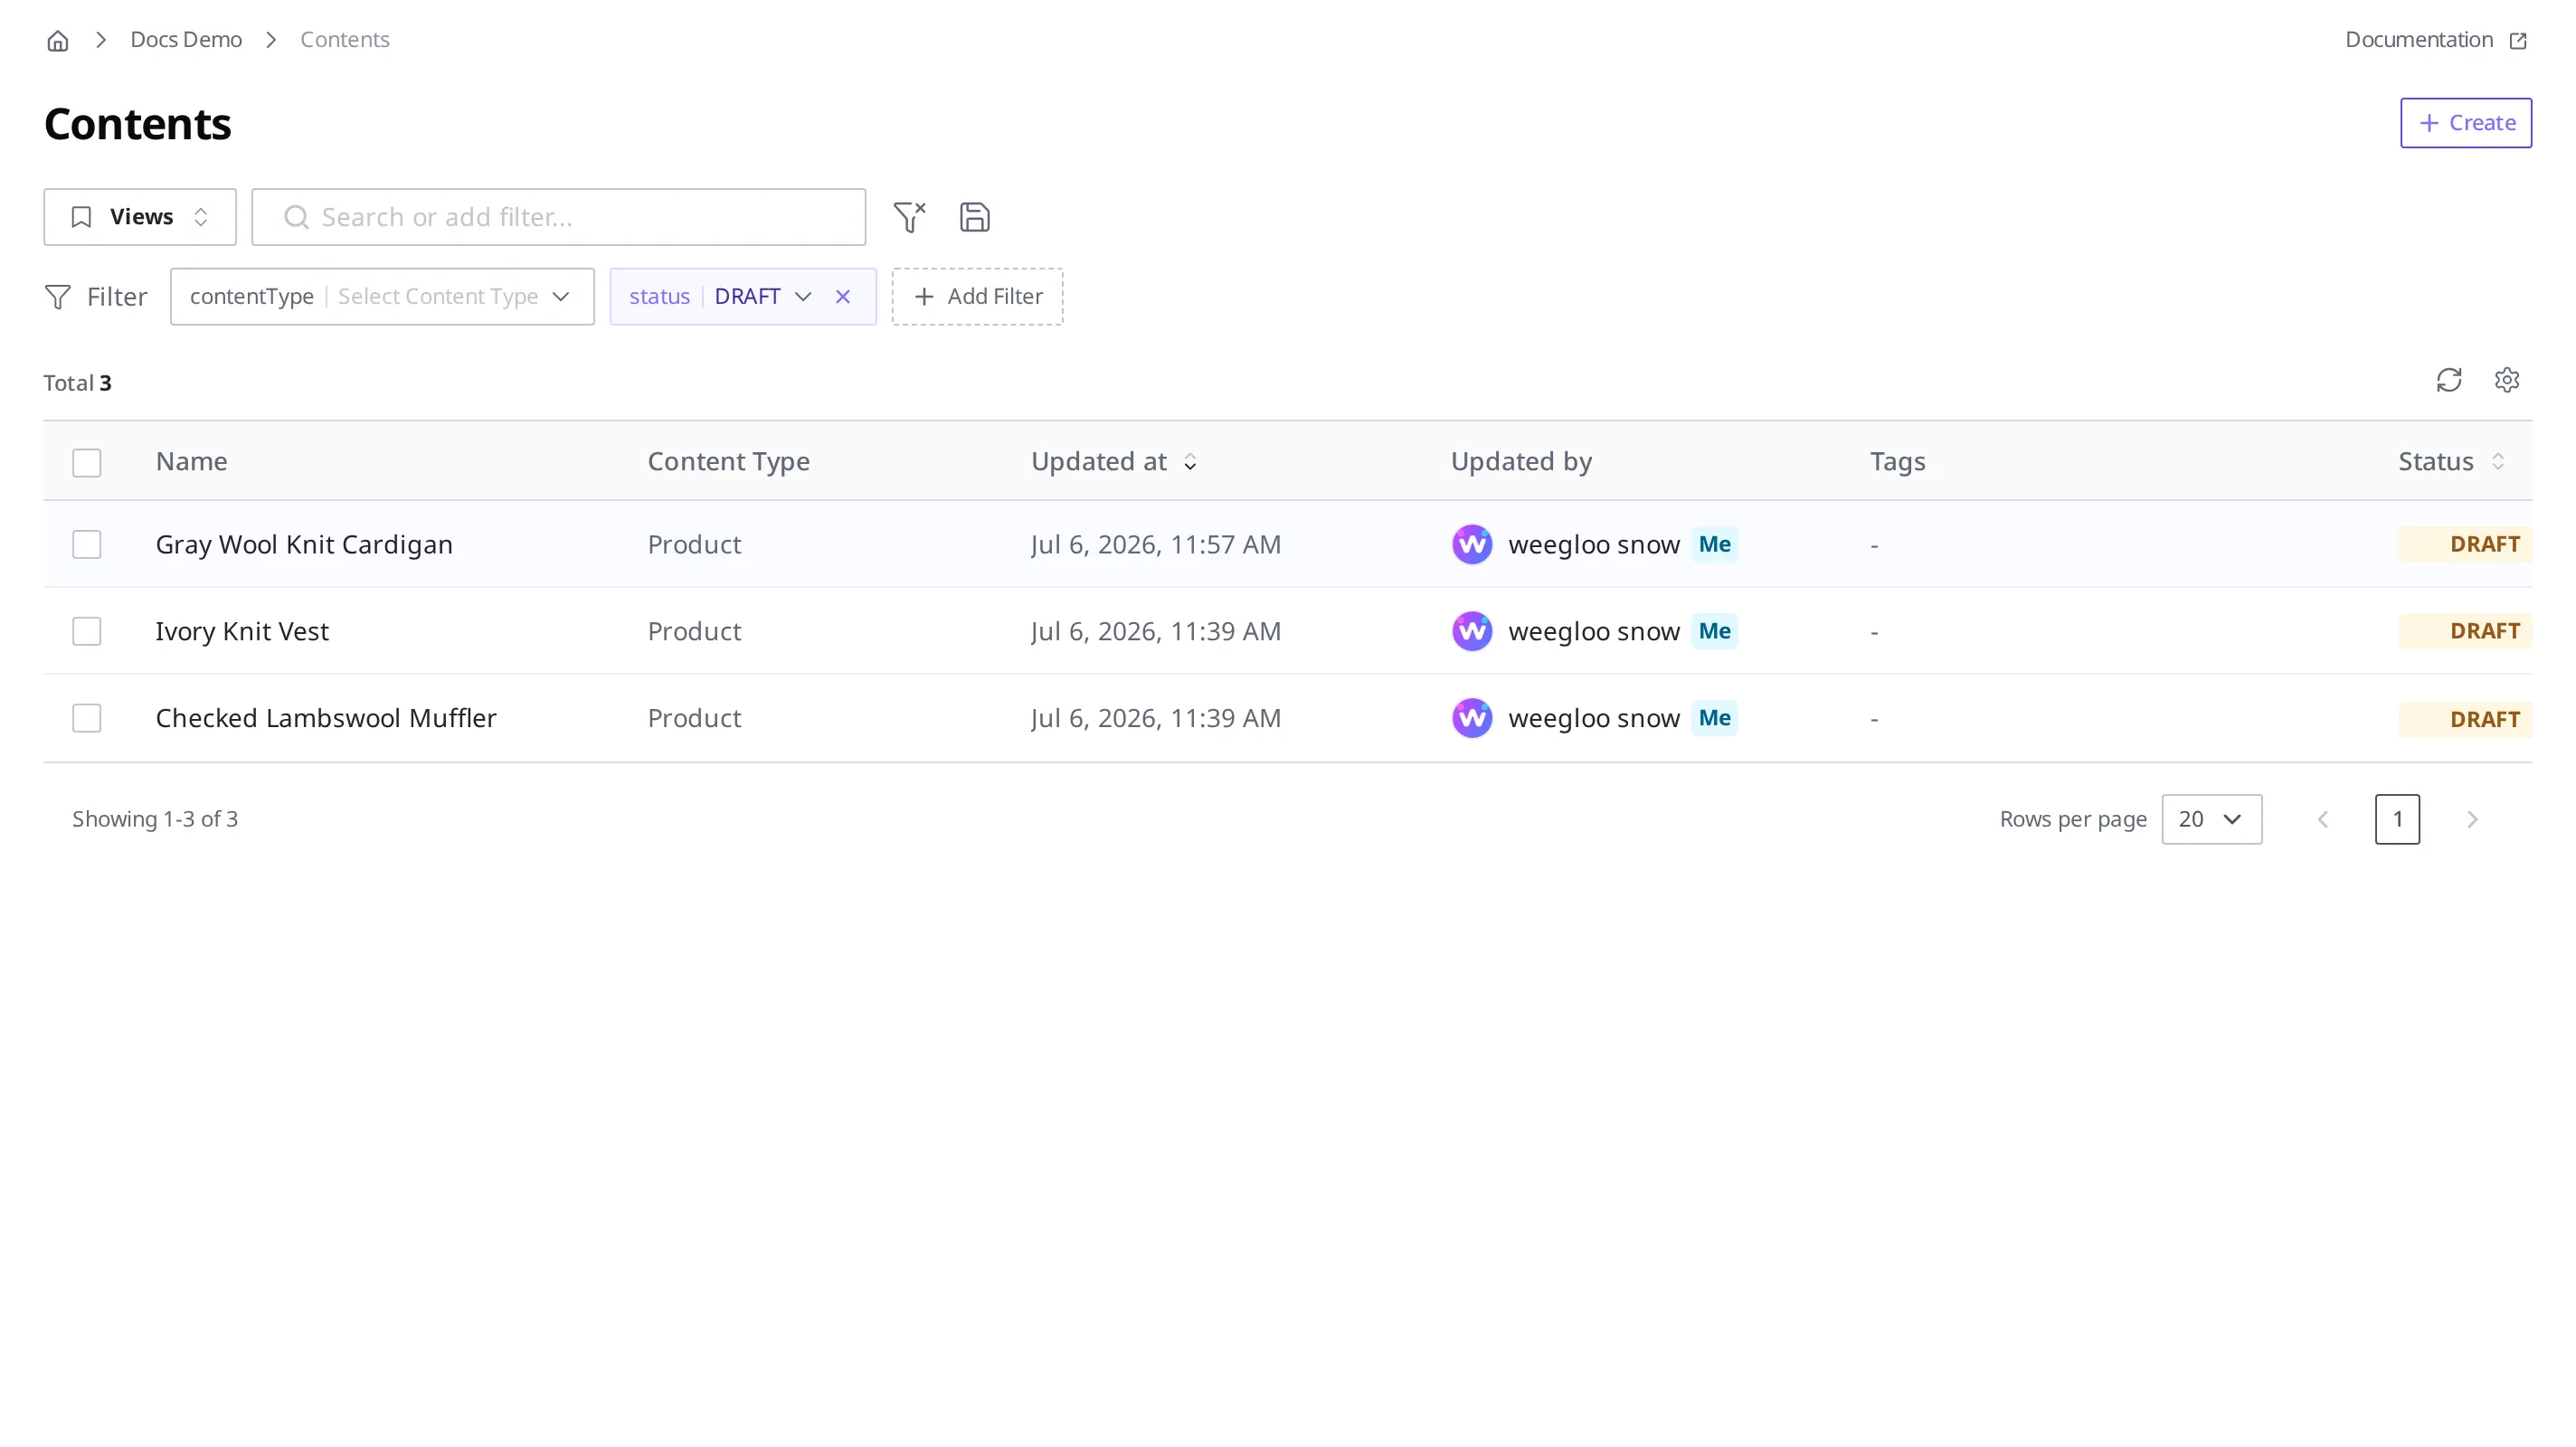
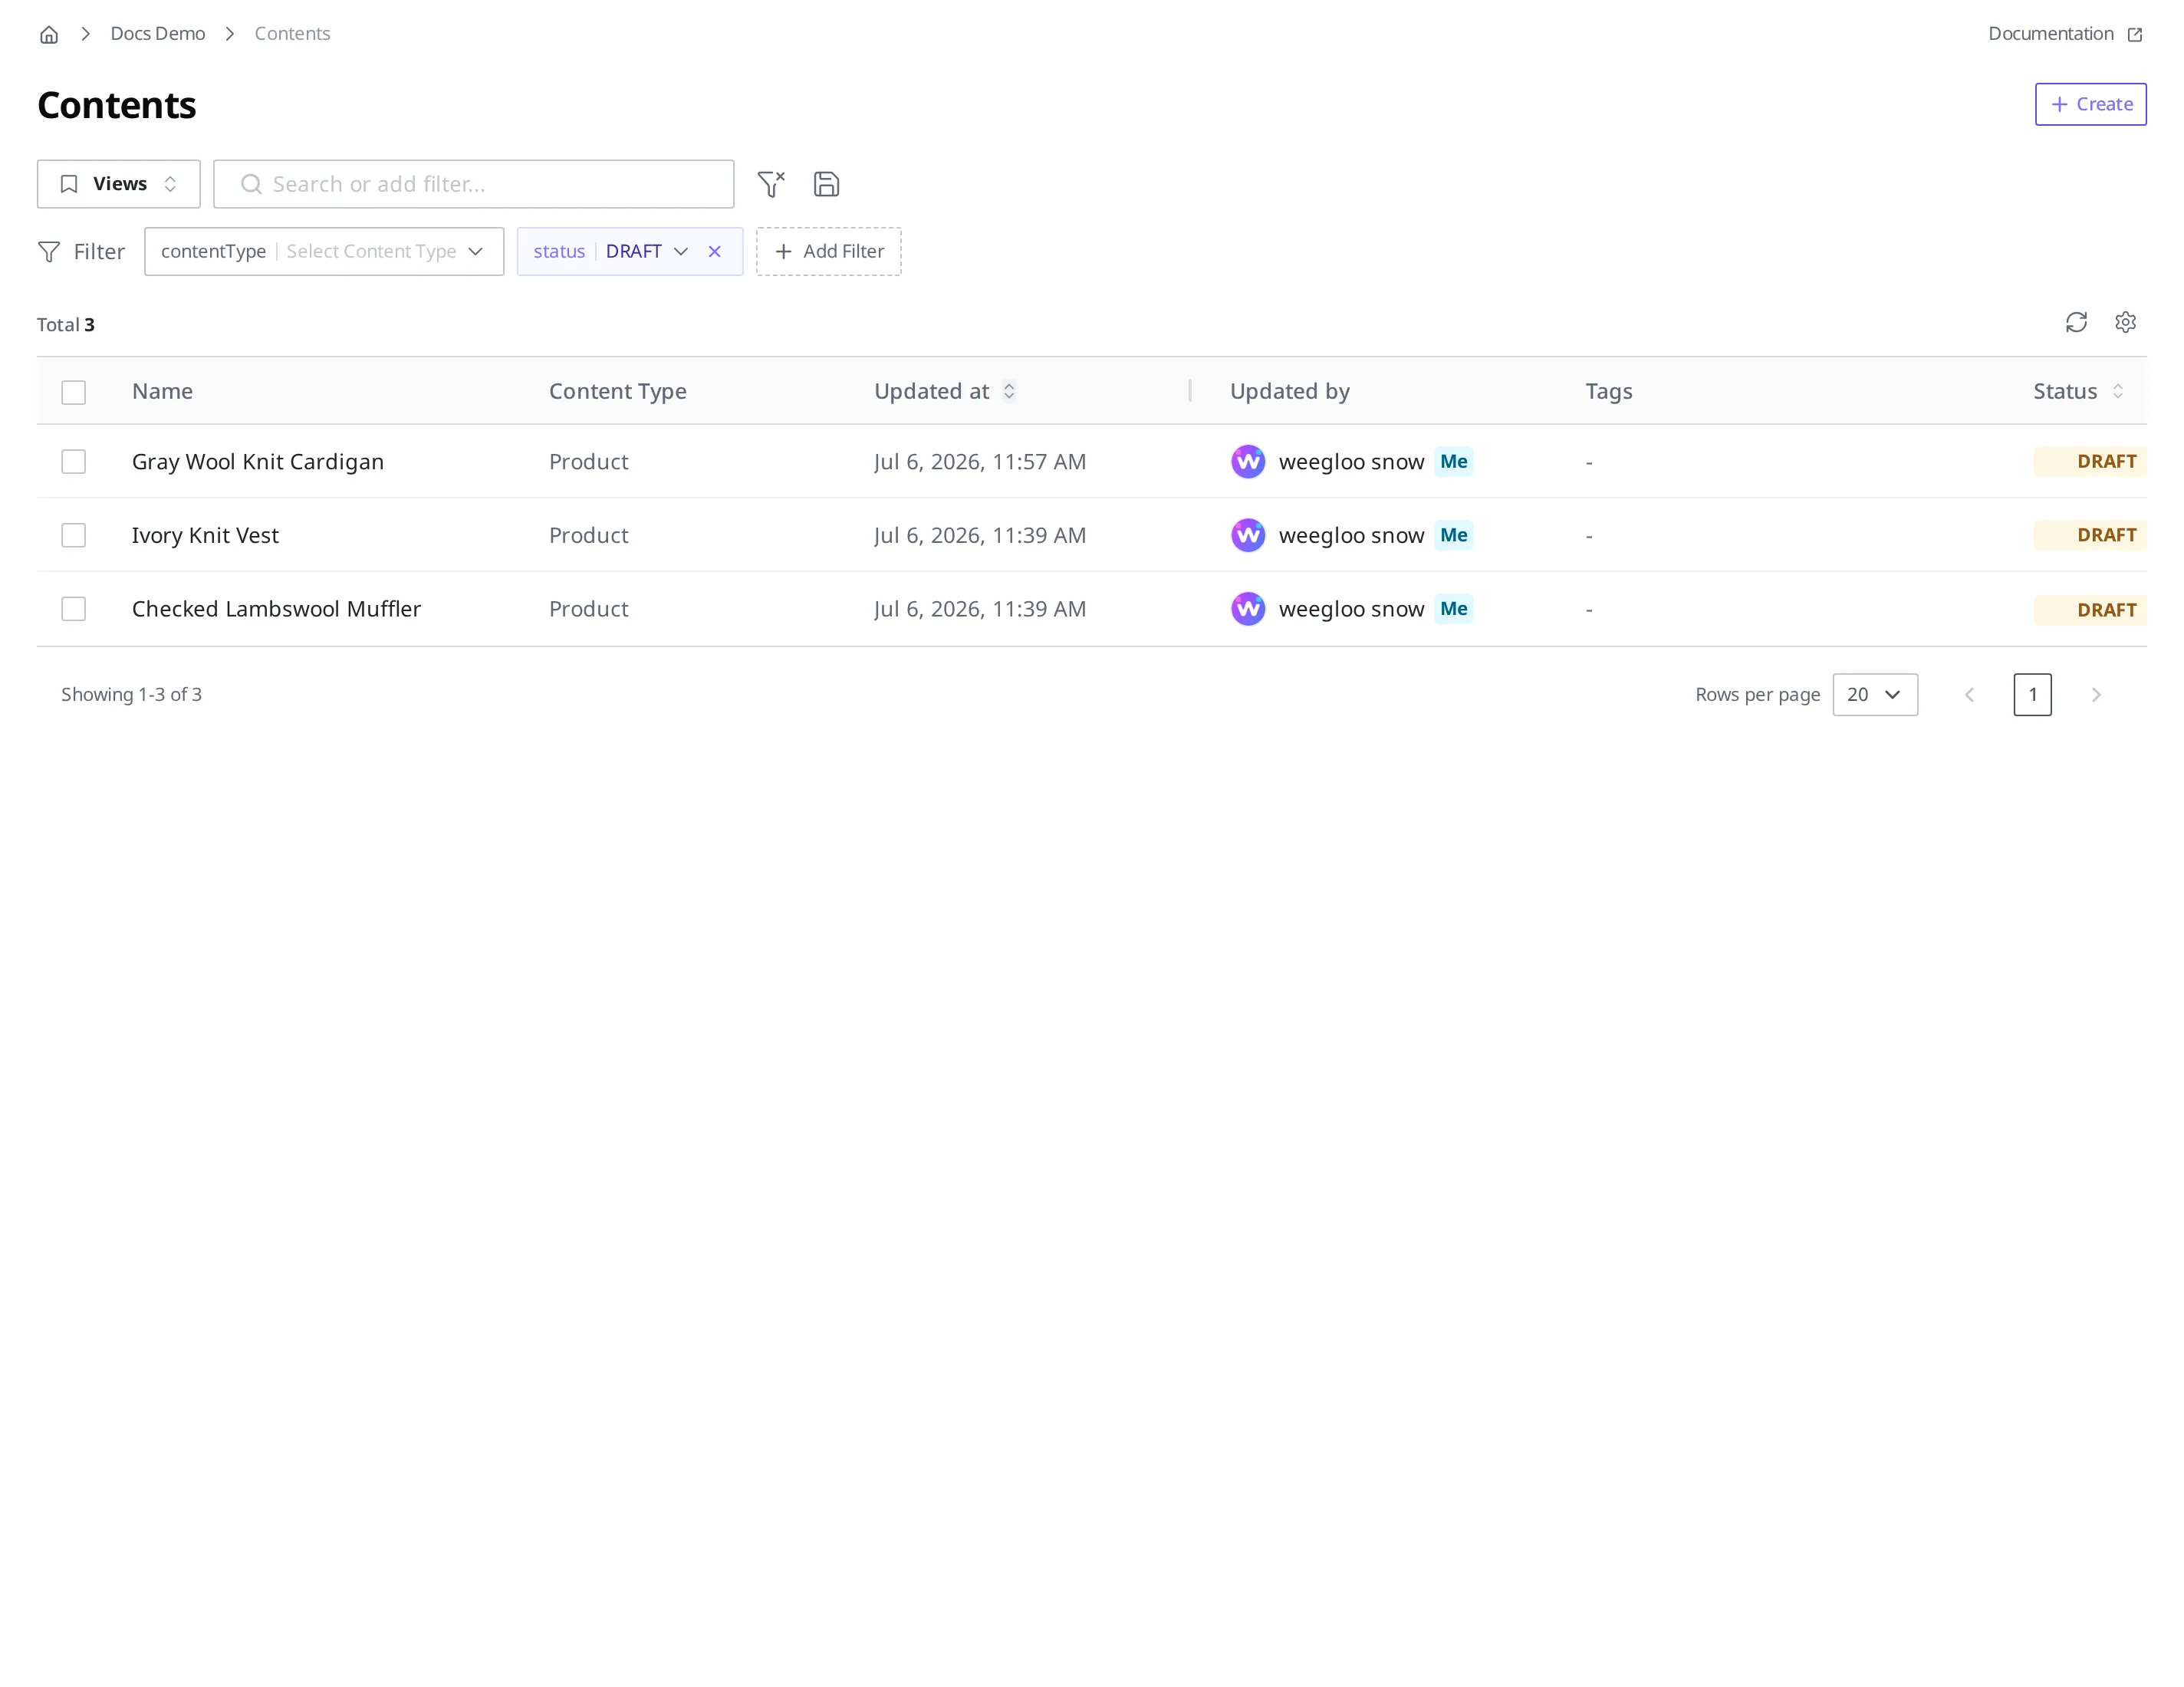
If you were registering 20 new products and stepped away partway through, it is easy to lose track of how far you got with publishing. In that case, set a filter that keeps only the ones whose status is Draft. Every Content that has only been created but not yet published gathers together. You can go down the list, opening each one and finishing the publishing.
- Click the Add Filter button and choose status.
- Choose Draft as the value.
If only products in Draft status remain, like "Ivory Knit Vest," "Checked Lambswool Muffler," and "Gray Wool Knit Cardigan," it worked.
What each of Draft, Published, and Changed means is covered in States and Publishing.
Show only products, not notices
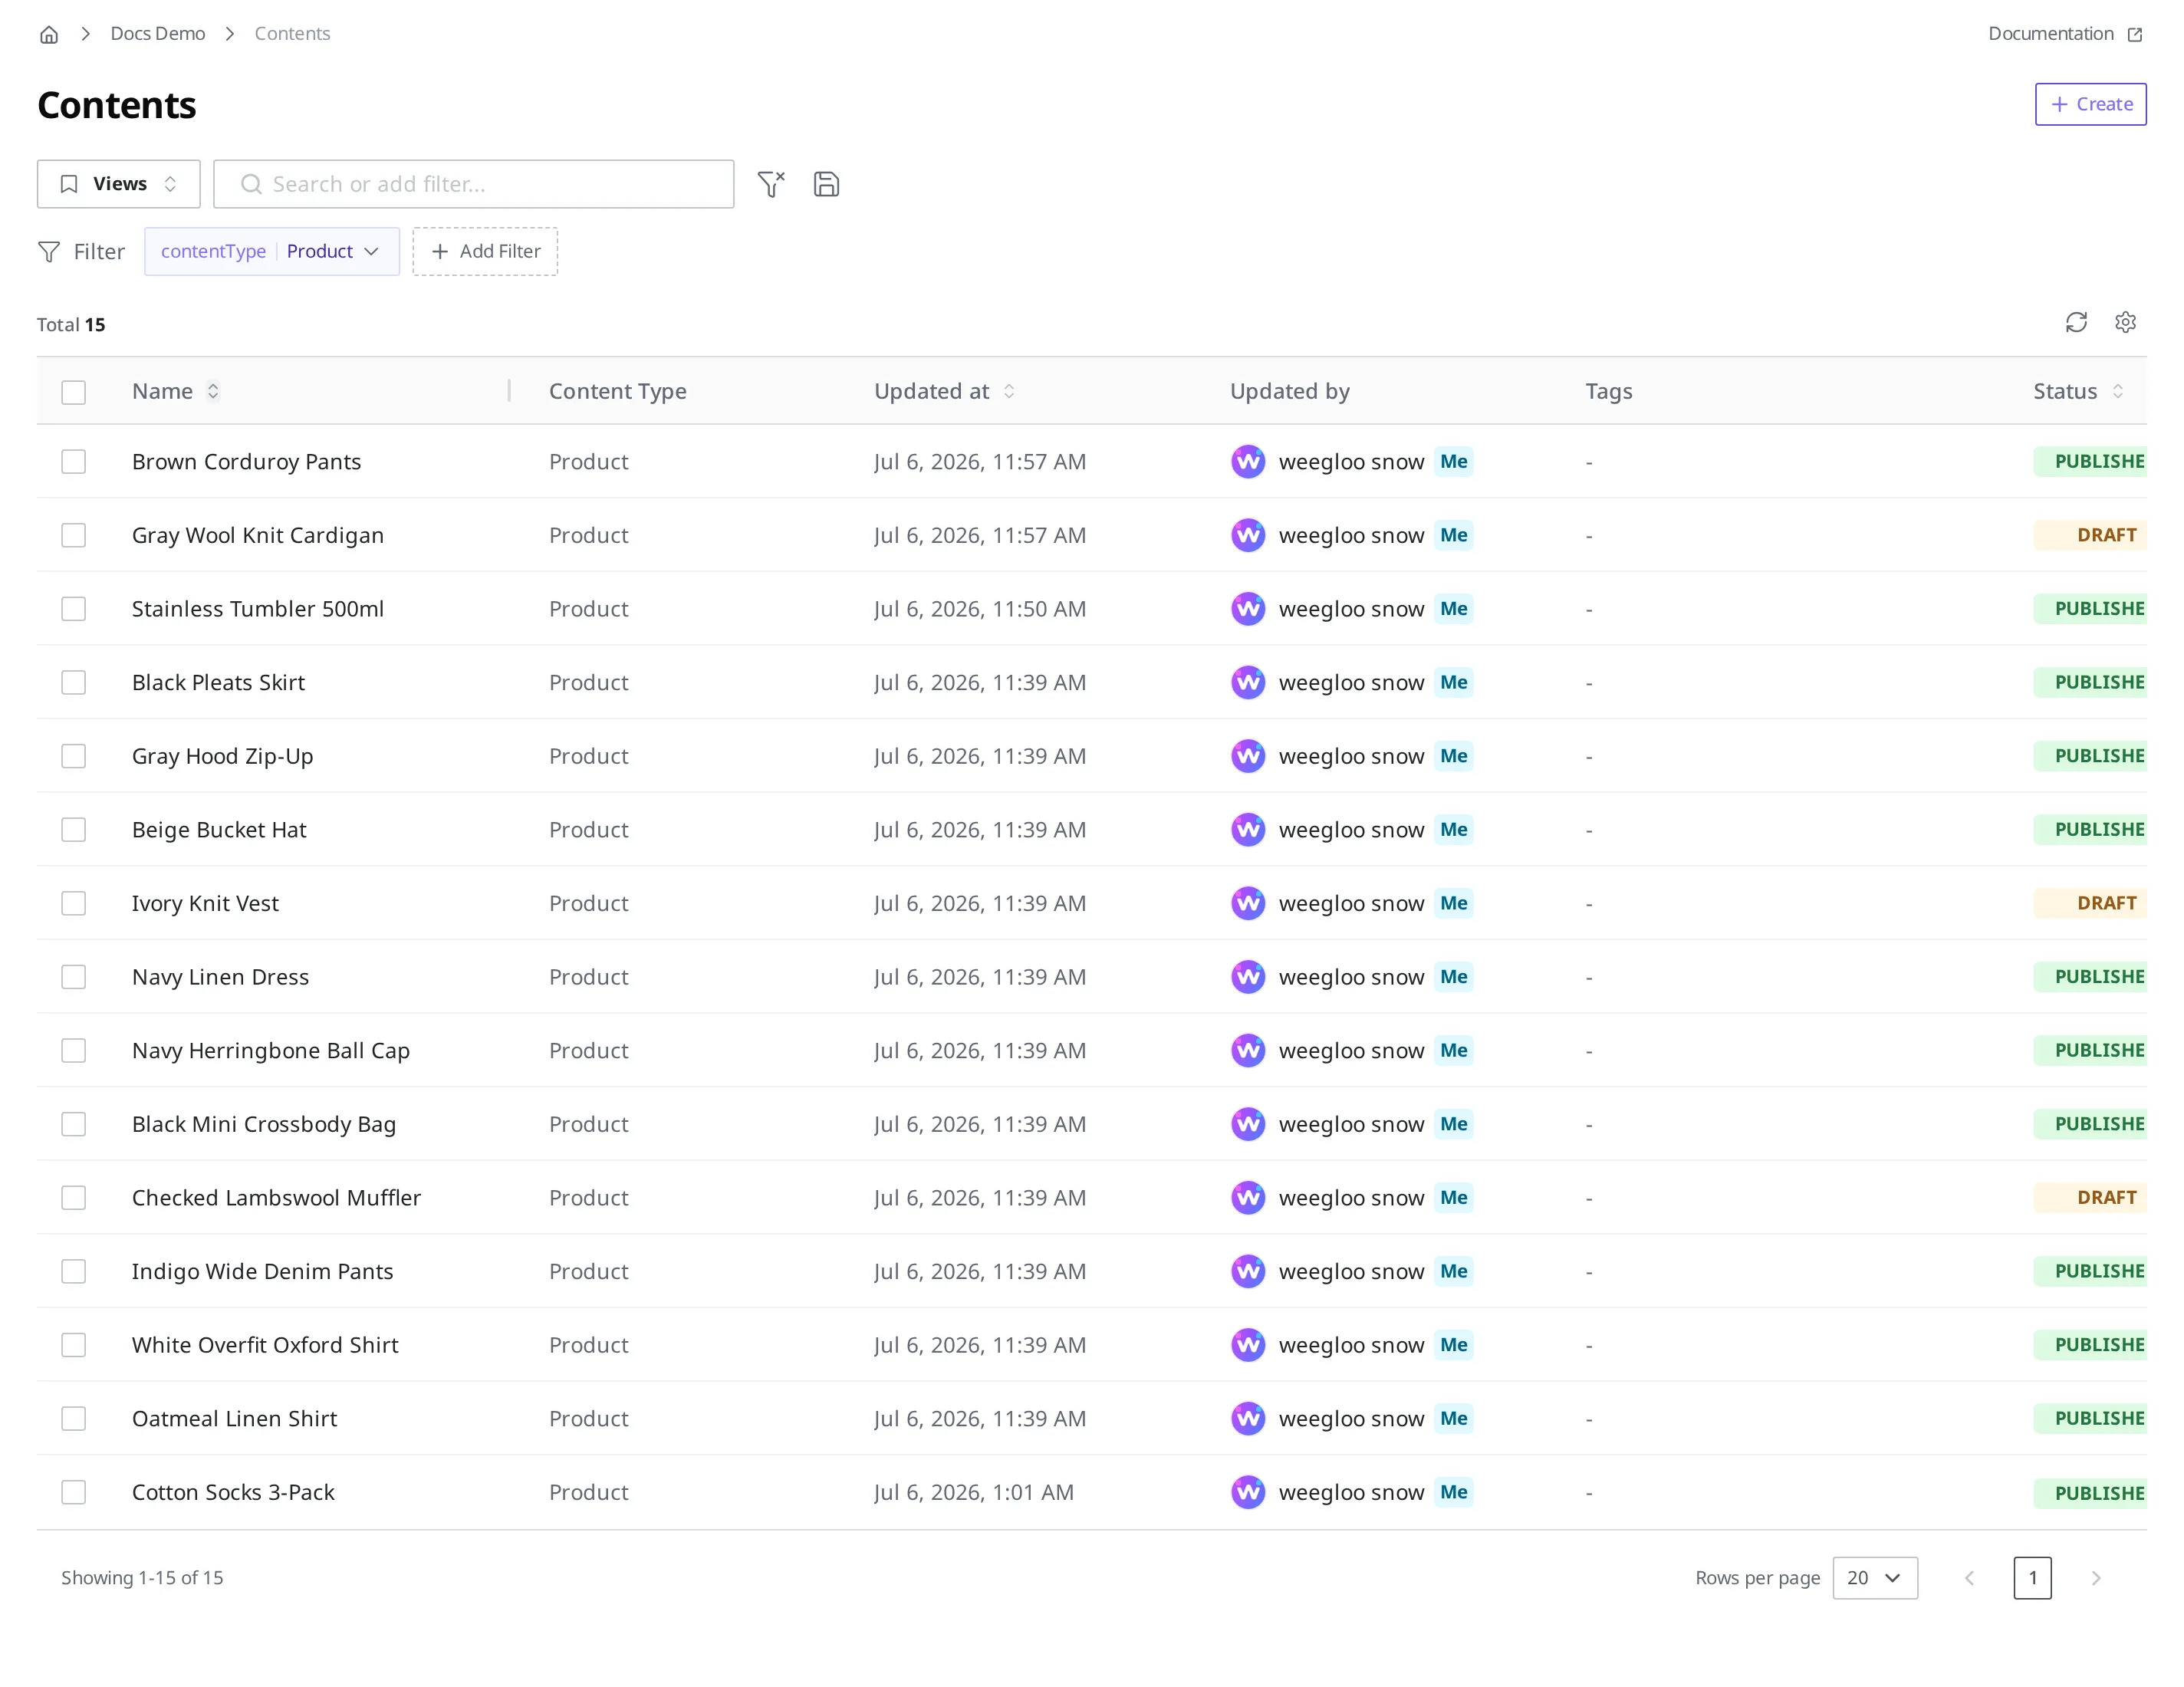
If your Space has Content Types beyond "Product," such as "Brand" and "Review," the list shows a mix of Content made from different templates. When you want to focus on tidying products, set a filter that keeps only the Content whose Content Type is "Product."
- Click the Content Type chip in the filter.
- Choose "Product" from the list.
If only the items made from the "Product" Content Type remain, it worked. Content made from the "Brand" or "Review" templates drops out of the list.
See only products grouped by a Tag
If you have attached a Tag to each product you count as a "Bestseller," you can set a filter that keeps only the ones with that Tag. You use this when you want to pick items out by a grouping you set yourself, independent of Content Type or Field value. The way you set the filter is the same as the Sales status or status filters above.
How to create a Tag and attach it to Content, and how to filter the list by an attached Tag, is covered in Tag.
See only what I created or edited
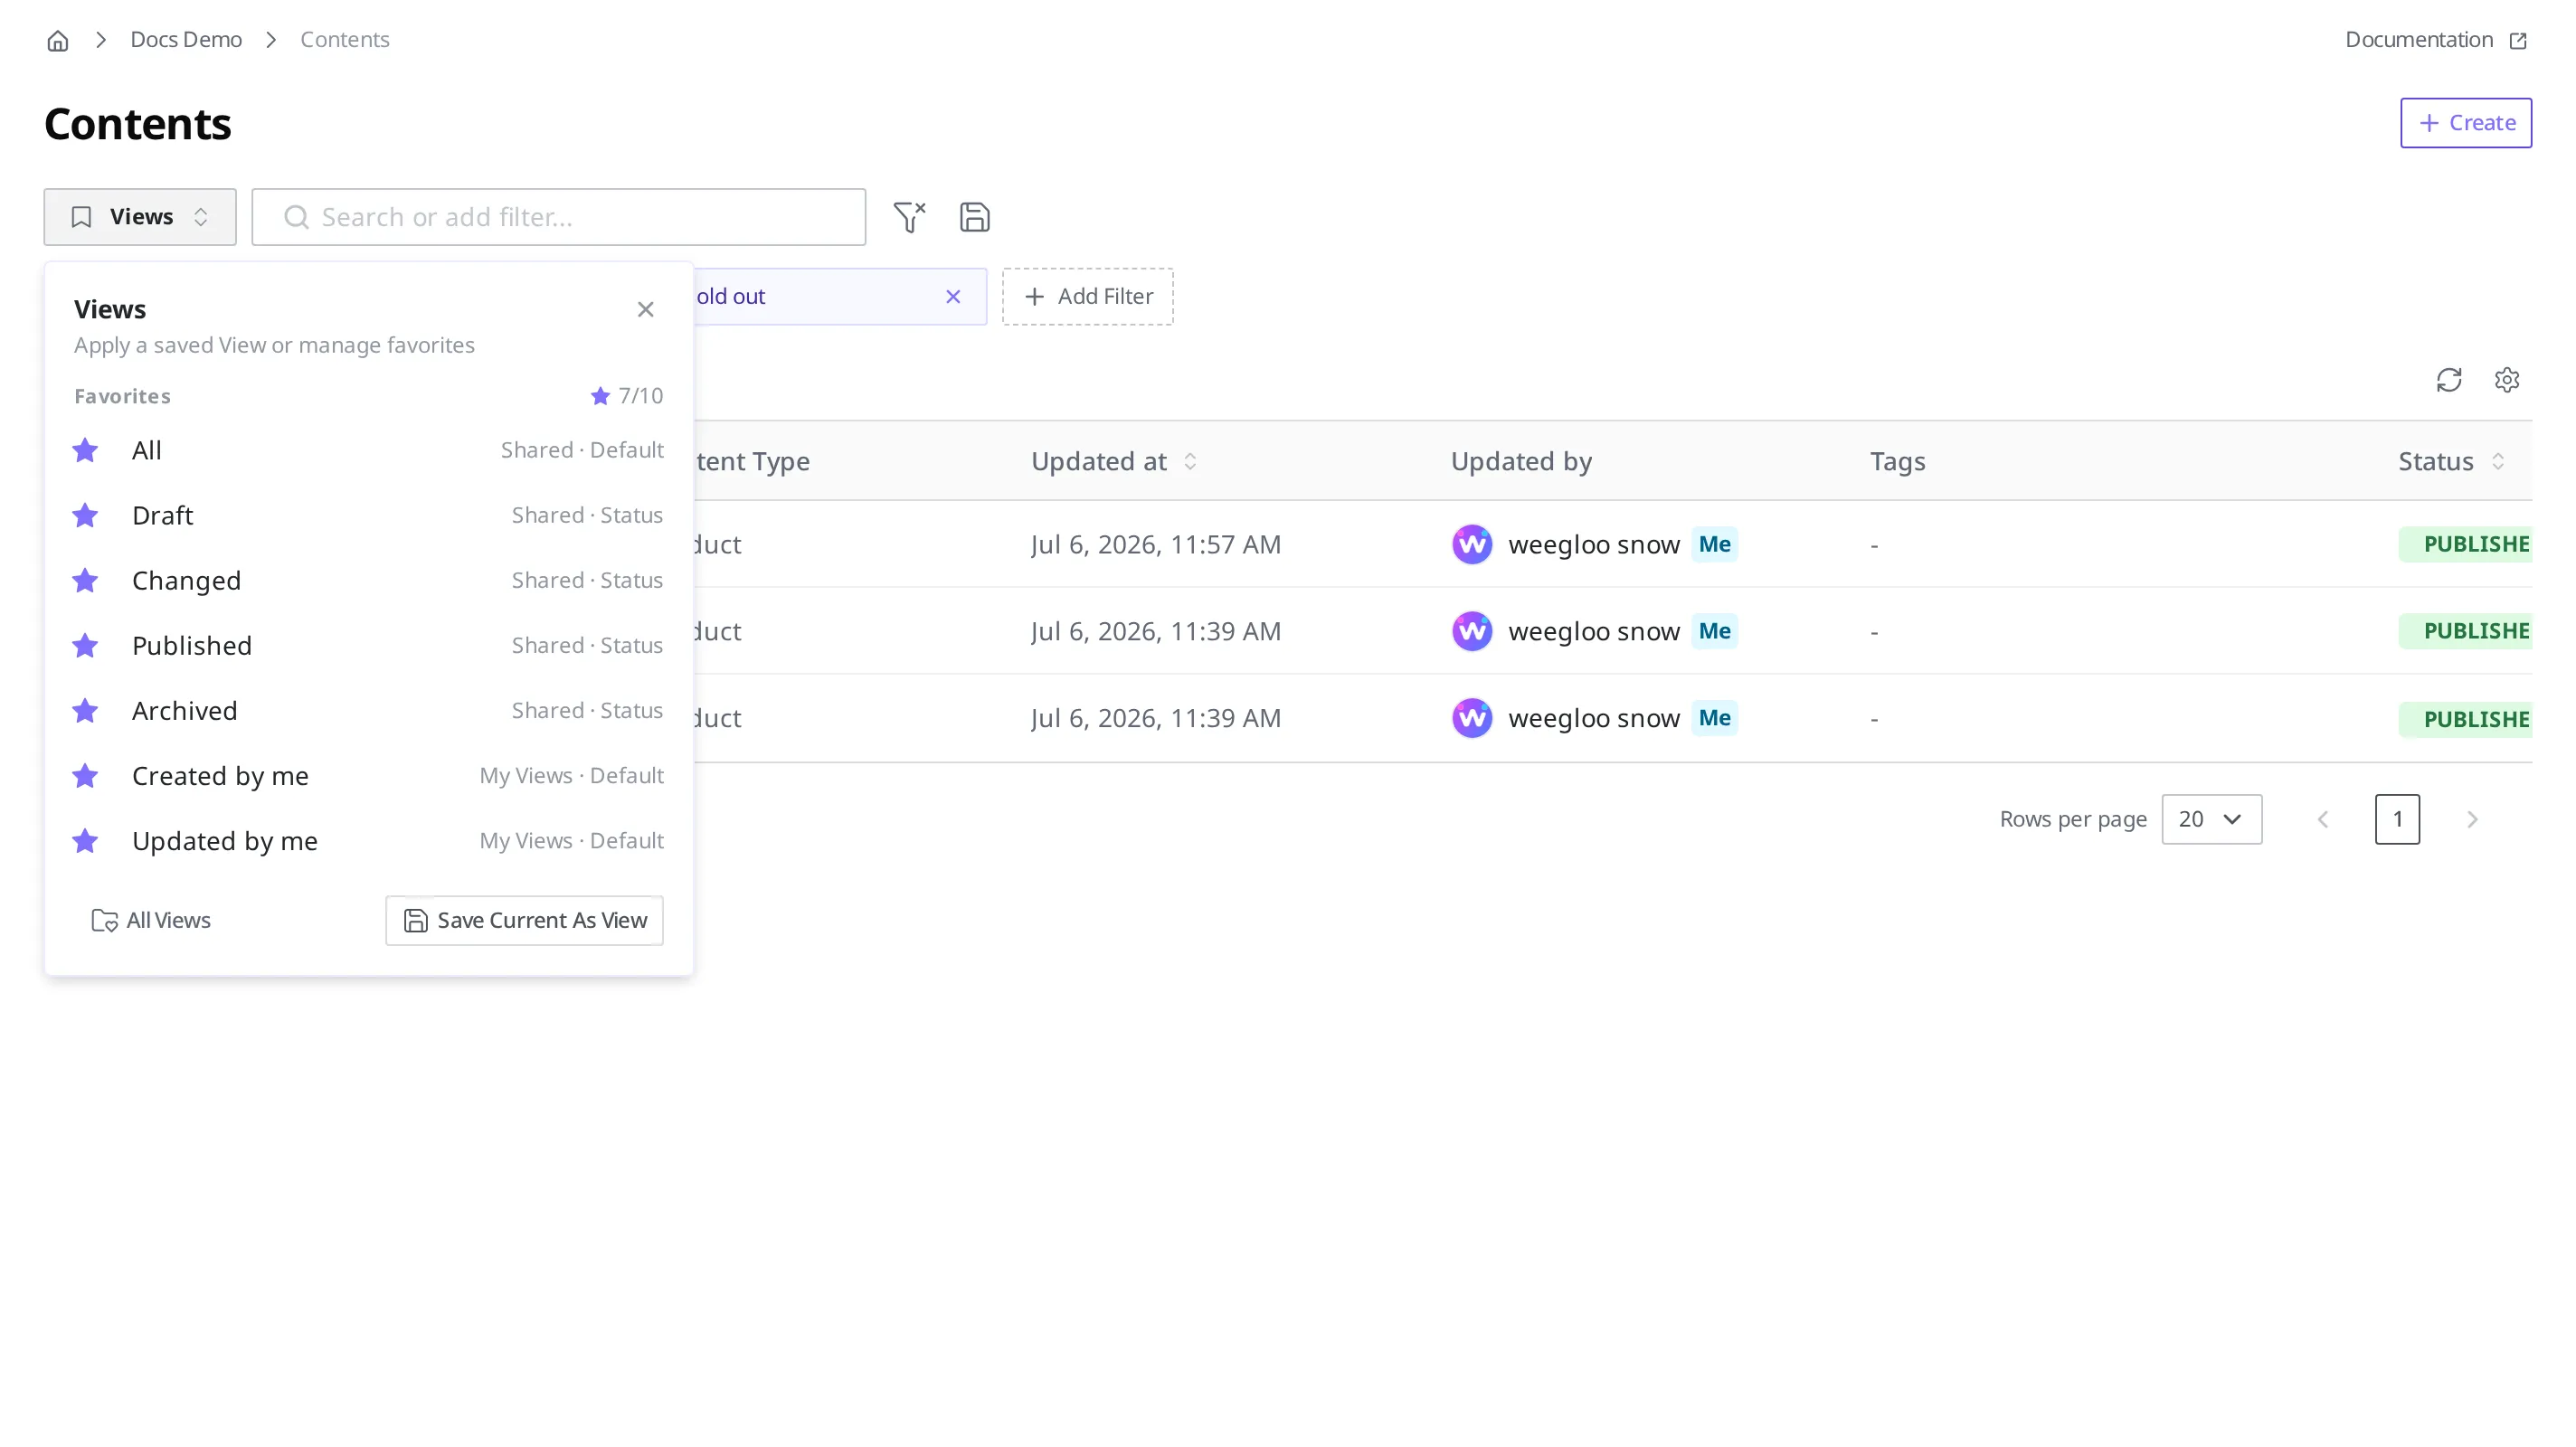
If you manage products together with two colleagues, the list holds the work of all three of you. If you think "I just want to review the products I edited last week," you do not need to set a new filter. Two Views provided by default when you join a Space already hold that condition.
- "Created by me": keeps only the Content you created.
- "Updated by me": keeps only the Content you edited.
- Click the Views button to the left of the search box.
- Choose "Updated by me" from the list.
The View list comes with "All," "Draft," "Changed," "Published," and "Archived" (Shared / Status) and "Created by me" and "Updated by me" (My Views / Default) by default. Choosing "Updated by me" leaves only the products you edited. Add a sort by last-modified date (see Sort to show the most recently edited first below) and the products you touched last week gather at the top.
Sort to show the most recently edited first
Once you have narrowed down what you are looking for, next comes the order. You can sort the list by system values like created date or last-modified date, or by Field values like price. Clicking a column title in the table sorts by that column. Clicking again reverses the sort direction. Here is how you might use it.
- Click the Updated at column title, and the most recently touched products come to the top.
- If you have added the price column (see See price and more at a glance in the list below), you can click its column title to see products from cheapest (or most expensive) first.
If the list contains Content with no value for the field you are sorting by, the sort is not applied and this message appears: "This sort can't be applied because some items are missing values for the selected sort field. Clear the sort or choose a different column." Fill in the value for that field, or sort by a different one.
See price and more at a glance in the list: column settings
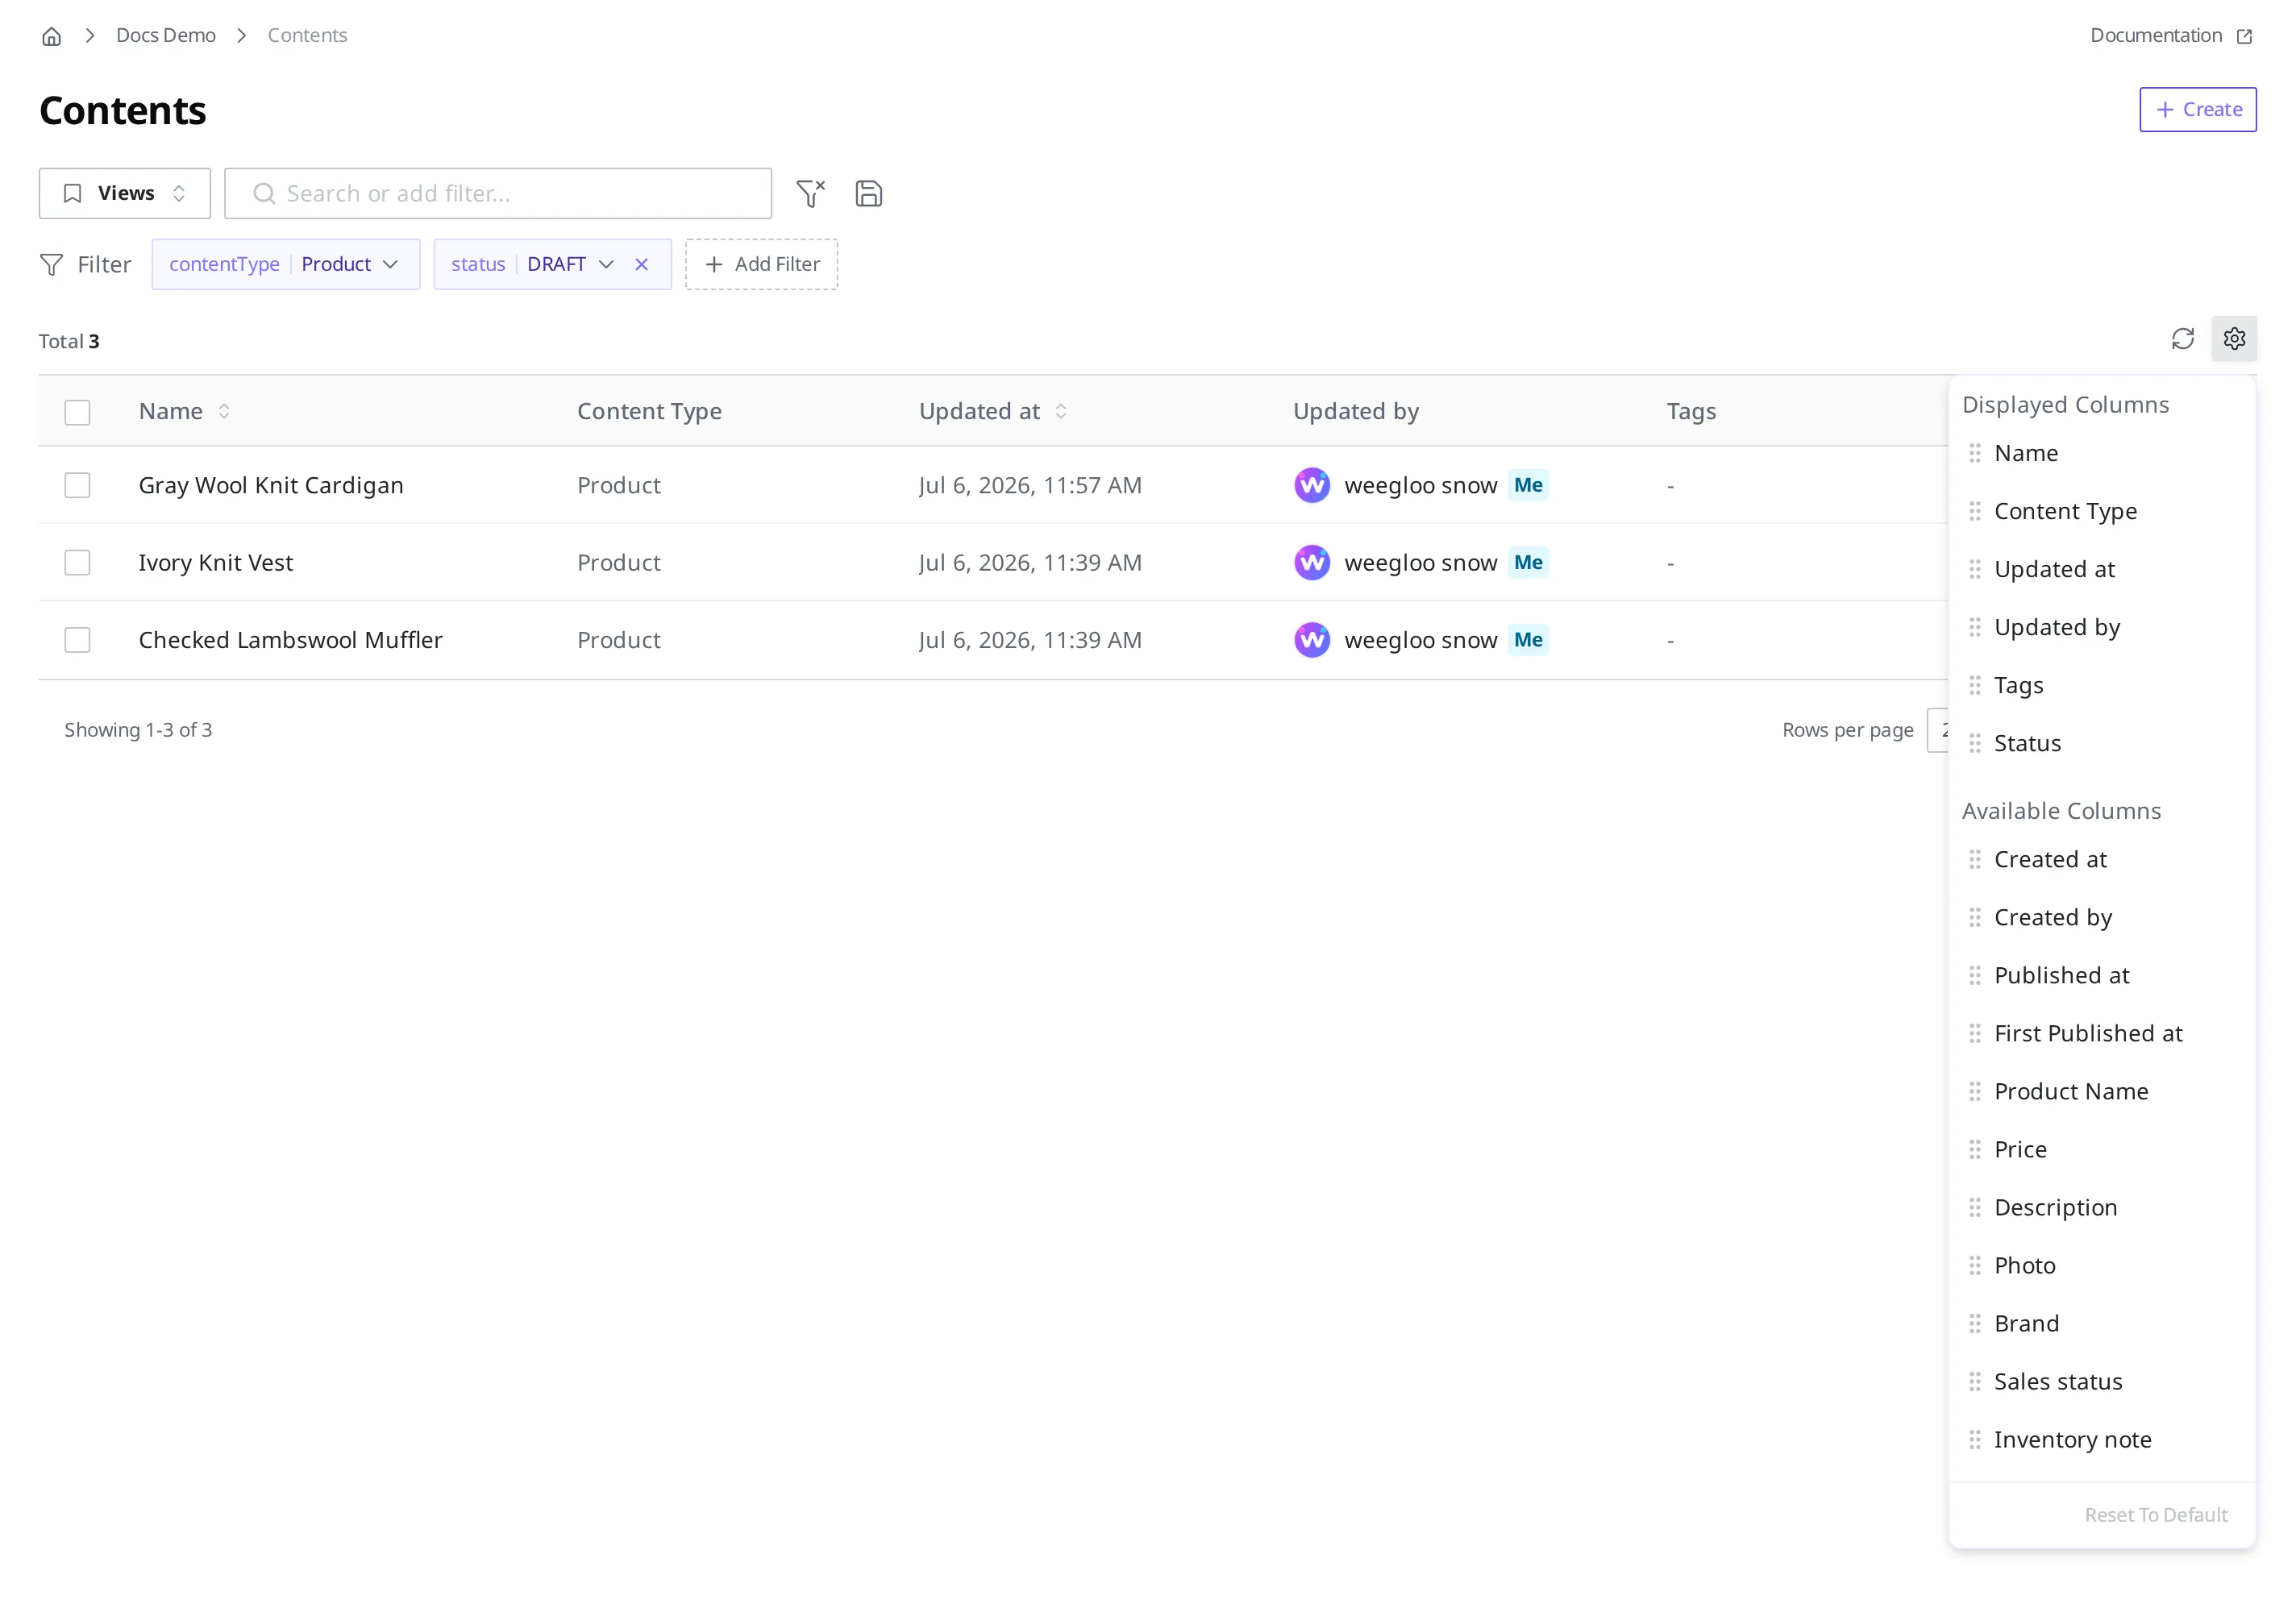
As you tidy up sold-out products, you start wanting to see the price and sales status right in the list, without opening each product one by one. You choose which information the list table shows as columns with the Column Settings button.
- Click the Column Settings button.
- In the Available Columns list, grab the drag handle on the price item and drop it into the Displayed Columns list.
- Move sales status the same way.
When the price and sales status columns appear in the list table, it worked. To go back to the original, click Reset to default.
Save conditions you use every week as a View
If you check sold-out products every Monday morning, instead of setting the same filter each time, save the conditions as a View. A View is the search-and-filter combination currently applied to the list, saved under a name.
- Set the filter from See only the sold-out products.
- Click the Views button to open the View list.
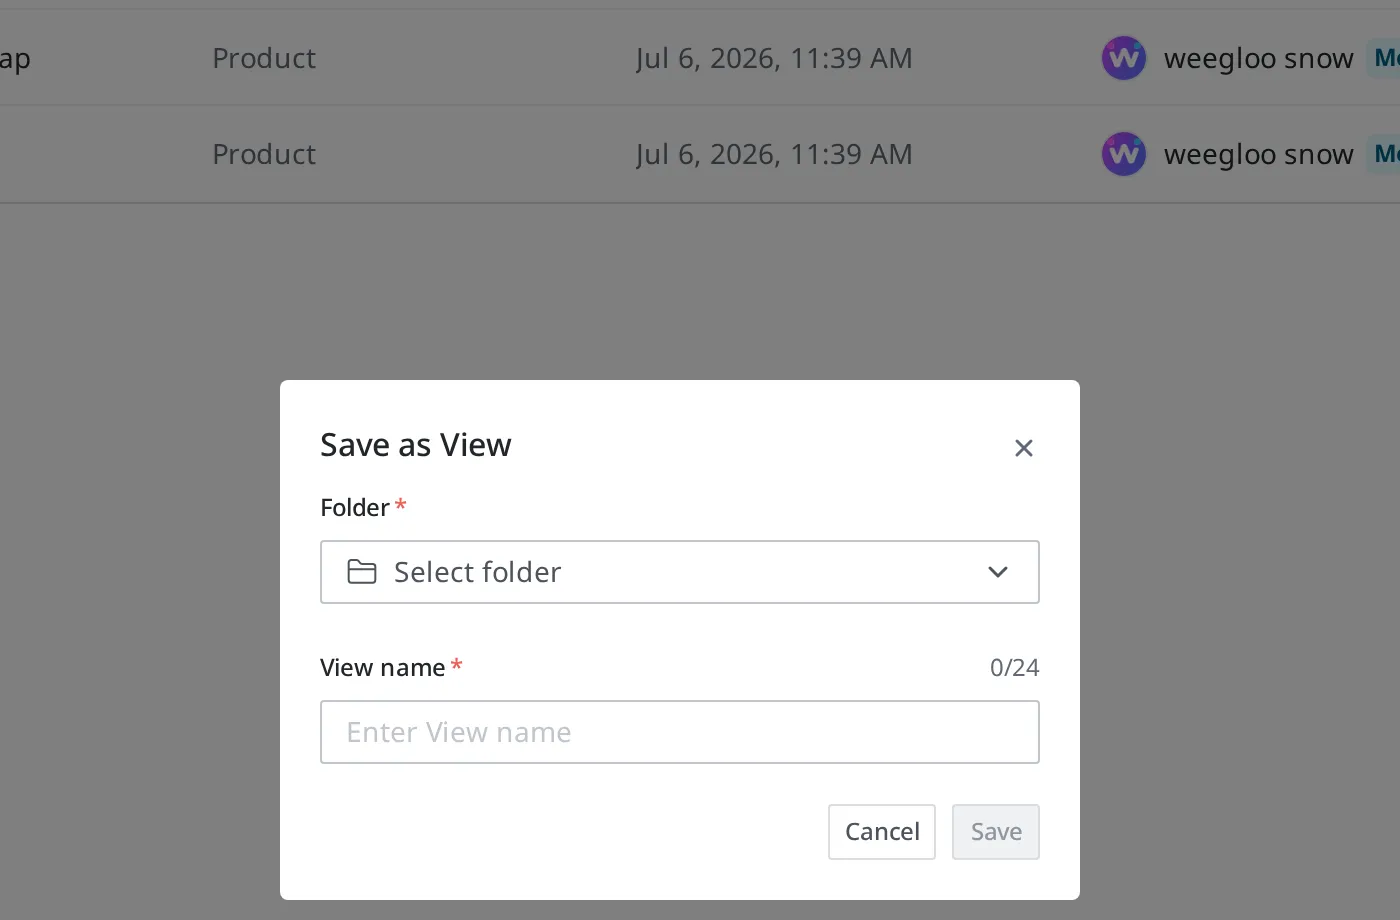
- Click Save Current As View.
- In the Folder field, choose a folder to save it in. If you do not have a folder yet, create one.
- In the View name box, type
Sold-out check(up to 24 characters). - Click Save.
When you create a new folder, you choose the visibility between Only me and Share with Space members. Next Monday, just choose "Sold-out check" from the View list and the list with the same conditions opens right away.
The View you saved appears together in the View list you saw in See only what I created or edited above.
When a product you just added doesn't show: refresh and paging
If a product a colleague just registered does not show in your list, the list is still in its earlier state. Clicking the Refresh button reloads the list.
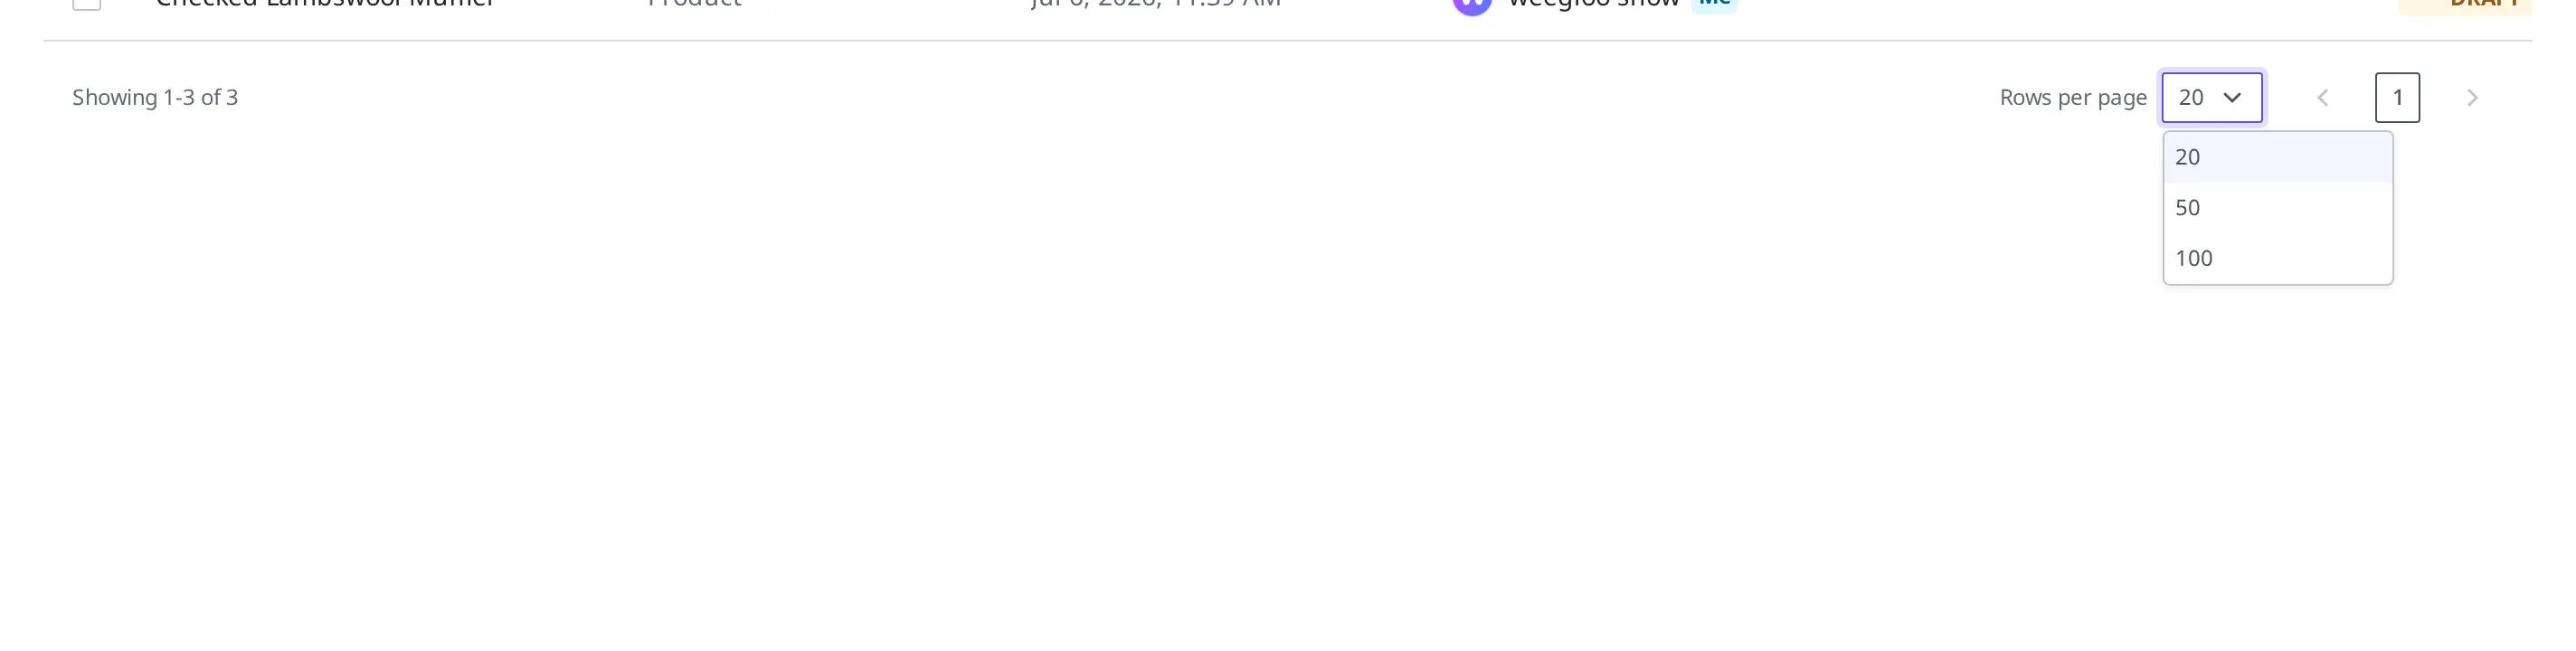
When the list is long and splits across several pages, you can choose how many items to show per page from 20, 50, or 100 (the default is 20), or click the previous and next icons to move between pages. That said, flipping through hundreds of items page by page is a last resort. It is faster to narrow things down first with the search and filters on this page.
What to do next
- States and Publishing: Covers what the Draft, Published, and Changed states you used as filter criteria each are and how they change.
- Tag: Covers how to create a Tag to use as filter criteria and attach it to Content.
- Creating and Publishing Content: Covers the flow of editing the Content you found and publishing it again.