Content Modeling
Last updated: July 3, 2026
Imagine you run a clothing shop. Every time you add a product, the same pieces of information go in: a product name, a price, a photo, a description. A Content Type is the form template that decides in advance what items every product must include. Think of it as a printed application form with blank fields.
Once you create a Content Type, from then on you just keep filling products into that template. Each product you fill in is called a Content. In other words, a Content Type is the blank form, and a Content is one filled-in sheet. Even if you register 100 products, there is still only one Content Type, "Product", and 100 Content are created.
This page first looks at what a Content Type is, then walks you through building the clothing shop's "Product" Content Type yourself.
Why deciding the template first pays off
If you write products freely with no fixed template, some products end up missing a price and others have no photo. Later, when you try to do something like "show only products priced under 50,000 won", you cannot find the prices because each product keeps them in a different place.
A Content Type heads off this problem in advance. You put rules like "every product must have a product name" and "the price is written as numbers only" into the template itself. So no matter who registers a product, everything stacks up in the same shape, and you can handle it all at once later when you search or send it out to your site.
Field: a single blank in the template
Each blank you create inside a Content Type is called a Field. For the "Product" Content Type, the product name, price, product photo, and detailed description are each a Field.
When you create a Field, you also decide what kind of value goes in that blank. The kinds differ: a product name is text, a price is a number, a photo is an image file. Setting the kind keeps you from accidentally typing text into the price blank, and it makes the matching input control (a calendar, a checkbox, and so on) appear on screen.
The Field kinds you can choose from are as follows.
| Field kind | What value it holds | Clothing shop example |
|---|---|---|
| Short Text | A single line of short text. Good for product names, codes, or labels, where you look for an exact match or search by the leading characters | Product name "Stainless Tumbler 500ml" |
| Long Text | Longer text spanning multiple lines. Good for detailed descriptions or notices | Product detail description |
| Integer | A whole number with no decimal point | Stock quantity 120 |
| Number | A number with a decimal point | Weight 0.5 (kg) |
| Content Reference | Links to another Content. For example, linking a "brand" to a product | Product → brand "DailyWear" |
| Media | Links to an uploaded file such as an image or video | Product main photo |
| Boolean | One of two values, true or false | "Is it a new arrival" |
| Date & Time | A date and time | Release date |
| Location | A position given as latitude and longitude | Store location |
| JSON | Free-form data that the kinds above cannot hold easily | Per-size option table |
Sometimes you want a single blank to hold several values. For example, if you want to put in more than one product photo instead of just one, set that Field to Use as list type. That lets you collect several values of the same kind in one place.
A Field kind also decides how you can find its value later. For example, Short Text (a product name or code) is well suited to finding an exact value or matching by the leading characters. Long Text (a detailed description) is not searched by default and is only shown, but if you turn on full-text search when you create it, you can also find that product by a word contained in the text.
How each Field kind is stored, and the specific ways to apply searches and filters (including special searches like finding by location, and advanced search), are covered in Common query parameters and the API Reference. When creating one in the content studio, knowing just the kinds in the table above is enough.
Putting rules on values: validation
You can put conditions on "the values allowed in this blank" for a Field. This is called validation. Values that do not meet a condition are not saved, which keeps incorrect Content from piling up.
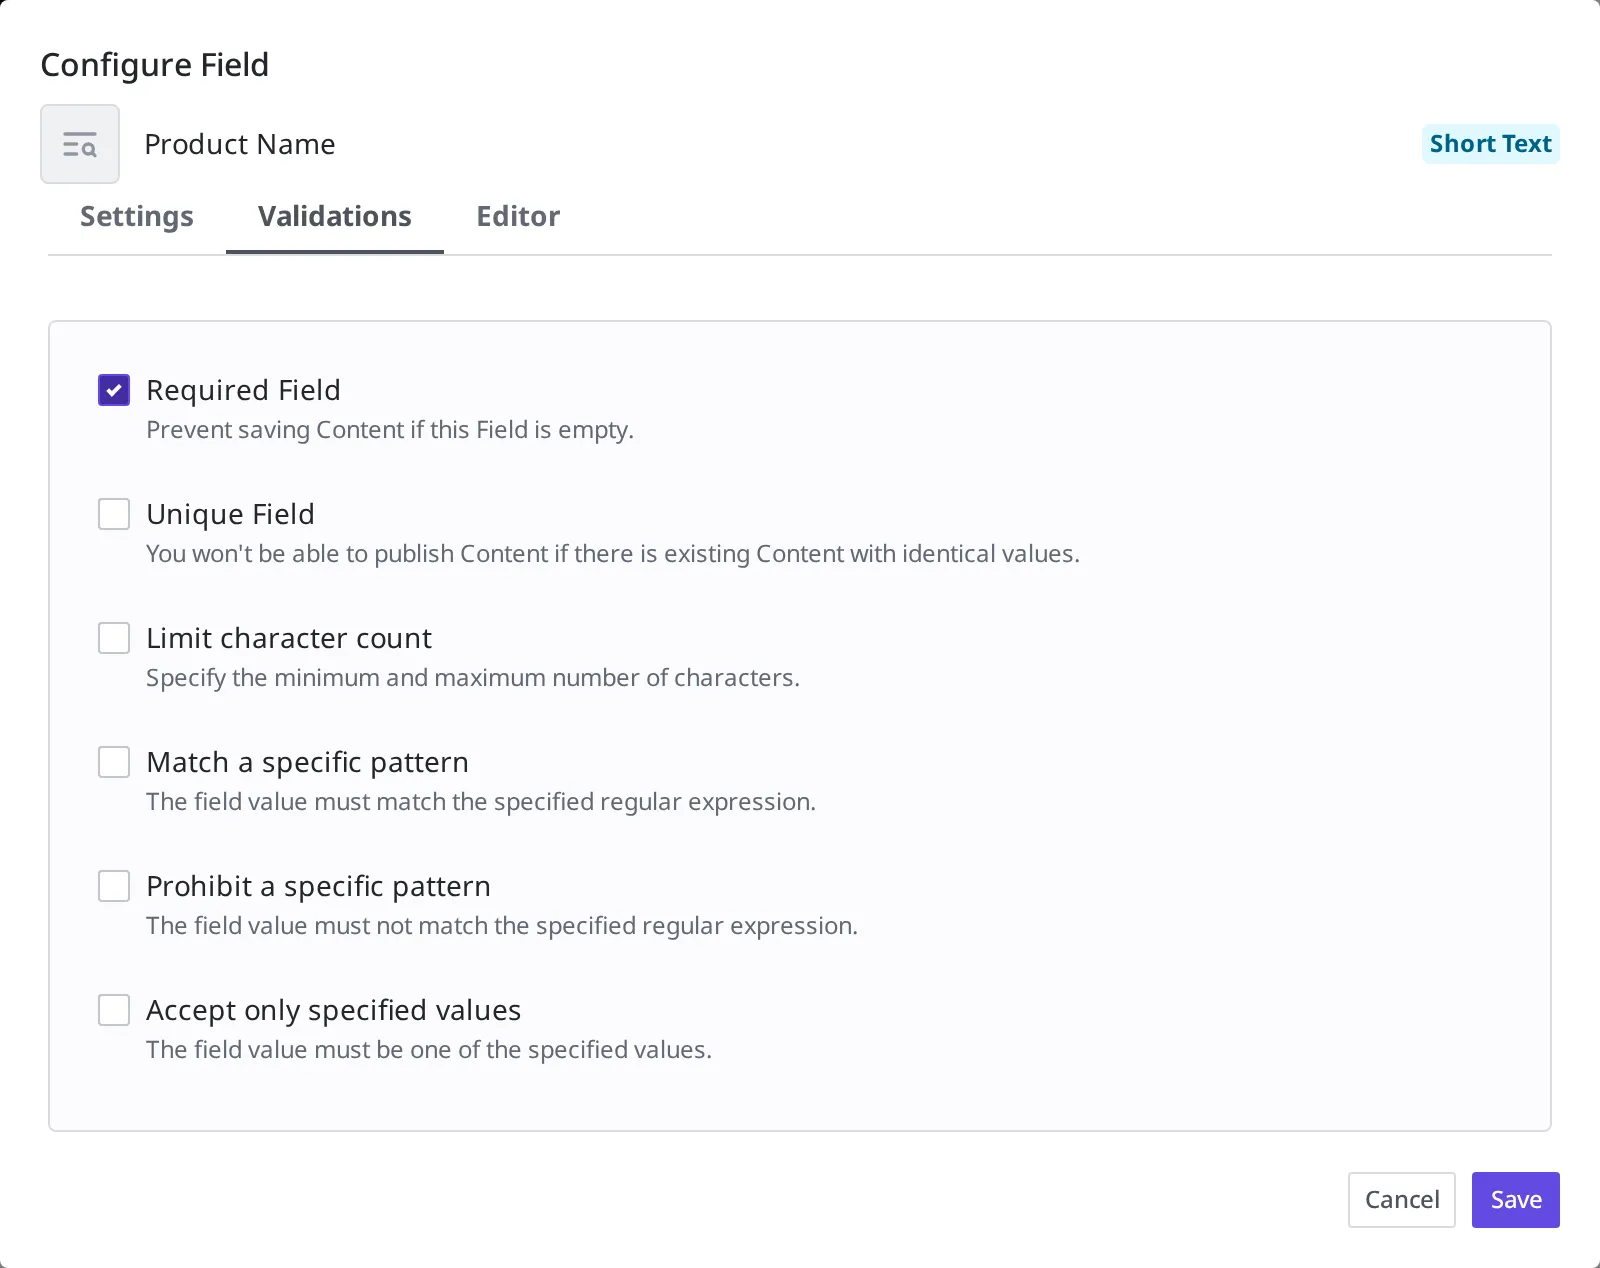
Taking a Short Text Field as an example, you can set the following conditions in the content studio.
- Required Field: Makes it impossible to save when this blank is left empty. Turn it on for values that must be present, like the product name.
- Unique Field: Prevents publishing when a Content with the same value already exists. Turn it on for values that must not collide, like a product code.
- Limit character count: Sets the minimum and maximum number of characters.
- Match a specific pattern: Accepts only values matching a set format.
- Prohibit a specific pattern: Rejects values matching a set format.
- Accept only specified values: Lets you choose only from values decided in advance.
The conditions you can set differ by Field kind. A number Field has conditions that set a value range, and a Media Field has conditions that set a file size or image dimensions. When you choose a Field kind in the content studio, only the conditions that apply to that kind appear on screen, so you do not need to memorize the full list ahead of time. Just pick and turn them on when the time comes.
Whether to include author information when publishing
When you create a Content Type, you can turn a setting called Include author info on publish on or off.
When you turn this setting on, "who created it and who last edited it" is saved together when you Publish a Content made with this Content Type. This information is also carried into the published version that is made public externally. Turn it on when you want to show the author's name on your site as well. The default is off.
What Publish means is covered in detail in States and Versions. Here, you only need to know it as "the step that makes a Content public externally".
Creating the "Product" Content Type
Now you will build the clothing shop's "Product" Content Type yourself. For the first Field, you will add the product name.
- In the left menu, click Content Type.
- Click the Create button at the top right of the list.
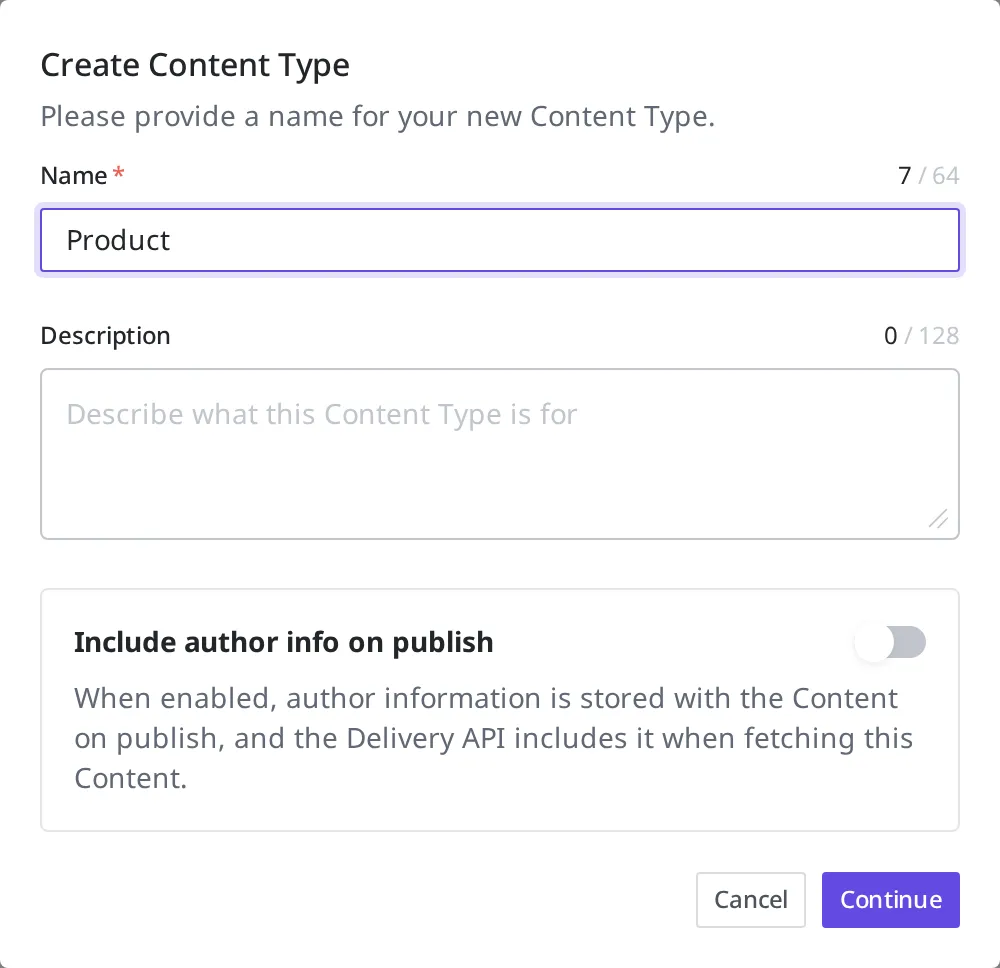
- Enter
Productin the name blank. - In the description blank, write what this Content Type is. (This is optional.)
- To publish the author information together, turn on Include author info on publish. You can leave it off for now and continue.
- Click the Continue button.
Next, create the first Field, the product name.
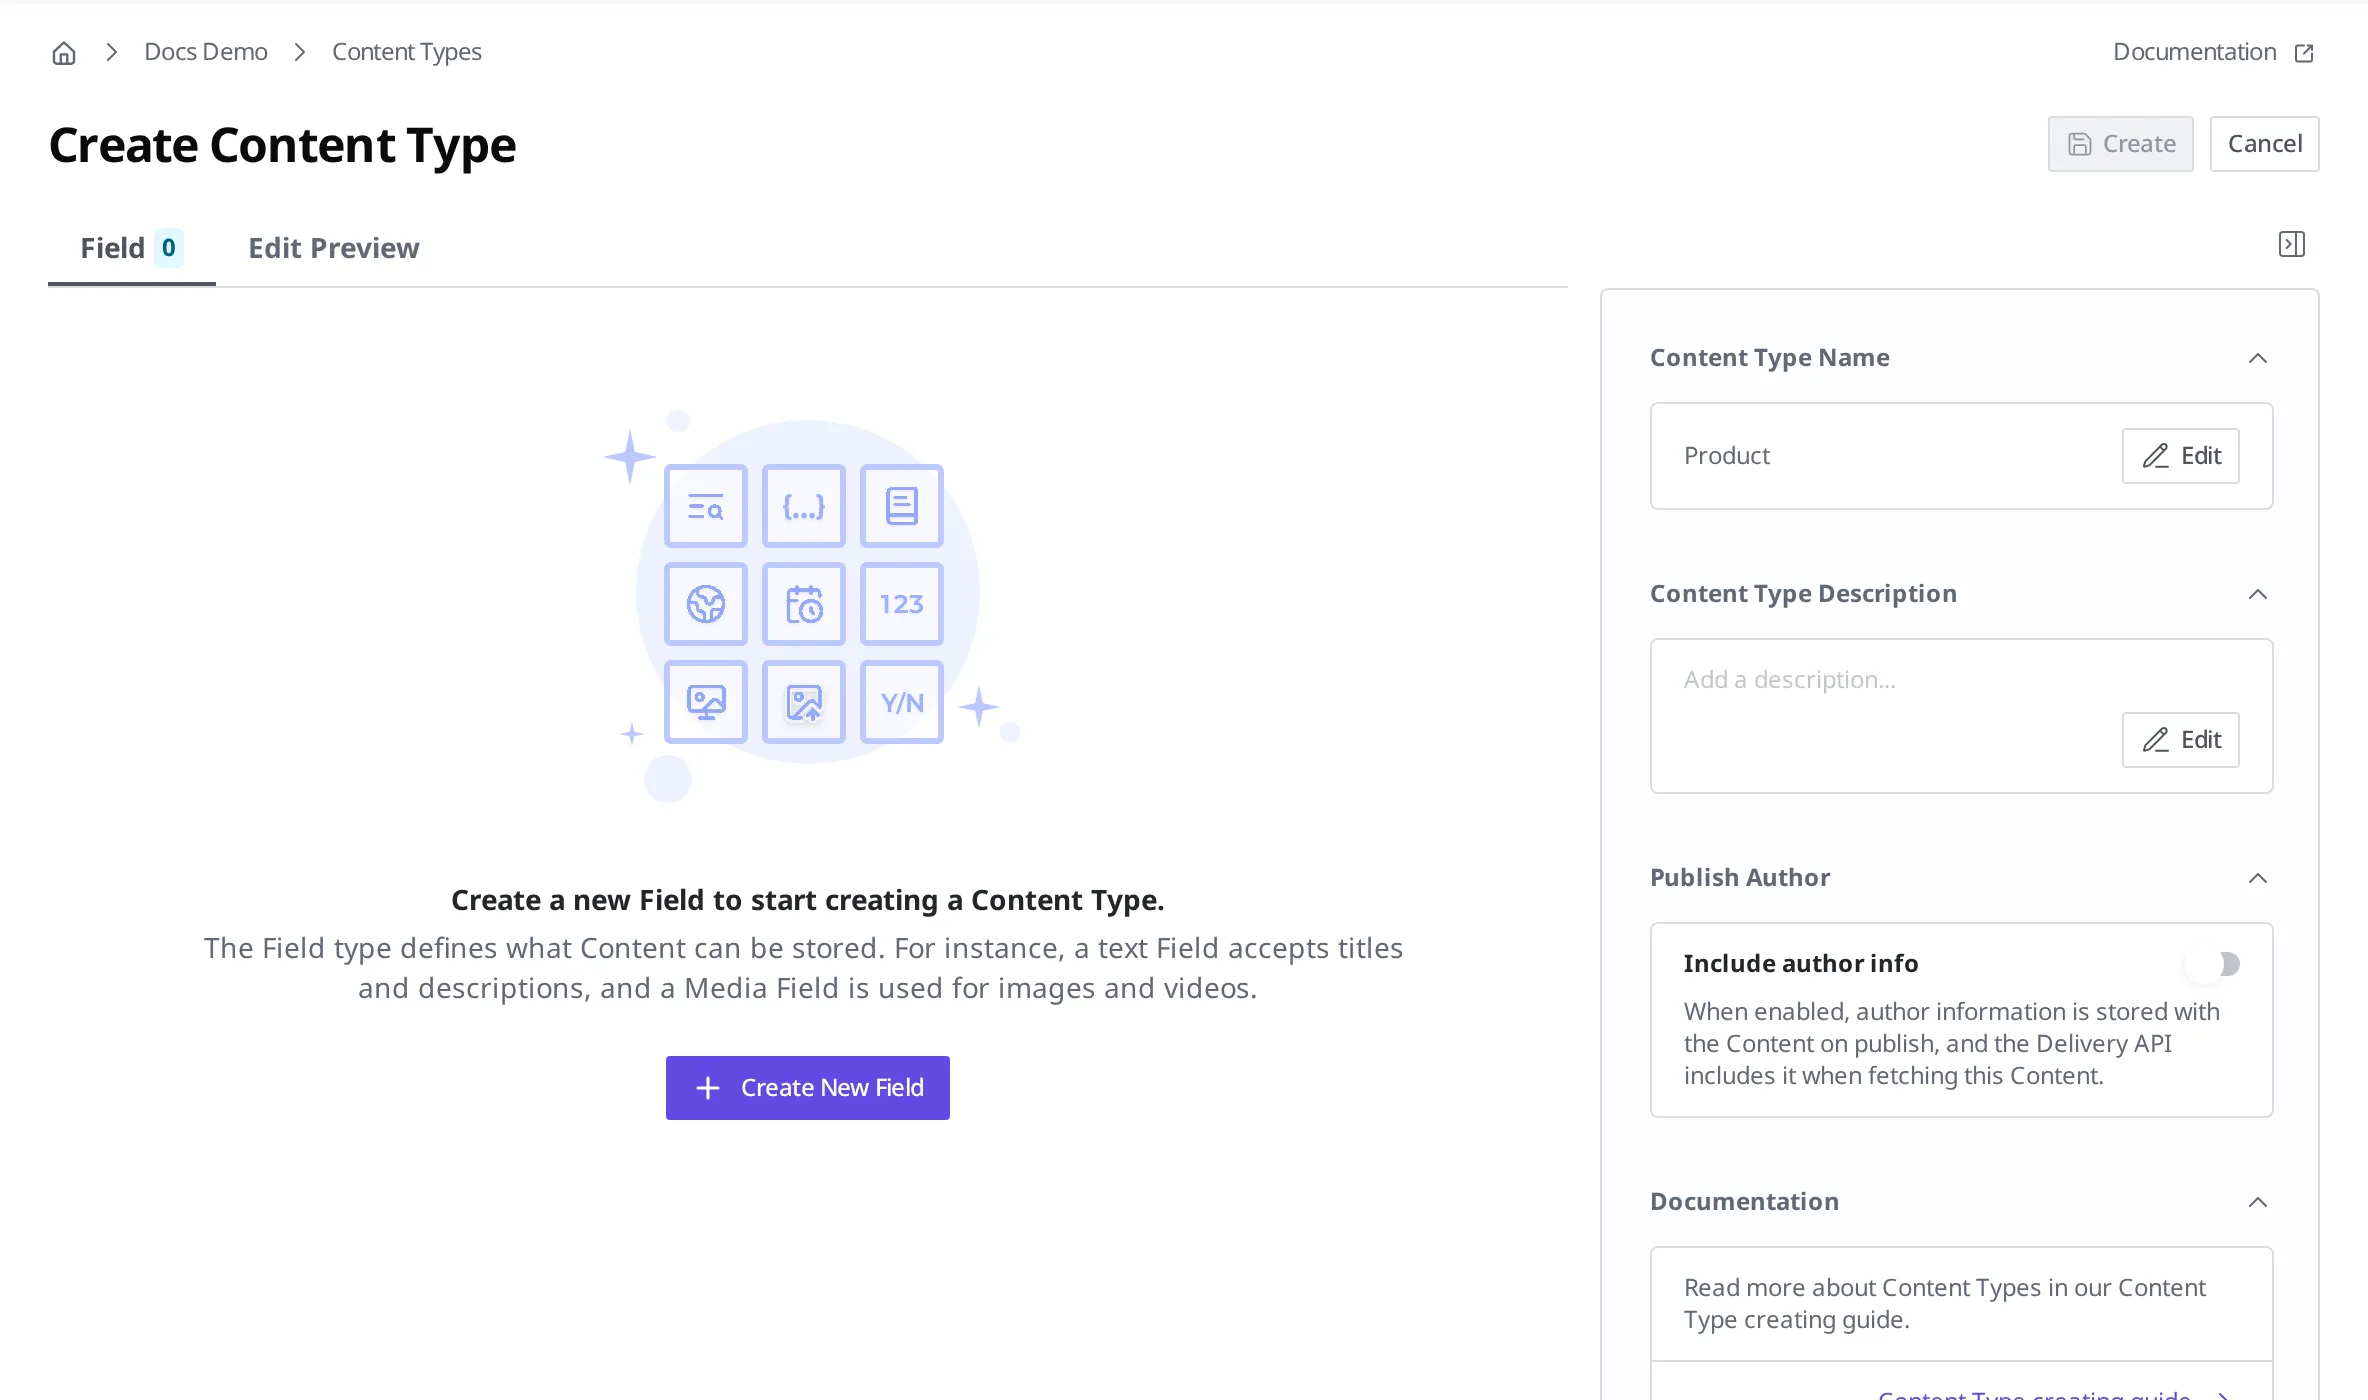
- In the Field editor, click Create New Field.
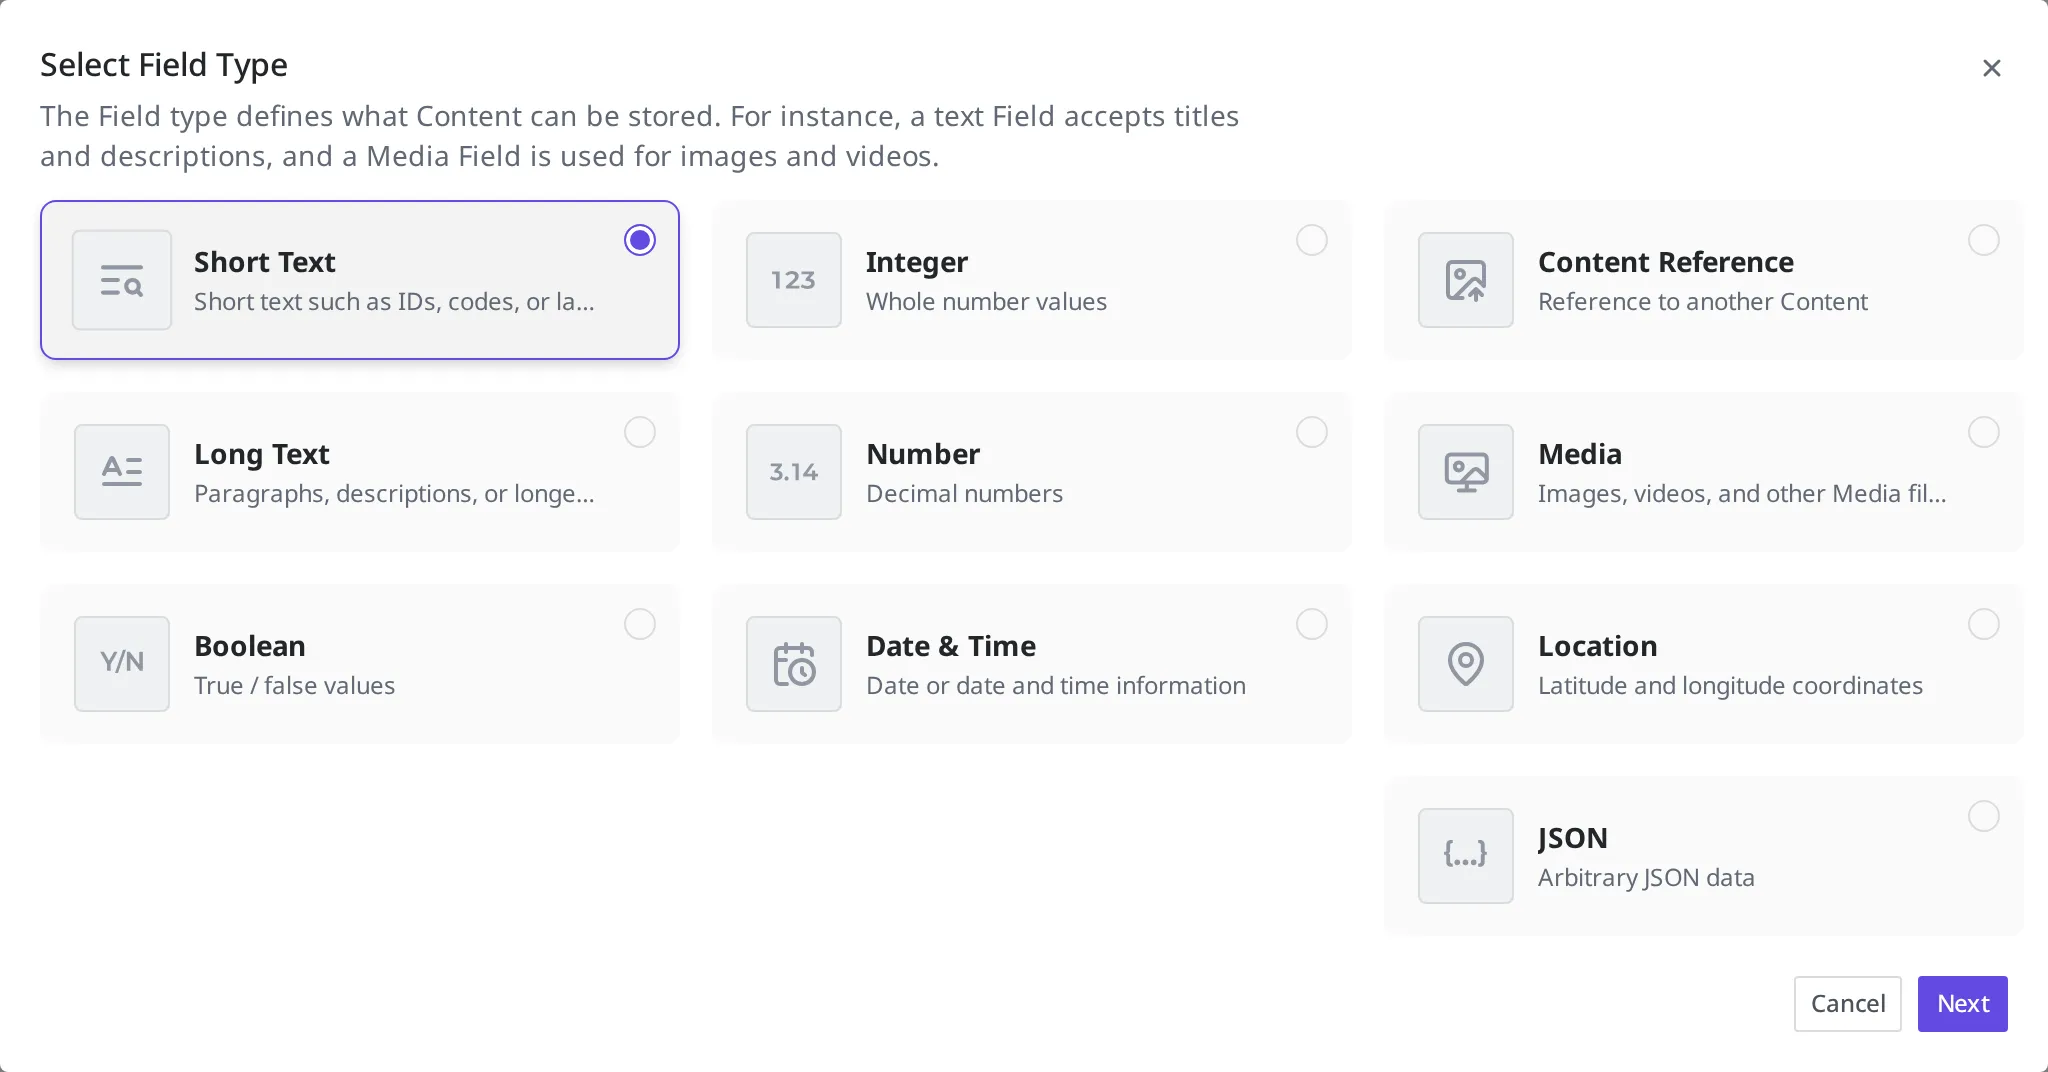
- On the Field kind selection screen, choose the Short Text card. A product name is a single line of short text.
- Click the Next button.
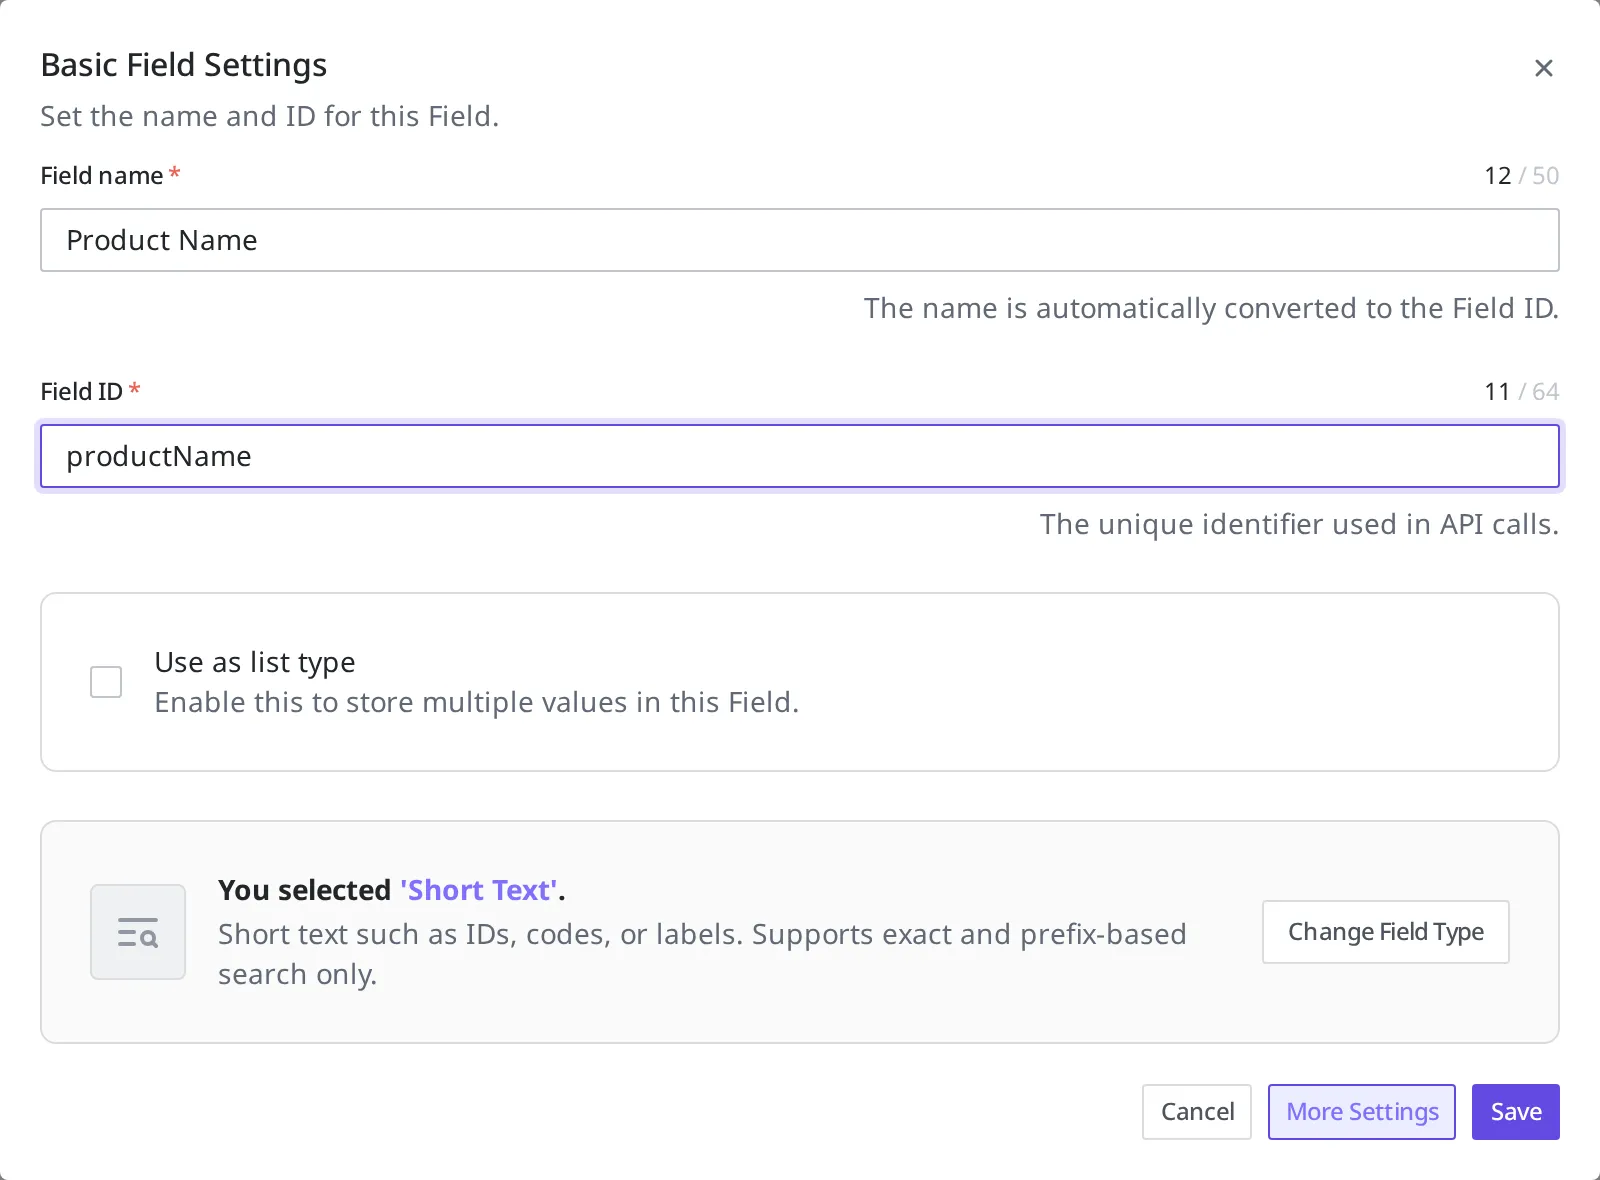
- Enter
Product Namein the Field name blank. This name is shown on the content studio screen. - Enter
productNamein the Field ID blank. The Field ID is generated automatically from the letters and digits in the name. However, a name with no letters or digits is not generated automatically. In that case, type it directly with letters and digits, likeproductName. The Field ID is the identifier used to point to this blank from the API.
A product name is a value that must always be present, so set a rule that prevents it from being saved when empty.
- Click More Settings.
- Go to the Validations tab.
- Turn on Required Field.
- Click the Save button.
- Click the Create button at the top right.
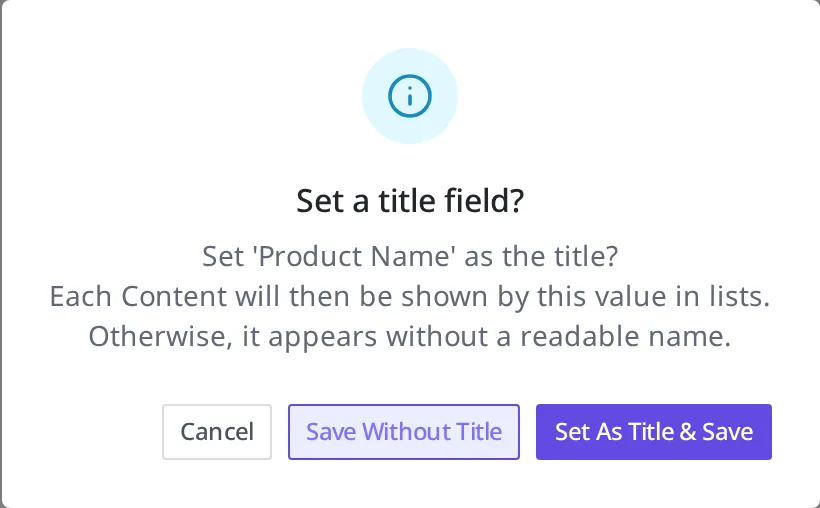
- When the "Set a title field?" window appears, click Set As Title & Save. The product name is then shown as each product's title in the Content list.
When "Product" appears in the list, the Content Type has been created.

What to know after creating it
A Field ID cannot be changed once it is created. You can edit a Content Type later to change a Field's display name (for example, Product Name → Item Name), but the Field ID of an already-created Field (productName) does not change. So it is best to decide the Field ID carefully at the start.
You can use it right after creating it. When you create a Content Type with Create in the content studio, it is published immediately and shown as Published in the list. Without going through a separate publish step, you can add a "Product" (Content) the moment you create it.
A Content Type in use cannot be taken down carelessly. If even one product (Content) made with the "Product" Content Type remains, that Content Type cannot be Unpublished or deleted. You must first delete all the Content made with that Content Type, then try again.
What to do next
- Authoring Content: Fill actual products into the "Product" Content Type you just created.
- States and Versions: Learn what states like Publish, Draft, and Changed mean.
- Managing Multiple Languages: Covers how to manage product information in several languages.