Reference
Last updated: July 3, 2026
Imagine you run an online clothing store. For each product, you want to note which brand it belongs to. If the brand "DailyWear" has dozens of products, you end up typing the same brand name, logo, and description into every single product. And when the brand description changes, you have to fix every one of those dozens by hand.
A reference removes this repetition. You create the brand information once, on its own, and each product simply links to that brand. Instead of re-entering the same information every time, you link to information that lives in one place. That is what a reference is. Edit the brand description once, and the change applies all at once to every product linked to that brand.
This page covers what a reference is, the kind of link that connects one Content to another Content, what happens when you link them, and how Content connect to one another.
Pointing versus copying
There are two ways to think about recording brand information on each product.
One is copying. Every time you create a product, you type the brand name "DailyWear" and the brand description directly into that product. A hundred products hold a hundred copies of the same text. When the brand description changes, you have to find and fix all hundred copies, and if you miss even one, that product shows a different description.
The other is pointing. You create the brand "DailyWear" as a single Content on its own, and each product just points to that brand Content. The information lives in only one place: the brand. Edit the description in that one place, and every product pointing to the brand follows the same new description.
A reference is this "pointing." The Field that holds the link is called Content Reference in the content studio. Add one Content Reference Field to the product Content Type, and in that box you choose a brand Content to link. To put it another way: instead of copying the brand information into each product by hand, you draw a single arrow that says "this product's brand is that DailyWear over there."
What a link looks like
When you link a product to a brand, it takes the following shape. Several products link to the same single brand.
Product "Stainless Tumbler 500ml" ──link──▶
Product "Insulated Mini Tumbler 350ml" ──link──▶   Brand "DailyWear"
Product "Foldable Travel Bottle 600ml" ──link──▶
You create the brand "DailyWear" just once, and both the tumblers and the bottle all link to this one place. Edit the brand description once in the DailyWear Content, and all three products above follow the new description.
Links can be made not only between Content, but also from Content to Media (an uploaded file such as an image or video). Attaching a main photo to a product is an example. This page covers connecting Content to one another. How to attach Media is covered in Media.
What comes along with a link
Once a product has a brand linked to it, you can pull in the linked brand information together with the product information. When you show the tumbler product on screen, the name and description of the brand "DailyWear" linked to it come along in one go. Even though you never copied the brand information into the product, it follows the link and reads the values from the one place where the brand lives.
So you only ever keep the brand information in one place: the brand Content. Each time you read the product, the brand information as it stands at that moment comes along through the link. Edit the brand, and the next time you read the product, the edited content follows.
The exact format of how far the linked Content is pulled in together, and which request retrieves it, is covered in the API reference. In the content studio, you only need to set up the link.
Deciding which kinds can be linked
A Content Reference Field lets you set a restriction: "only certain Content may be linked in this box." For a product's brand box, you do not want just any Content coming in, because a review or a notice should not be linked into the brand slot by mistake.
So you can decide that only Content created from the "Brand" Content Type may be linked in this box. With that in place, the choices in the brand box are limited to brands, and other kinds of Content will not link. You can also allow several Content Type to be linked together. For example, a single box can allow both "Brand" and "Partner," so that either one can be linked.
You set this restriction in the detailed settings of the Content Reference Field. Turn on Accept only specified Content Type under Validations, then choose "Brand" as the allowed Content Type.
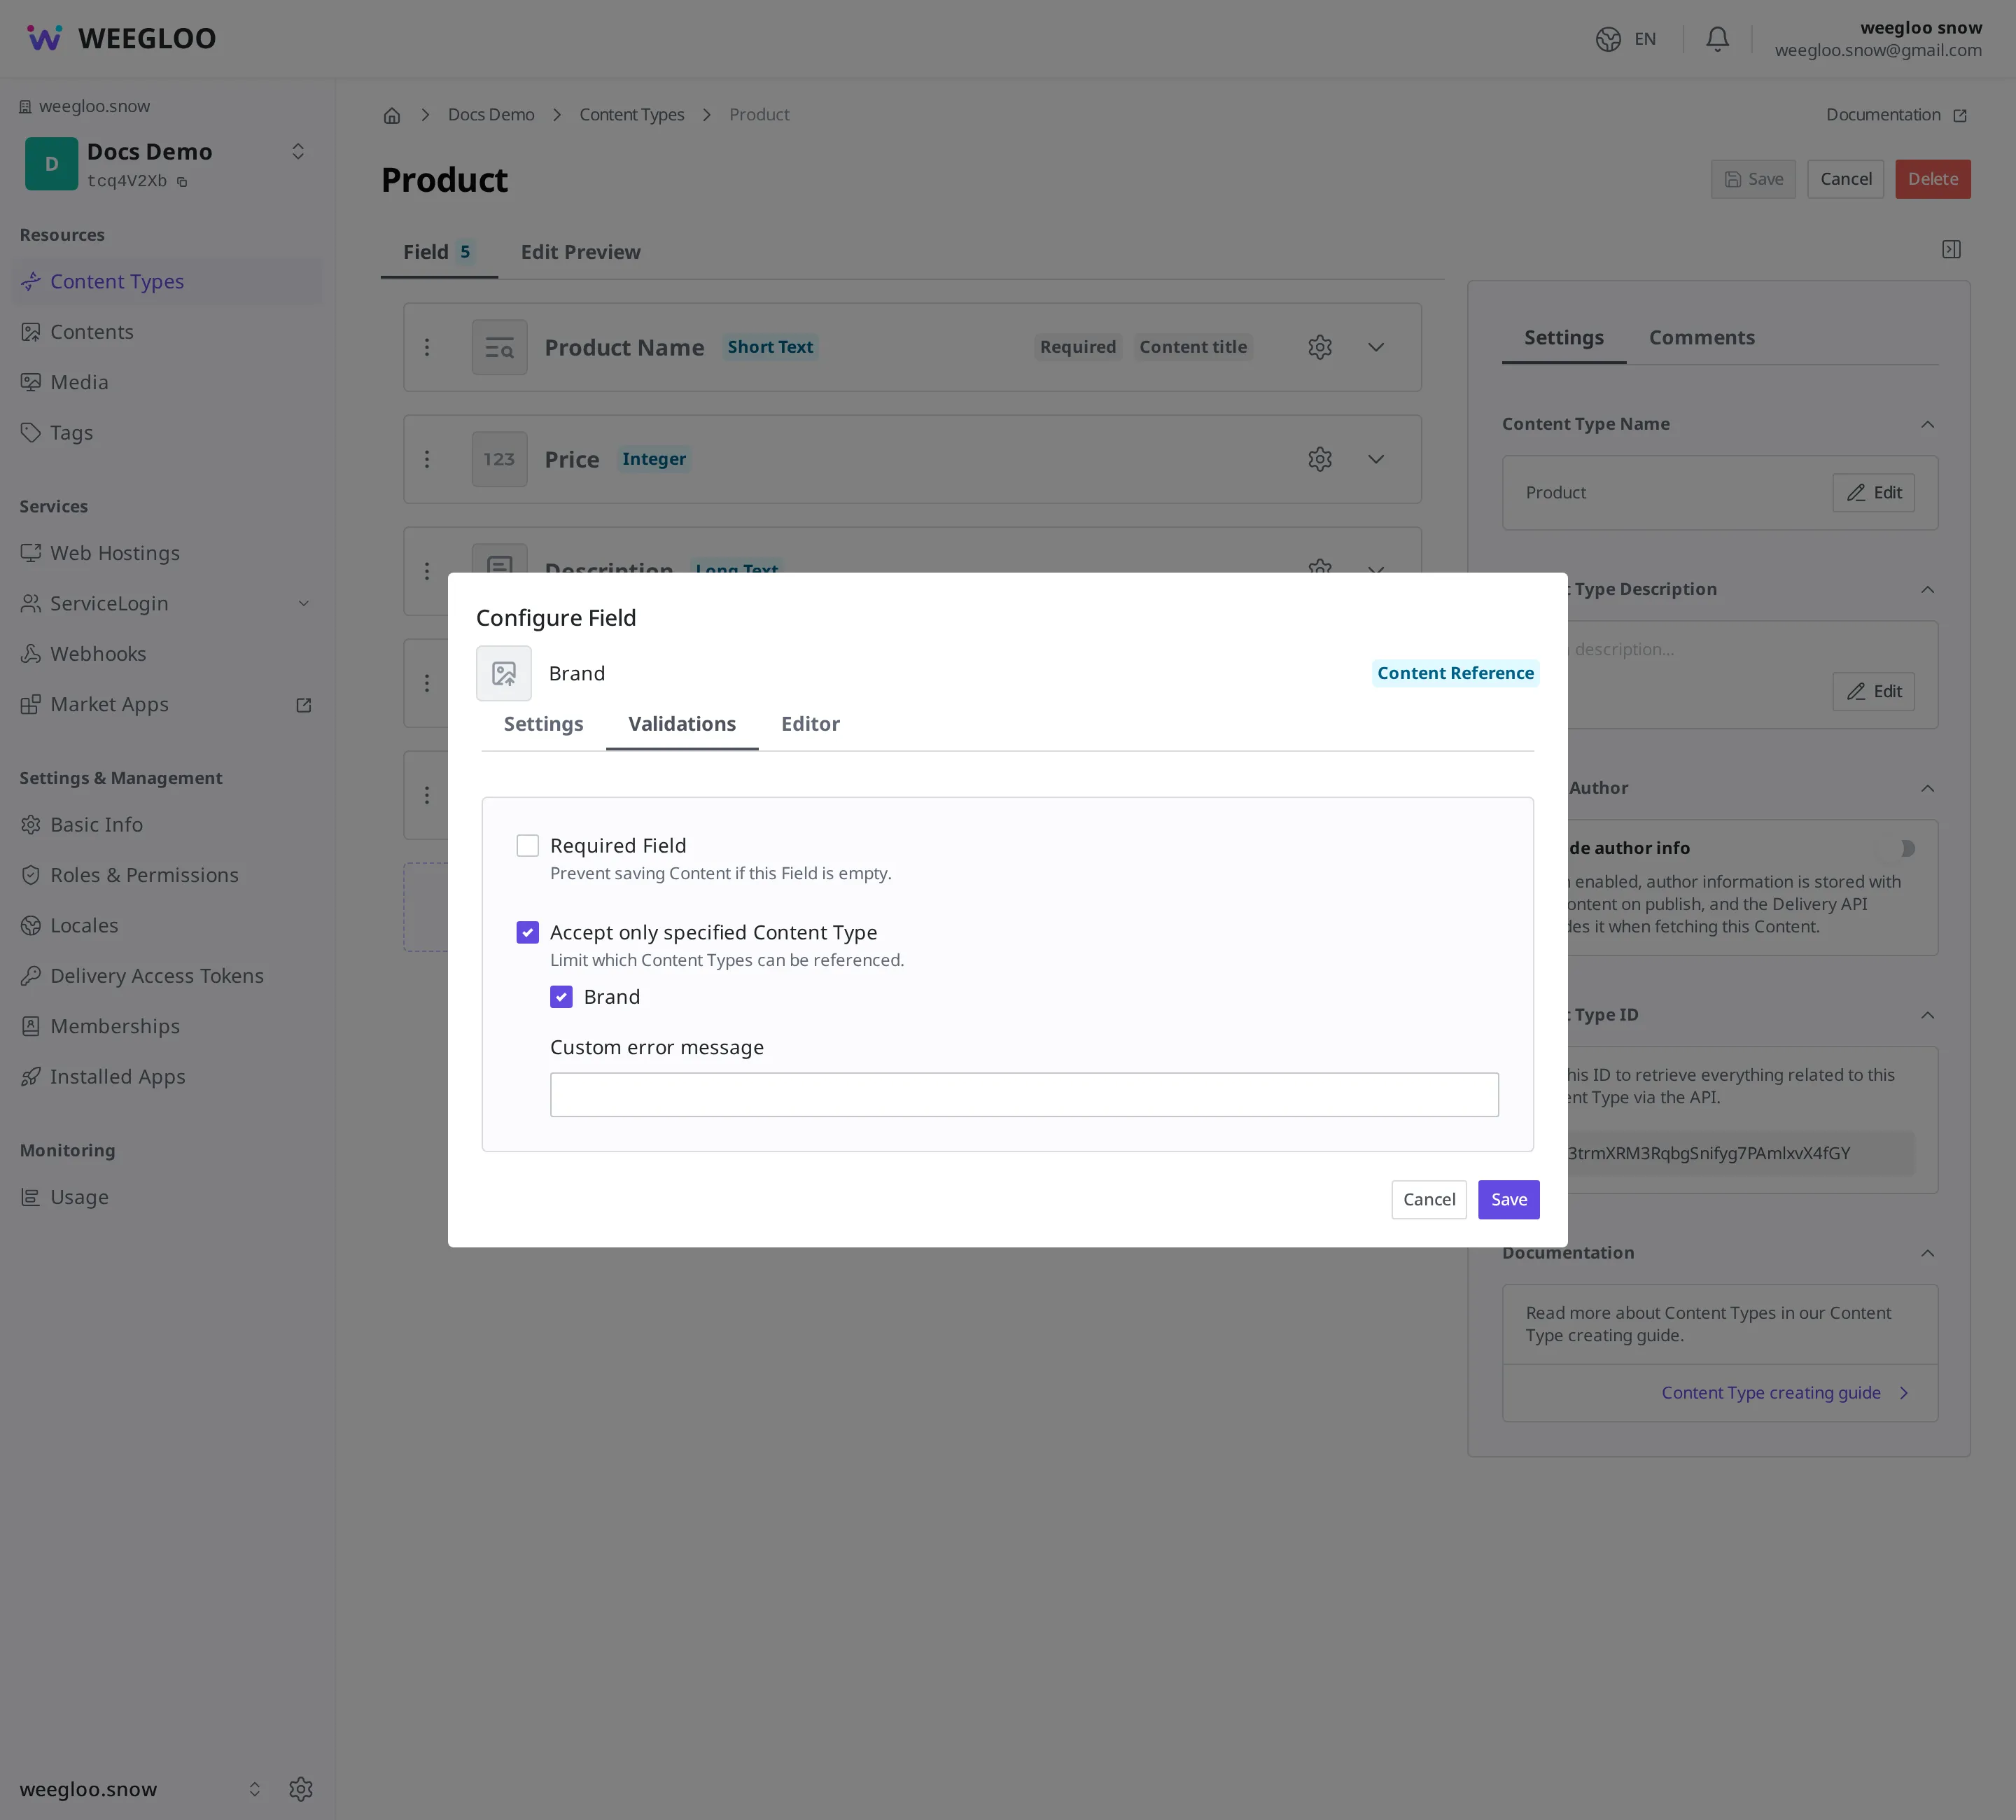
This restriction is checked when you save or publish. If you link a Content that is not one of the allowed Content Type, saving is blocked, and if a linked Content is deleted in the meantime and can no longer be found, that is caught by the check as well. It is a safeguard that keeps wrongly made links from piling up.
Linking several items in one box
Linking a single brand to a product is often enough. But sometimes you want to link several items in one box. For example, in a "Products that go well with this one" box, you want to connect several related products together.
For this, set the Content Reference Field to Use as list type. Then you can link several Content in one box, such as linking a tumbler, a bottle, and a vacuum flask all into the "Products that go well together" box. When using the list type, you can apply the same restriction on which kinds can be linked.
Adding a brand-link box to "Product"
To let a product link to a brand, add a Content Reference kind of Field to the "Product" Content Type. How to add a Field is covered in Content modeling. On the screen where you choose the Field kind, pick Content Reference, then set the "kinds that can be linked" described above to "Brand."
You need something to link to before you can make the connection, so prepare the brand side first.
- Create the "Brand" Content Type. Add Field such as the brand name and the description.
- Create one brand Content, "DailyWear," from the "Brand" Content Type.
- Add a Content Reference Field to the "Product" Content Type and set the kinds that can be linked to "Brand."
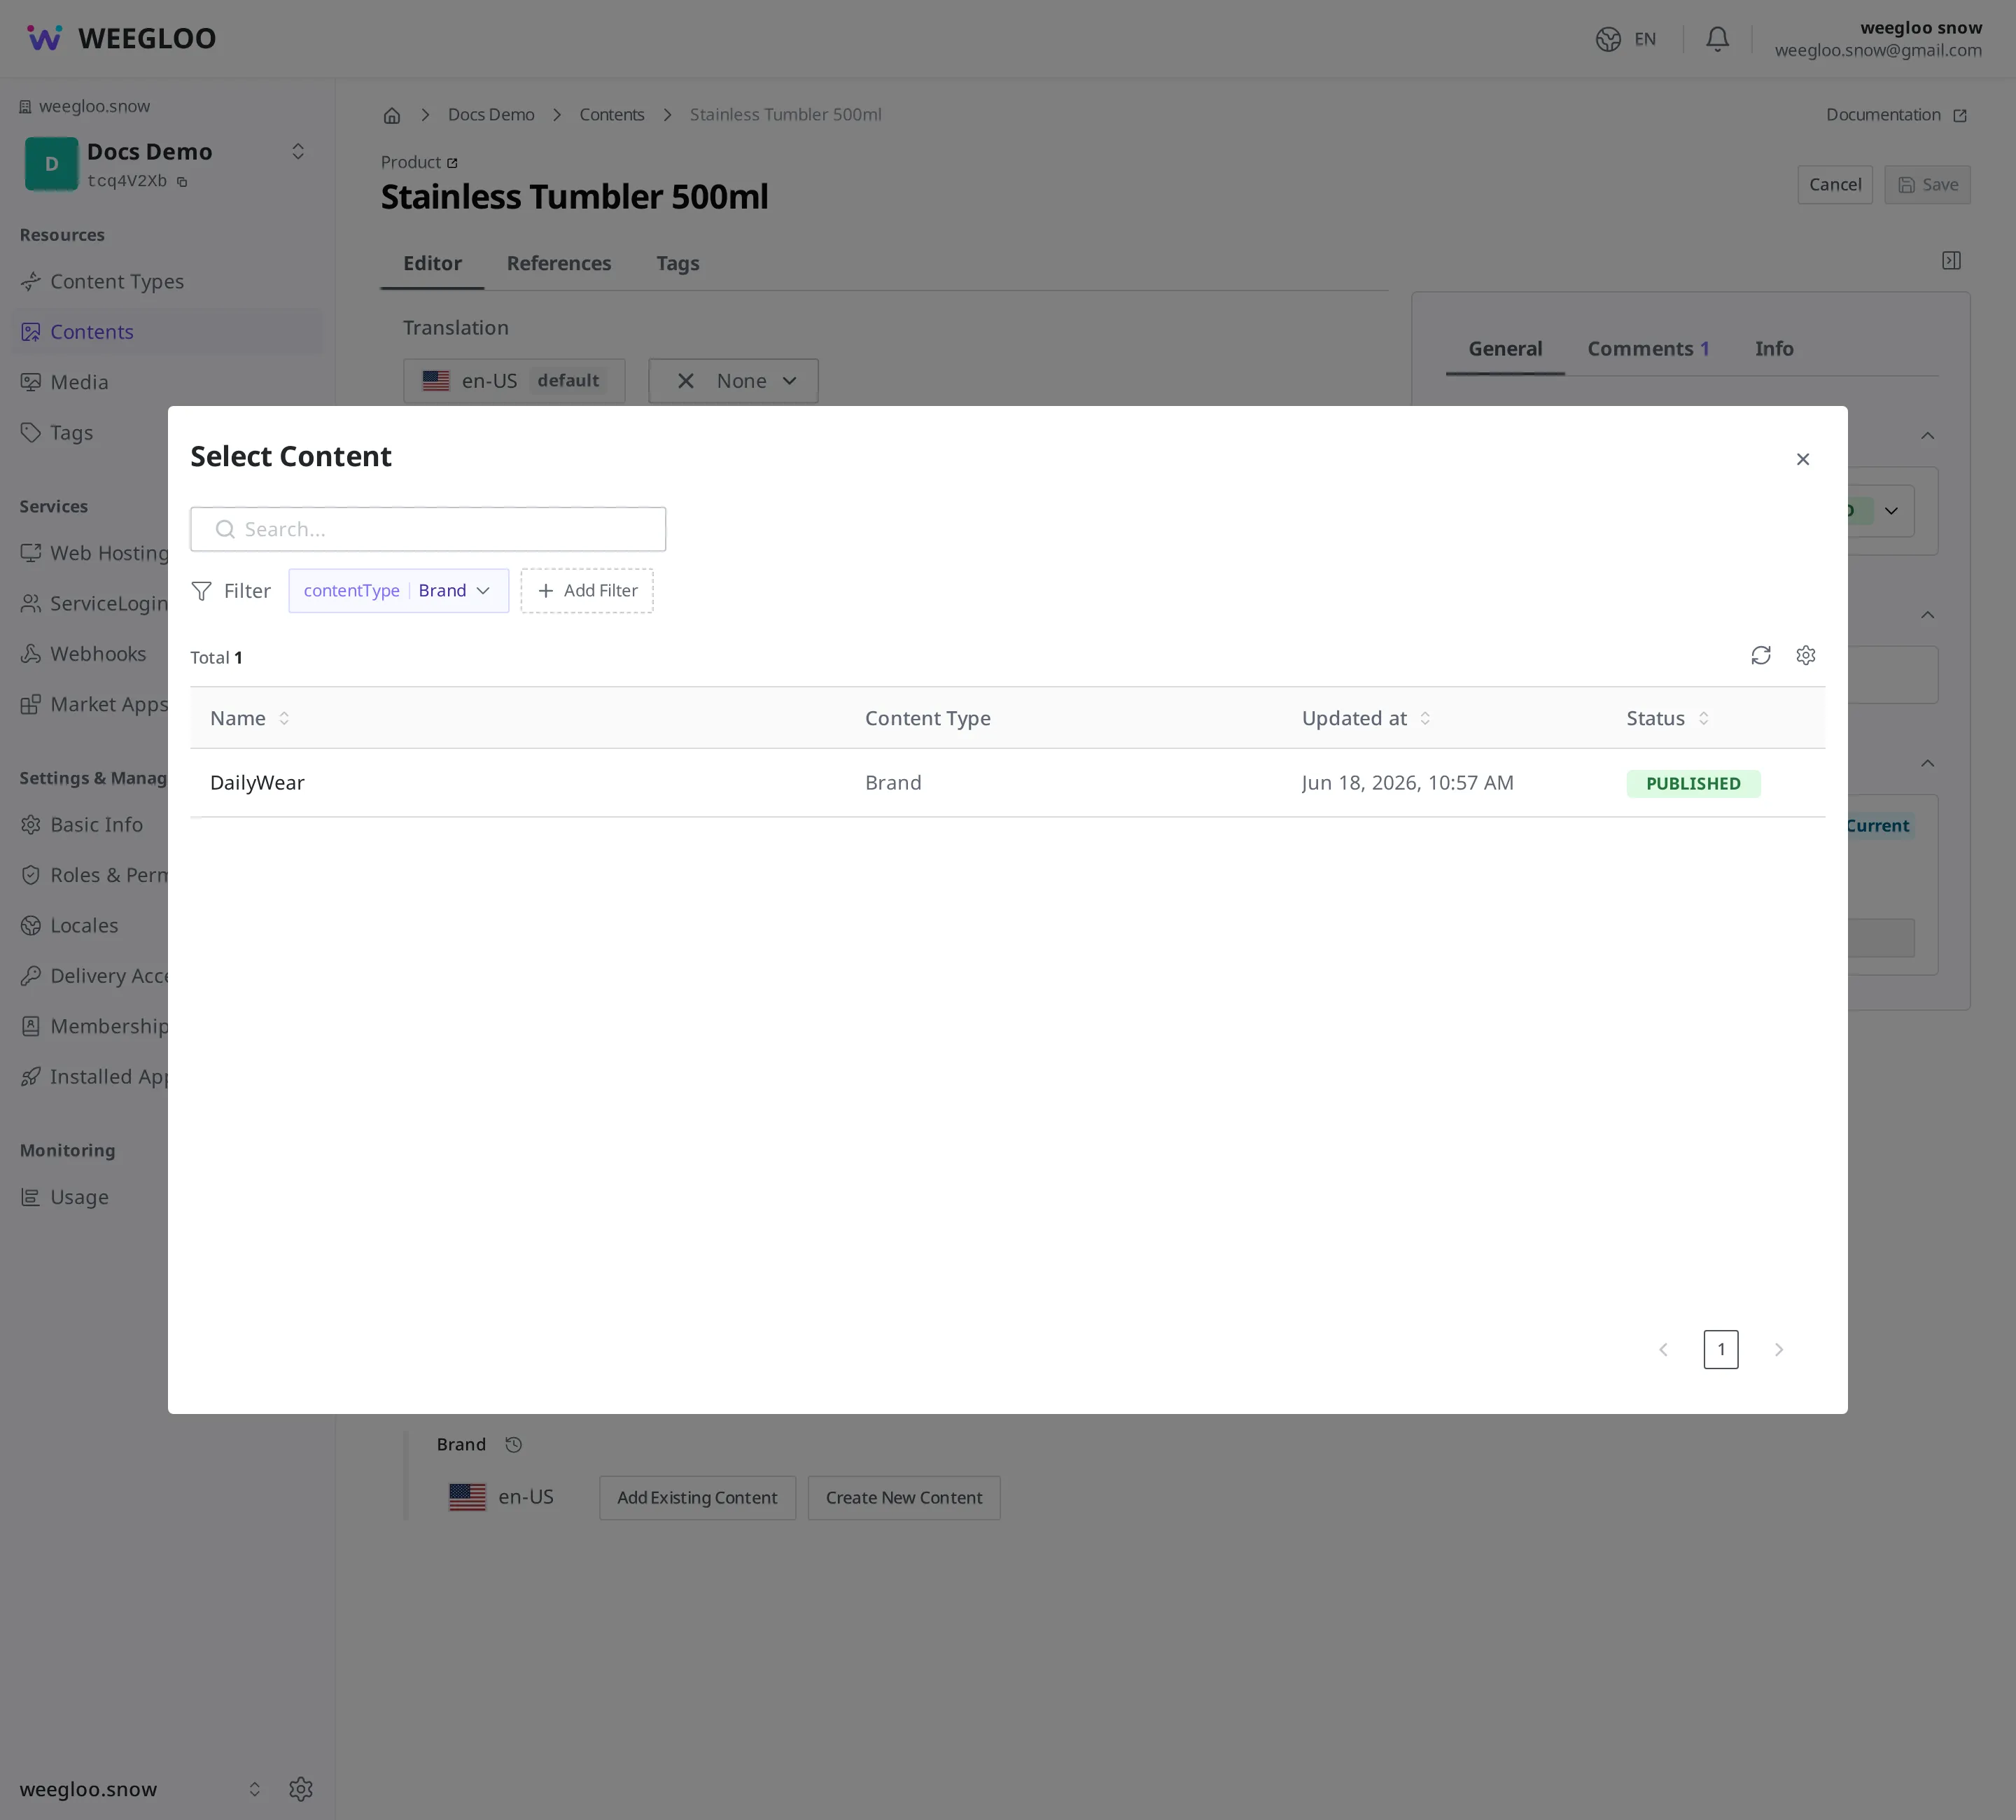
- Open the product "Stainless Tumbler 500ml" and click Edit.
- Click Add Existing Content in the brand box. The Select Content window opens.
- Choose "DailyWear" from the list and link it.
The Select Content window shows only the "Brand" you set as the kind that can be linked. The restriction you set earlier applies here directly.
Now the tumbler product is linked to the brand "DailyWear." When you choose "DailyWear" in the same box from other products too, several products end up linked together to one brand.
Things to know when working with links
If a linked Content disappears, it is caught by the check. If you delete a brand Content that a product has linked, the product's brand box ends up linking a Content that can no longer be found. In that state, saving or publishing the product is blocked by the check. Link a different brand again, or, if that box is not required, clear it and then try again.
Linking does not merge the two Content into one. The product and the brand remain as separate Content. Delete the product and the brand Content stays as it is; edit the brand and the product Content itself stays unchanged. The only thing that changes is the value read along through the link.
What to do next
- Content modeling: covers how to add a Content Reference Field to the "Product" Content Type.
- Media: covers how to attach Media, such as a main photo, to a product.
- Status and publishing: covers the step of publishing a linked Content to make it visible externally.
- API reference: reference this when you work directly in a program with the request format for retrieving linked Content together and the structure of the
Referelement that holds the link.