

Other Setups
Many tools support MCP. Tools like Claude, Claude Code, Codex, and Cursor have their own dedicated guide pages, while this page covers the general way to connect WEEGLOO MCP directly to other MCP-supporting tools.
The servers and addresses you connect to are the same in every tool. But the format and key names you write that information into your configuration with differ from tool to tool. So this page explains "what you are connecting" from the perspective of the MCP protocol, rather than any one tool's configuration format. For the actual location and format of the configuration file, also check the documentation of the tool you are connecting.
Once connected, the tool's LLM agent performs the work you used to do by hand in the content studio, driven by natural-language requests alone. Describe in words what you want to build, and the agent handles the work directly, designing a Content Type and creating Content or Media and so on.
Prerequisites
- Node.js 18 or later: Required to run the file-transfer server (
weegloo-upload) locally. You can download it from Node.js downloads. - An MCP-supporting tool: Any tool that lets you register an MCP server in its configuration can be connected the same way. Check that tool's documentation for the location and format of its configuration file.
The two servers and transports
WEEGLOO provides two MCP servers, and the two use different transports. There are broadly two ways an MCP client connects to a server, and WEEGLOO's two servers each use one of them.
weegloo: The main server for creating, reading, updating, and deleting resources. It is a remote HTTP server that uses MCP's Streamable HTTP transport. The client connects through a single endpoint address,https://ai.weegloo.com/mcp, and authentication is handled via OAuth (see Authentication below). The set of tools you can use is determined by the?group=value appended to the end of the address (see MCP).weegloo-upload: The server for handling files, such as uploading Media or deploying Web Hosting. It is a locally run server that uses MCP's stdio transport. The client launches the server process directly with thenpx -y weegloo-uploadcommand and communicates over standard input/output. Running it requires Node.js, and authentication uses a Personal Access Token placed in an environment variable.
Most tools register both servers together in a single configuration file.
Authentication
The two servers also authenticate differently.
weegloo(remote HTTP): Authenticates via the MCP-standard OAuth. You do not put a token in the configuration file.weegloo-upload(local stdio): No OAuth; you put a Personal Access Token directly into theAUTH_BEARER_TOKENenvironment variable.
The weegloo server connects remotely, and authentication is handled via the MCP-standard OAuth. The flow is as follows.
- When the tool first connects to the
weeglooserver, the WEEGLOO authentication page opens in your browser. - Paste the Personal Access Token you issue below into that page and approve the connection to finish authenticating.
Because this is the MCP-standard method, with any recent tool that supports OAuth this authentication happens automatically once you register just the server address.
The WEEGLOO authentication page that opens in your browser on first connection looks like this.
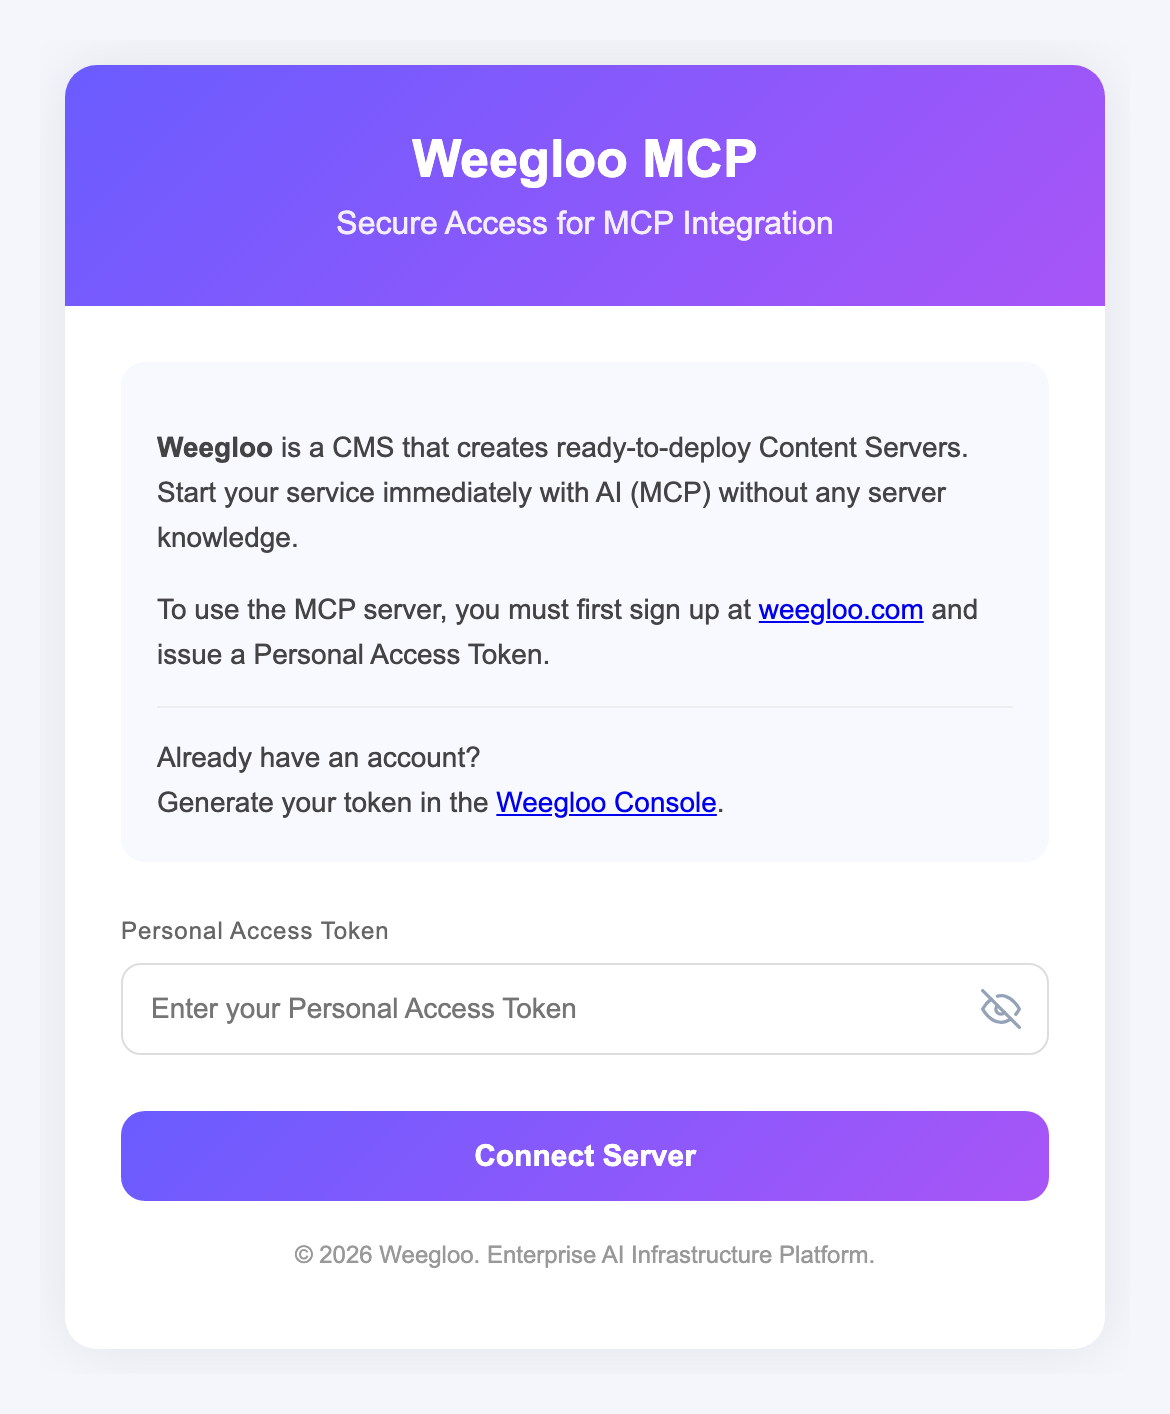
Use the button below to issue a Personal Access Token ahead of time. Paste it into the authentication page above, and use the same token for weegloo-upload's AUTH_BEARER_TOKEN as well.
The token is issued only at the moment you press the copy button, and you can revoke it at any time in the Weegloo Console. Because the actual token is stored as-is in the configuration file, be careful not to expose this file publicly or upload it to a shared repository.
Configuration example
Here is the information you need when moving each server into your tool's configuration.
weegloo(remote HTTP): An indication that the transport is HTTP, plus the endpoint addresshttps://ai.weegloo.com/mcp.weegloo-upload(local stdio): The run commandnpxand the arguments-y weegloo-upload, plus the environment variablesUPLOAD_API_URLandAUTH_BEARER_TOKEN.
Each tool uses different key names and a different file format to hold this information. Below is an example in Claude Code's .mcp.json format. Key names may differ in other tools, so keep the values as-is and move them into that tool's format.
{
  "mcpServers": {
    "weegloo": {
      "type": "http",
      "url": "https://ai.weegloo.com/mcp"
    },
    "weegloo-upload": {
      "command": "npx",
      "args": ["-y", "weegloo-upload"],
      "env": {
        "UPLOAD_API_URL": "https://upload.weegloo.com/v1",
        "AUTH_BEARER_TOKEN": "<Personal Access Token>"
      }
    }
  }
}
In AUTH_BEARER_TOKEN, put the token you copied above in place of <Personal Access Token>. The key that holds the remote weegloo server's address in particular differs from tool to tool. Here are a few examples.
| Tool | Configuration format | Remote weegloo address key |
|---|---|---|
| Claude Code · Cursor | JSON | type: "http" + url |
| Codex | TOML | url |
| Antigravity | JSON | serverUrl |
| Android Studio | JSON | httpUrl |
The local weegloo-upload server, in most tools, uses the command, args, and env keys with the same names as in the example above. Note, however, that on Windows some tools require you to write command as cmd and args as ["/c", "npx", "-y", "weegloo-upload"].
After you save the configuration, you need to restart the tool or reload its MCP configuration for the changes to take effect. If needed, you can change the set of tools you can use by appending a group to the end of the weegloo address, such as ?group=all (see MCP).
Skills and Rules
If you connect manually without using the install tool, Skills and Rules are not installed automatically. But Skills and Rules are what let the agent make good use of WEEGLOO. To use WEEGLOO well, take the files from Skills and Rules and place them yourself where the agent you use reads them. The locations differ from agent to agent. For example, Claude Code uses .claude/skills/ and .claude/rules/, while Codex uses .agents/skills/ and AGENTS.md.
Verifying the connection
After restarting the tool, if you can see the tools from both servers in that tool's MCP tool list, the connection is working.
weegloo: The tools for handling resources appear. Because it is a remote HTTP server, the WEEGLOO authentication page opens in your browser on first connection. Follow the on-screen instructions and paste the token you copied earlier to finish authenticating.weegloo-upload: The tools for handling files appear.
Once connected, you can just ask that tool's agent to create a Space or a Content Type.
What you can do
Once connected, the LLM agent can perform the following tasks directly.
- Creating, reading, updating, and deleting resources such as Organization, Space, Content Type, Content, and Media
- Deploying a static website you have built as Web Hosting
What to do next
- MCP: Covers the full picture of the connection, including server groups and the
weegloo-uploadserver. - Issue a Personal Access Token: Covers how to issue the token you use for the connection.
- Move a static page over with AI: Walks through the flow of moving a real page into a content-driven service using the MCP you connected.