

Cursor IDE Setup
Once you connect the WEEGLOO MCP server to Cursor IDE, an LLM agent inside the IDE performs the work a person used to do in the content studio, driven only by natural-language requests. Describe in words what you want to build, and the agent handles tasks such as designing a Content Type and creating Content or Media directly. Along with the MCP server, the install tool also installs Skills and Rules so that the agent uses the WEEGLOO API the way it is meant to be used. Skills are guides that capture how to do a specific task well, and Rules are rules to follow across all tasks.
For details on the MCP server and on Skills and Rules, see the MCP and Skills and Rules pages respectively. This page covers only how to connect to Cursor IDE.
Prerequisites
Running the install commands below requires Node.js. First, use the following commands to check whether it is installed and whether the version is 18 or higher.
If Node.js is installed but npx is not, update npm to the latest version with the command below. Updating npm installs npx along with it.
If Node.js is not installed or its version is too old, install Node.js using the method that fits your operating system.
If you do not have Homebrew, install it first from brew.sh, or download Node.js directly from nodejs.org.
If winget is missing or not recognized, download the LTS installer from nodejs.org. After installing, you need to open a new terminal.
Distribution packages can be outdated, so we recommend installing with nvm, which works across many distributions.
To download the installer directly, check nodejs.org.
Cursor must also be installed. If you do not have it yet, you can get it from Download Cursor.
Connecting
For a default install, copy the install command on this page and run it once in your terminal. To go through the install steps and choose each one yourself, open Custom install.
Install MCP and Skills
Copy the install command and run it in your terminal.
Authenticate the MCP connection
Authenticate in the following order.
-
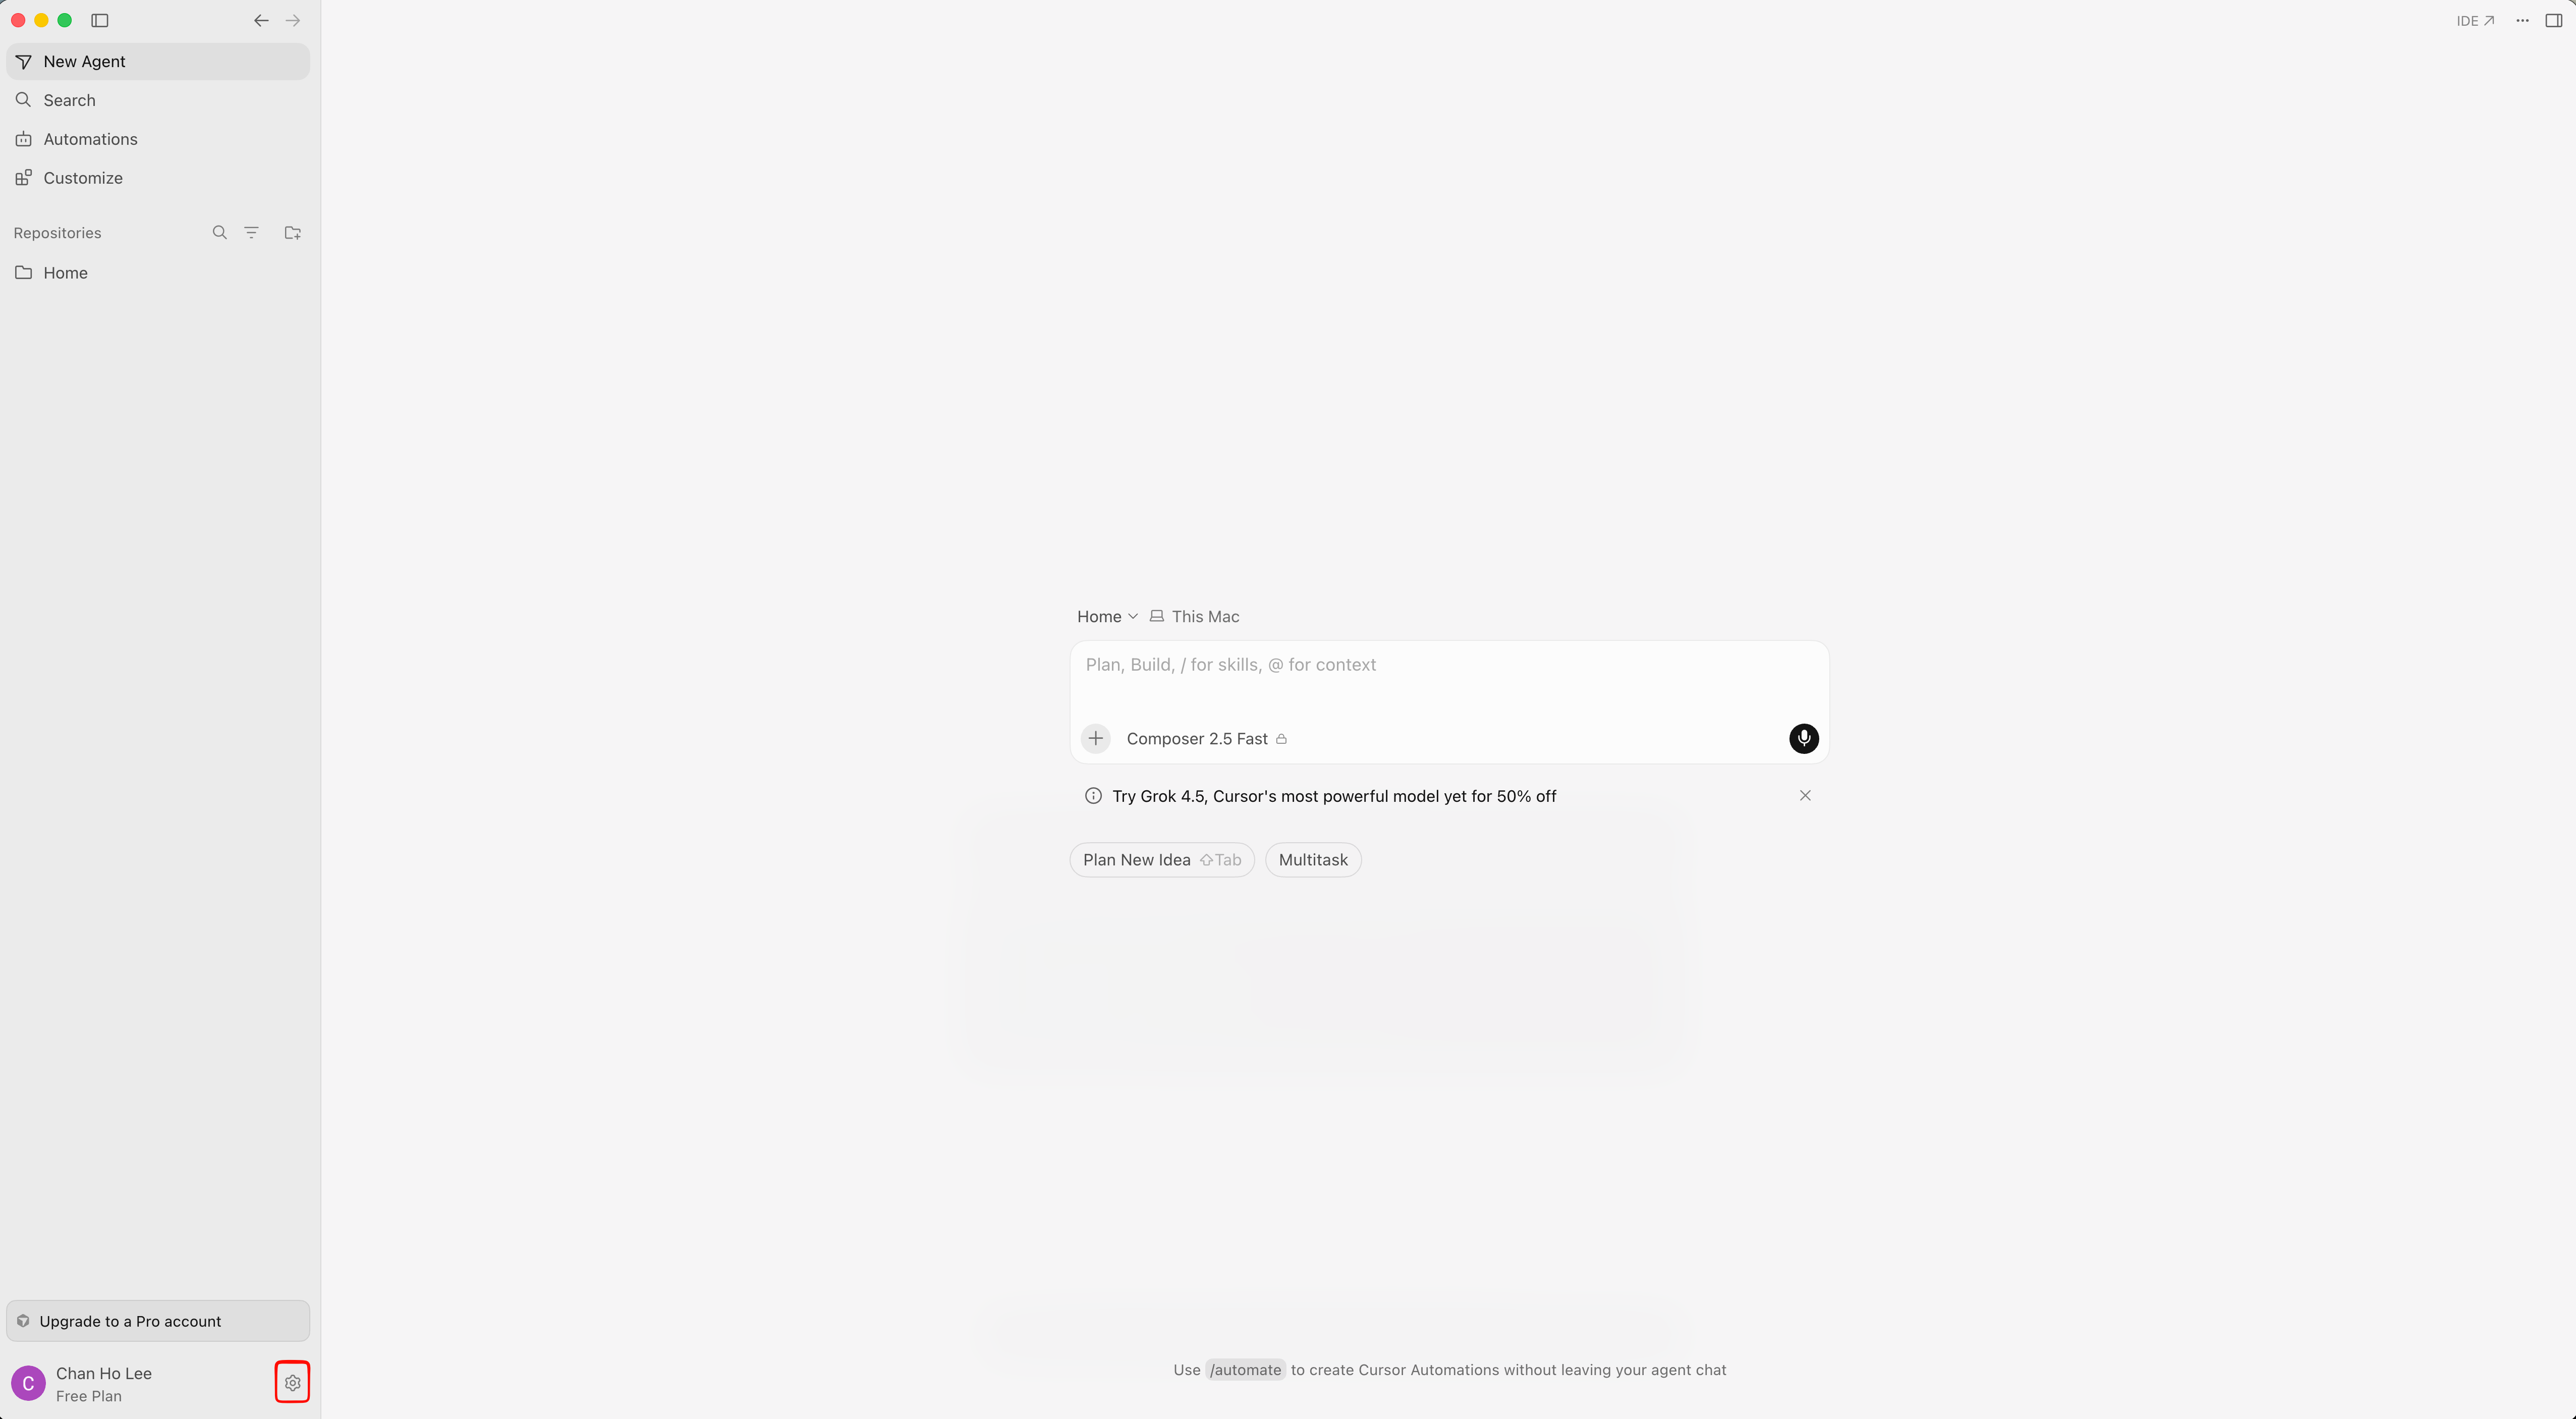
Click the gear icon at the bottom left of Cursor to open settings.
-
In the settings menu on the left, choose Tools & MCPs to open the Home tab. Click Connect to the right of
weegloo.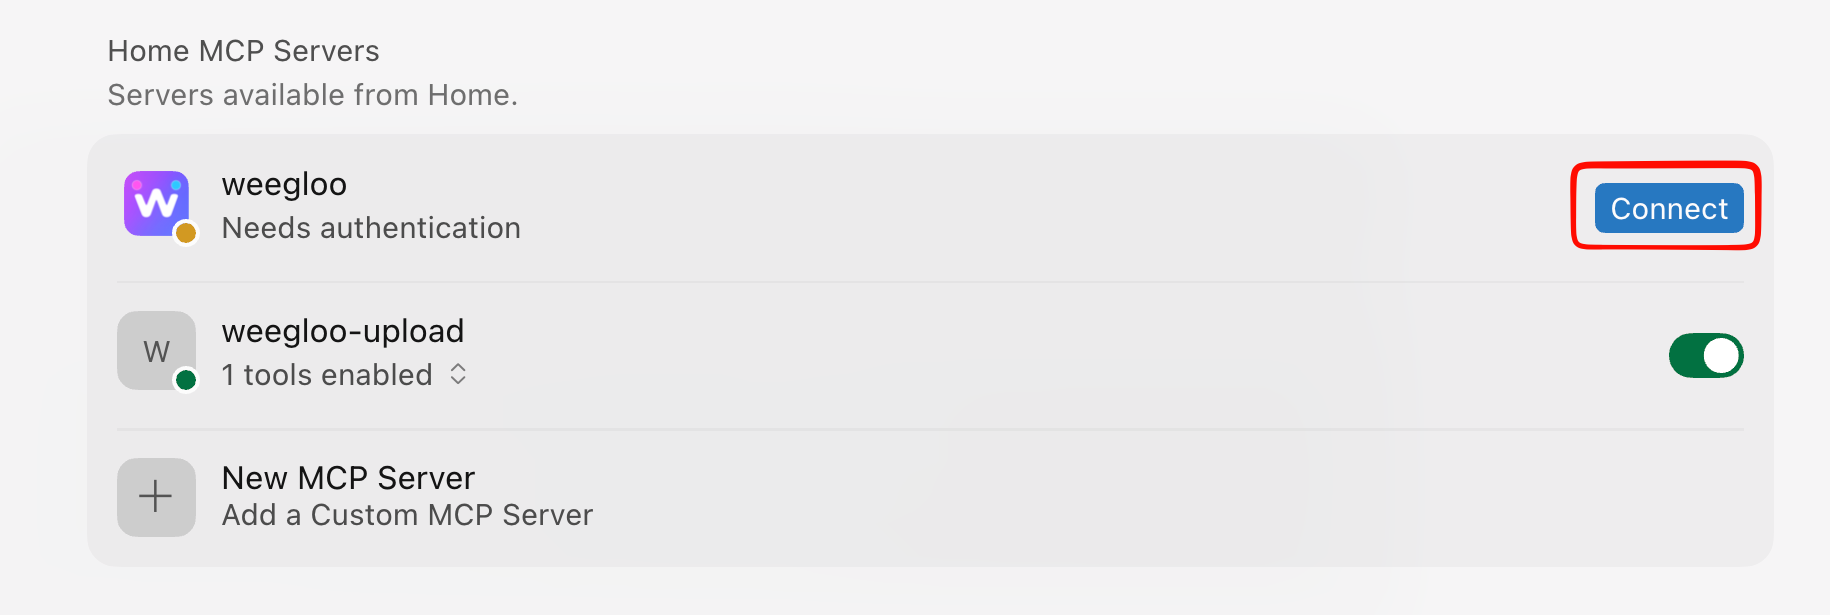
-
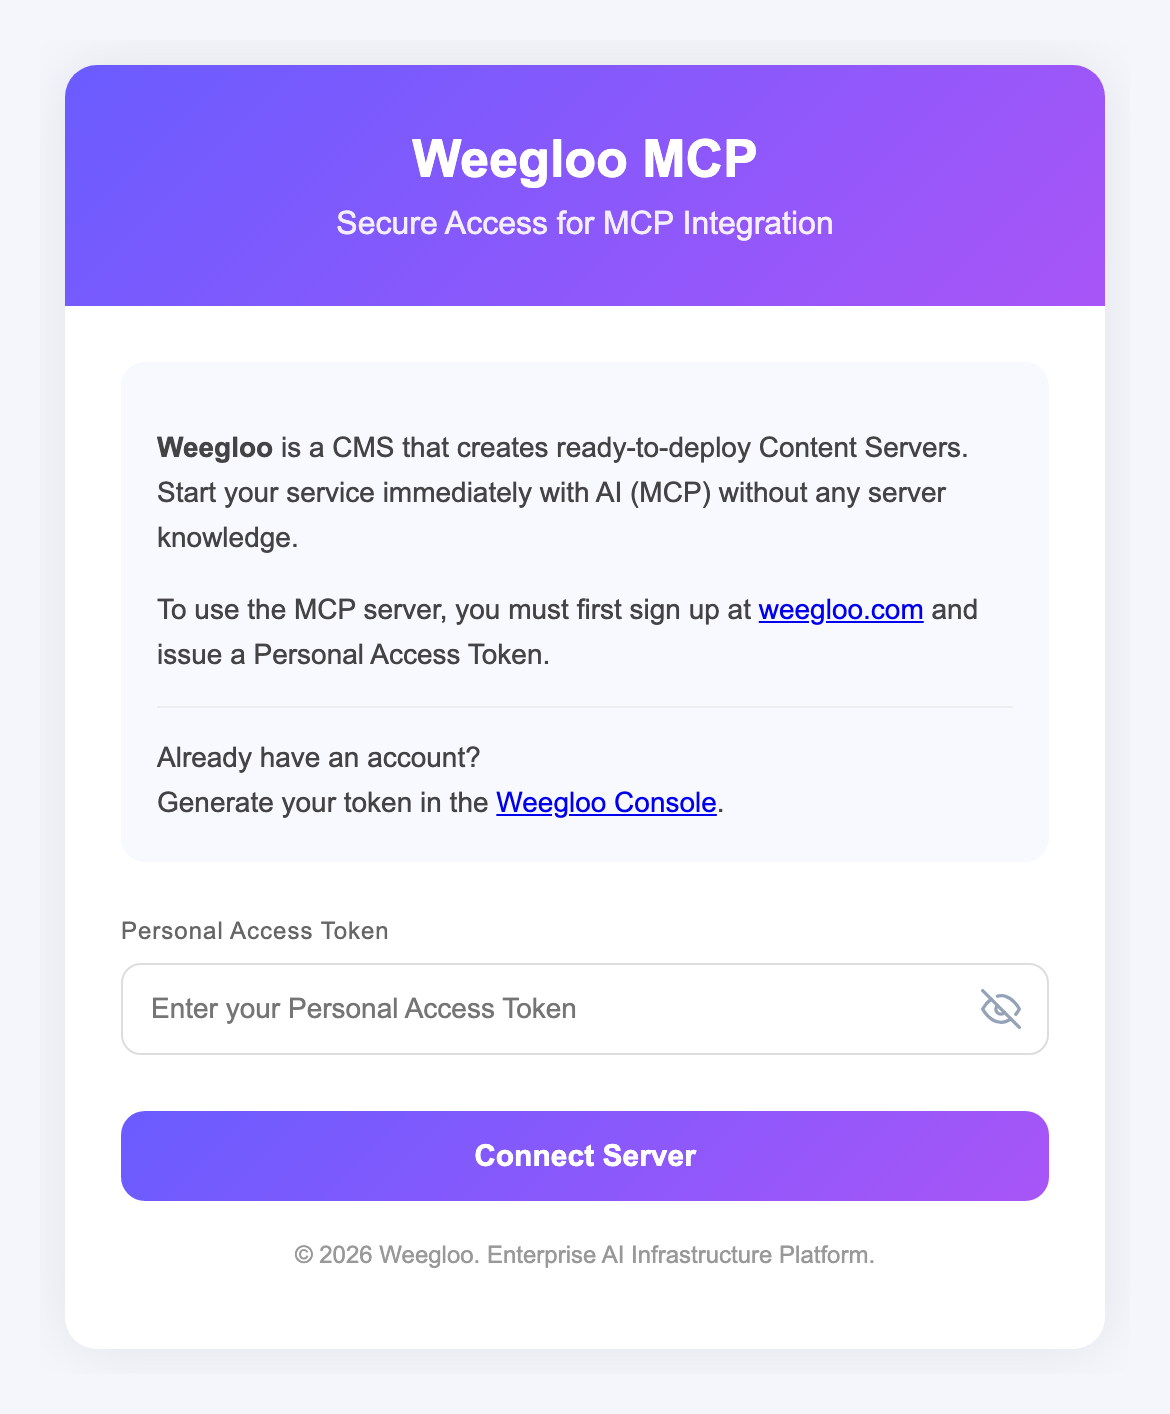
The WEEGLOO authentication page opens in your browser. Copy your token with the Copy token button, paste it, and click Connect Server.
-
A green dot next to
weeglooandweegloo-uploadconfirms the connection succeeded.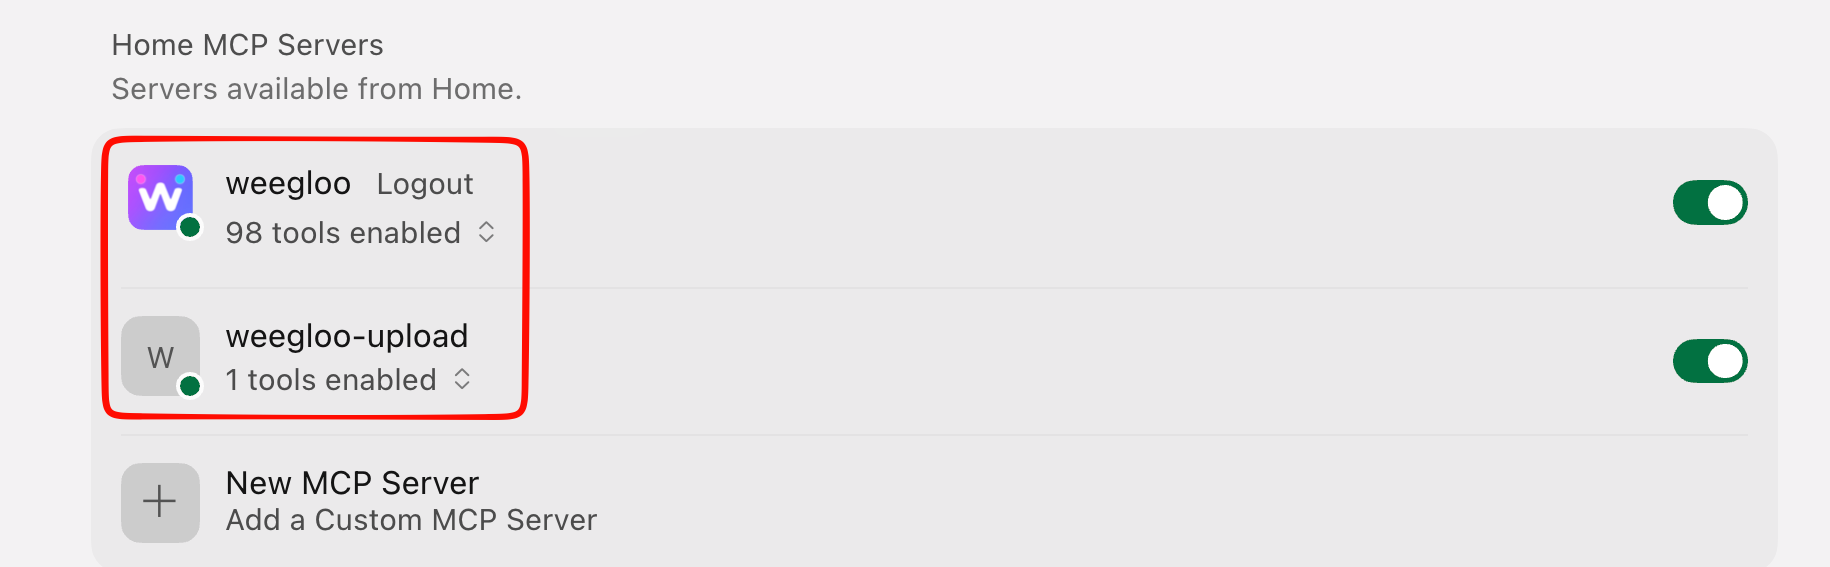
Install MCP and Skills
Copy the install command and run it in your terminal. Be sure to run it inside the project folder you want to connect.
Authenticate the MCP connection
Authenticate in the following order.
-
Click the gear icon at the bottom left of Cursor to open settings.
-
In the settings menu on the left, choose Tools & MCPs, then in the top tabs choose the tab named after your current project.
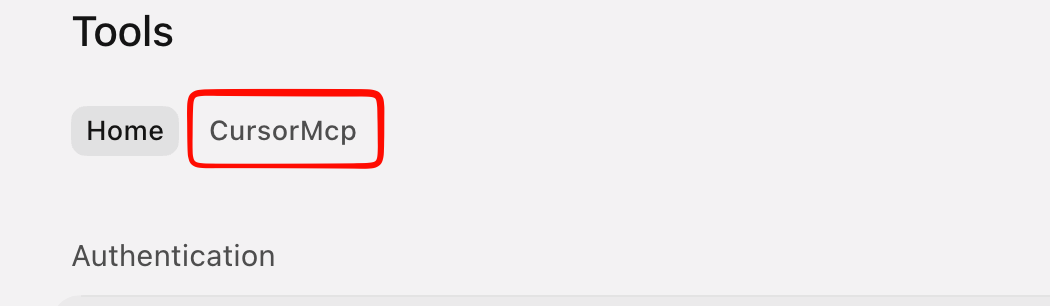
-
Turn on both the
weeglooandweegloo-uploadtoggles in the Installed list.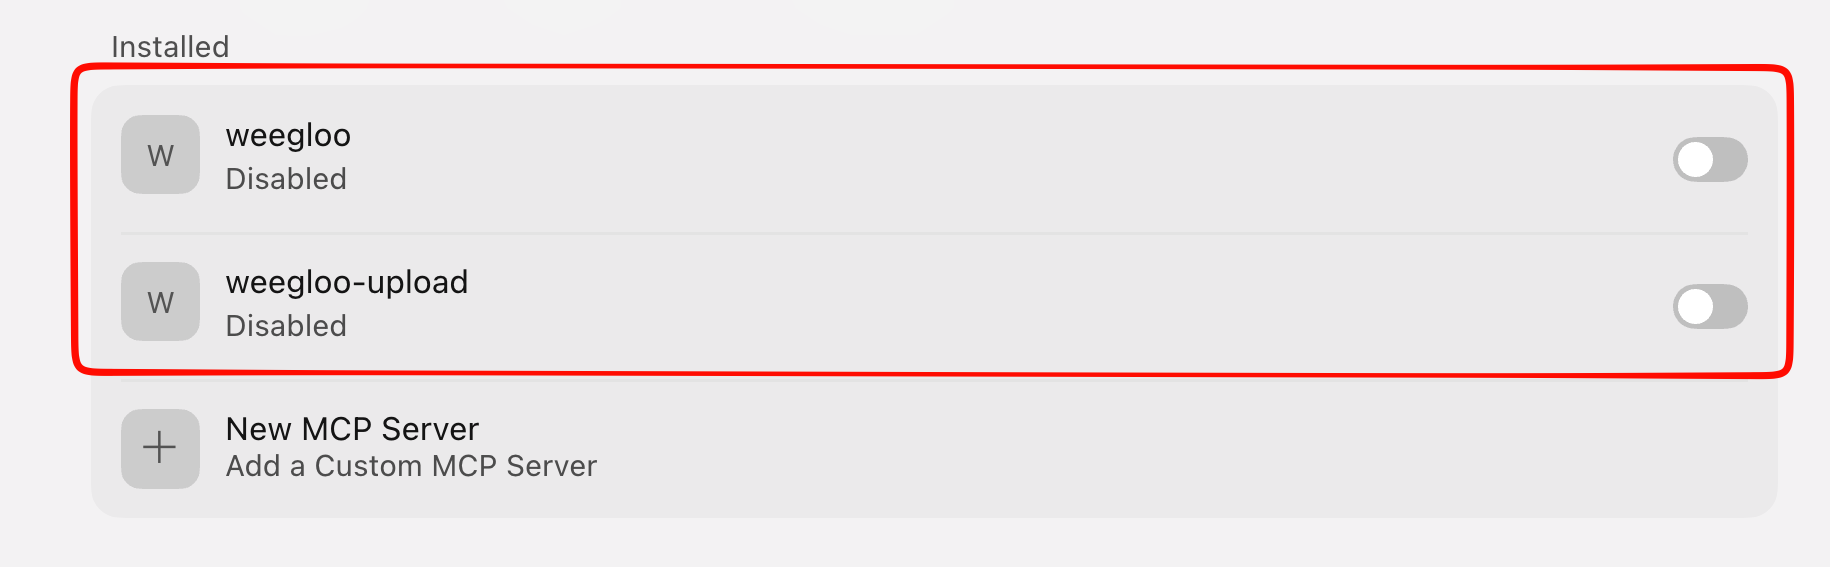
-
When
weegloochanges to Needs authentication, click Connect on the right.weegloo-uploadconnects automatically.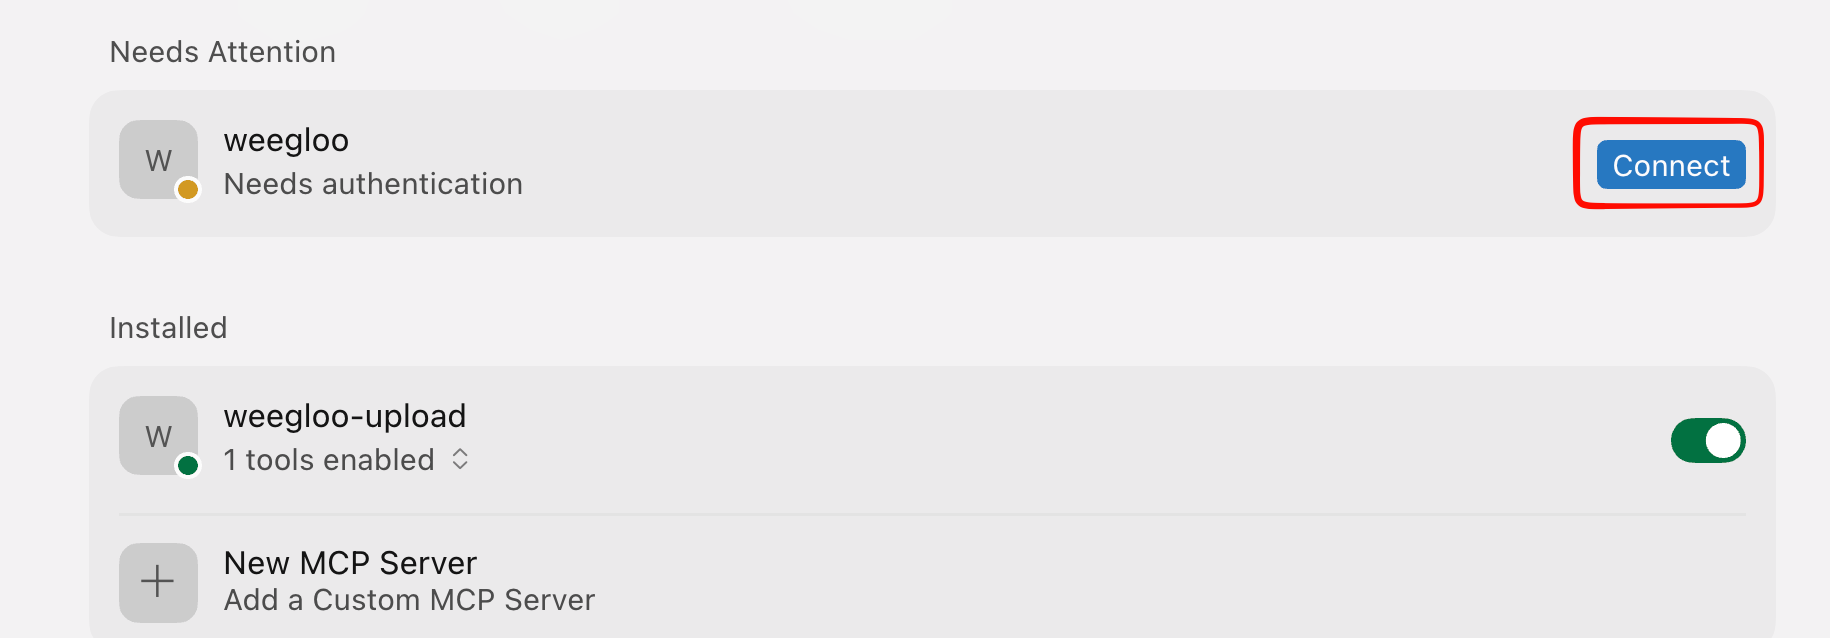
-
The WEEGLOO authentication page opens in your browser. Copy your token with the Copy token button, paste it, and click Connect Server.
-
A green dot next to
weeglooandweegloo-uploadconfirms the connection succeeded.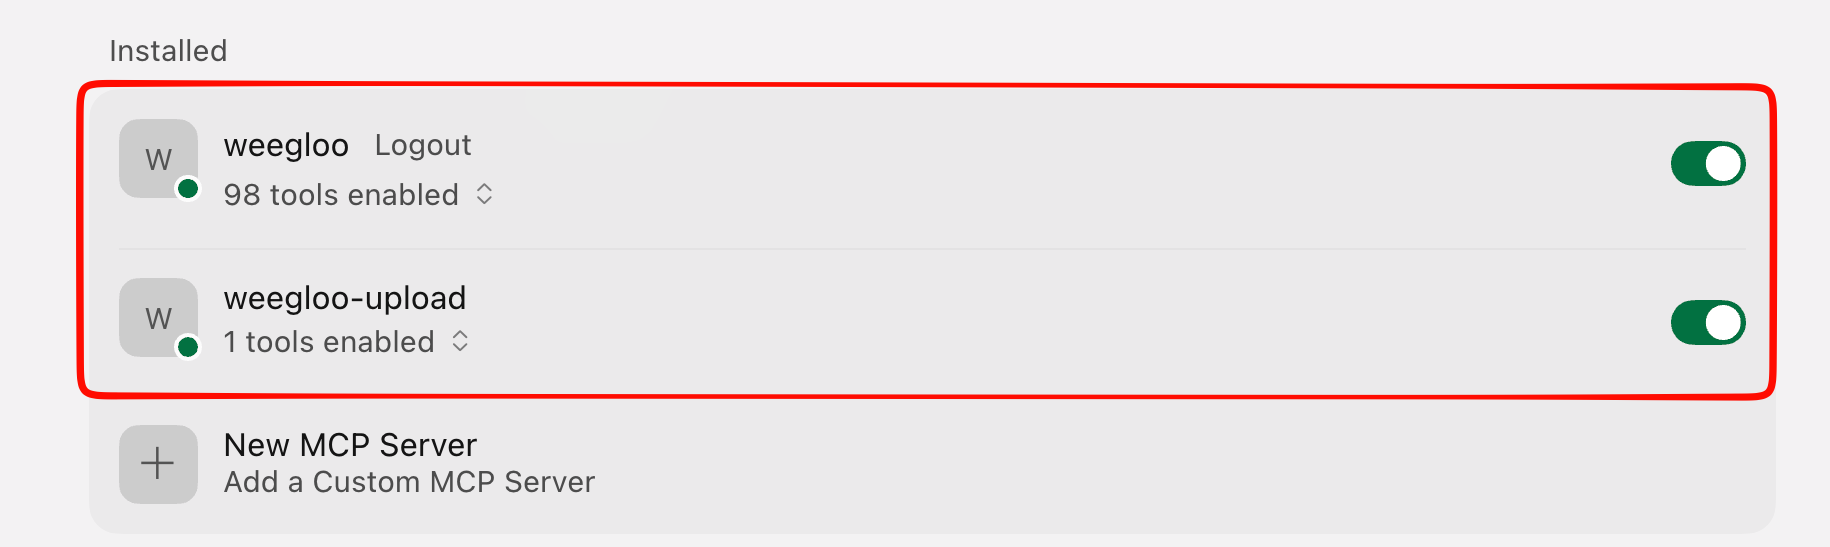
Run npx weegloo interactively and install by choosing the prompted items yourself.
Run the install tool
Run the command below in your terminal and choose each prompted item in turn. Where it asks for the token, use the Copy token button below to copy the token and paste it.
Authenticate the MCP connection
Authenticate in the following order.
-
Click the gear icon at the bottom left of Cursor to open settings.
-
In the settings menu on the left, choose Tools & MCPs to open the Home tab. Click Connect to the right of
weegloo. -
The WEEGLOO authentication page opens in your browser. Copy your token with the Copy token button, paste it, and click Connect Server.
-
A green dot next to
weeglooandweegloo-uploadconfirms the connection succeeded.
Run the install tool
Move to the project folder you want to connect, then run the command below in that folder and choose each prompted item in turn. Where it asks for the token, use the Copy token button below to copy the token and paste it. Be sure to run it inside that project folder.
Authenticate the MCP connection
Authenticate in the following order.
-
Click the gear icon at the bottom left of Cursor to open settings.
-
In the settings menu on the left, choose Tools & MCPs, then in the top tabs choose the tab named after your current project.
-
Turn on both the
weeglooandweegloo-uploadtoggles in the Installed list. -
When
weegloochanges to Needs authentication, click Connect on the right.weegloo-uploadconnects automatically. -
The WEEGLOO authentication page opens in your browser. Copy your token with the Copy token button, paste it, and click Connect Server.
-
A green dot next to
weeglooandweegloo-uploadconfirms the connection succeeded.
MCP server config file
The install tool creates and manages the config file automatically, so you do not need to check it yourself. The content below is reference material for those who need the specific config file structure and paths.
The install tool registers the servers in Cursor's MCP config file. A global install uses ~/.cursor/mcp.json, and a project install uses .cursor/mcp.json in the project folder. The weegloo server connects over HTTP to https://ai.weegloo.com/mcp, and the weegloo-upload server, which handles files, runs via npx and uses a Personal Access Token for authentication.
{
  "mcpServers": {
    "weegloo": {
      "type": "http",
      "url": "https://ai.weegloo.com/mcp"
    },
    "weegloo-upload": {
      "command": "npx",
      "args": ["-y", "weegloo-upload"],
      "env": {
        "UPLOAD_API_URL": "https://upload.weegloo.com/v1",
        "AUTH_BEARER_TOKEN": "<Personal Access Token>"
      }
    }
  }
}
To change the server group, append a group value to the end of the weegloo server's url. For example, to use all tools, write https://ai.weegloo.com/mcp?group=all. For the tool makeup of each group, see MCP server groups.
Skills
The install tool sets up each Skill as its own directory. A global install uses ~/.cursor/skills/, and a project install uses .cursor/skills/ in the project folder.
Rules
Cursor supports Rules as a built-in feature (Cursor Rules). The install tool sets up each rule as a single .mdc file. A global install uses ~/.cursor/rules/, and a project install uses .cursor/rules/ in the project folder.
What to do next
- MCP: Covers the full picture of the connection, including server groups and the
weegloo-uploadserver. - Keeping up to date: Covers how to keep the Skills and Rules you installed up to date.
- Issuing a Personal Access Token: Covers how to issue the token to use for the connection.
- Migrating a Static Page with AI: Follow the flow of moving a real page into a content-based service using the MCP you connected.