

Inviting Members and Granting Permissions
Last updated: July 6, 2026
Say a new merchandiser (MD), Dahee Park, has joined your online clothing store, "Cozy Closet." Before Dahee can register her first product, she first has to be inside the "Cozy Closet" workspace, and it also has to be decided what she is allowed to do. This page walks through the three tasks the operator in charge of that setup handles, in order: inviting a new colleague in, granting or changing their role, and cleaning up access for someone who has left, such as a freelance writer whose contract has ended.
What Organization and Space are is covered in Organizations and Spaces, and how a role decides permissions is covered in Roles and Permissions. This page builds on those concepts and only lays out the order of the tasks in the management screens.
Inviting happens in two steps
Because there are two places a colleague joins, the Organization and the Space, bringing in a new colleague also splits into two steps.
| Step | What you do | When it takes effect |
|---|---|---|
| 1. Invite to the Organization | Invite your colleague by their email address | They are registered as a member the instant you invite them. There is no separate acceptance step |
| 2. Add to the Space | Add the colleague who has joined the Organization as a Space member and set their role | They can access the Space the instant you add them |
Step 1 always comes first. Someone who is not an Organization member cannot be added to a Space. If Dahee is already in the Organization, you can skip Step 1 and do only Step 2.
Step 1: Invite by email to the Organization
You invite someone to an Organization by their email address. You can invite someone even if they do not yet have a WEEGLOO account, so if Dahee only has a company email set up, you can invite her right away. Inviting and managing members can be done by an Organization Owner or Admin.
You open the Organization's member management screen by clicking the Organization name at the top left of the content studio, then choosing Memberships in the left menu.
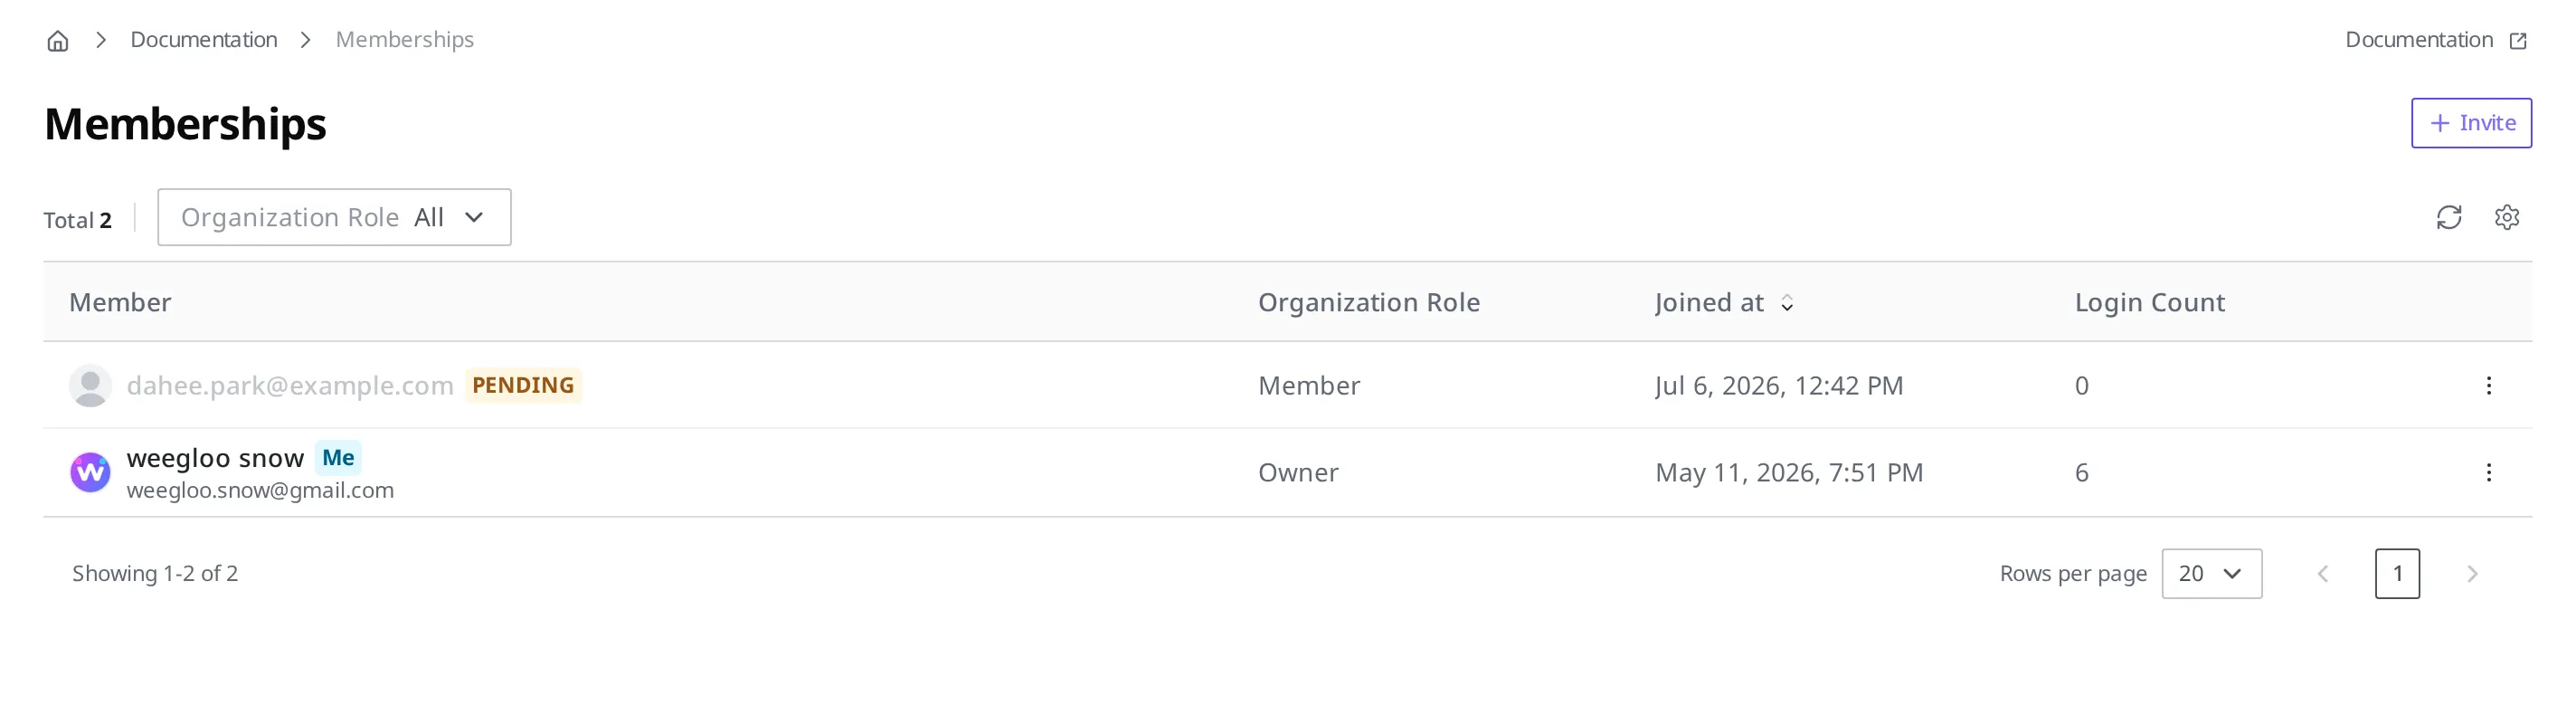
- Click the Organization name at the top left of the content studio to enter the Organization screen.
- In the left menu, click Memberships.
- At the top right, click the Invite button.
- In the Email(s) field, enter
dahee.park@example.com. - Under Choose an Organization Role, choose Member. (Member is selected by default.)
- Click the Invite button again at the top right to send the invitation.
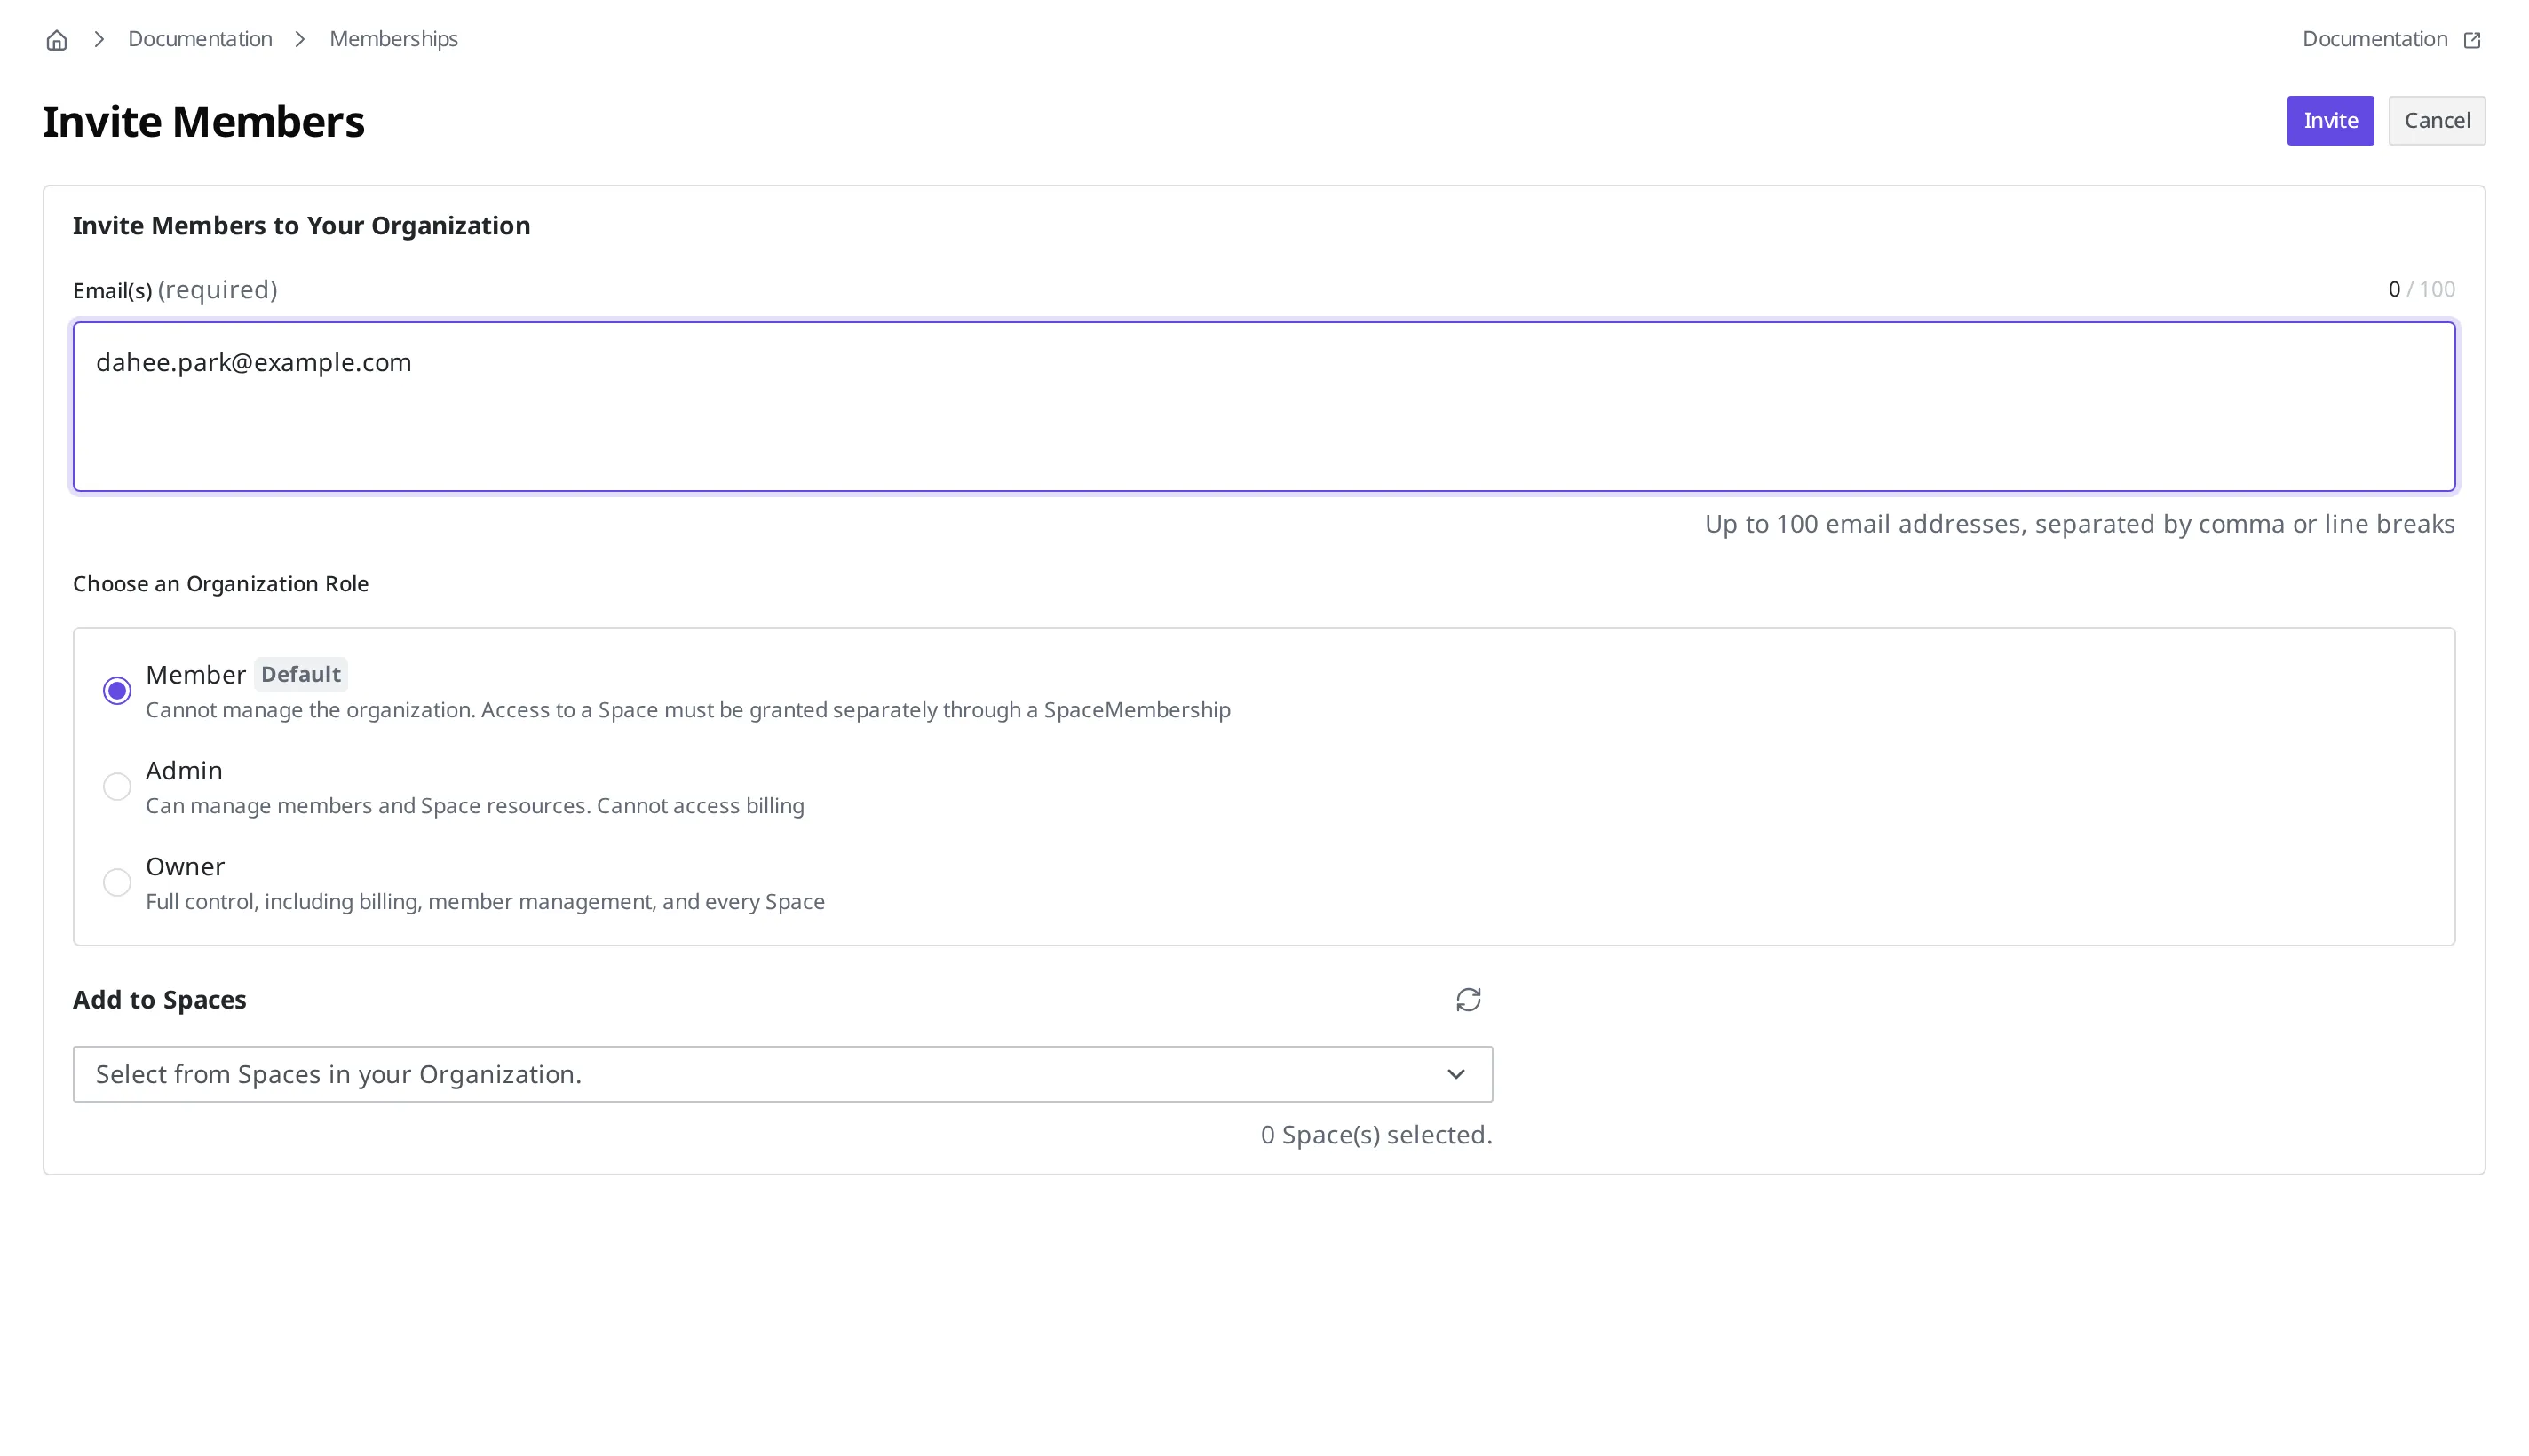
Once you finish inviting, the following happens.
- Dahee becomes an Organization member right away, without having to click any acceptance button.
- An invitation email is sent to
dahee.park@example.com. If she has never logged in with a WEEGLOO account before, she starts using it from the moment she follows that email and logs in for the first time. Until that first login, she is shown with a PENDING badge in the member list.
What each Organization role (Owner, Admin, Member) can do is covered in Organizations and Spaces.
Step 2: Add to the Space and set a role
Now that Dahee is an Organization member, it is time to assign her to the shopping mall Space where she will actually work with products. You manage a Space's members on the "Memberships" screen in the Space settings.
Unlike Step 1, this step does not ask you to enter an email. When you pick a person from among the Organization members and add them, that person can access the Space the moment you add them. Anyone who is not an Organization member cannot be picked on this screen. The notice on the right of the screen also says, "To add members to this Space, they must already be Organization Members. Invite new members from the Organization Memberships page."
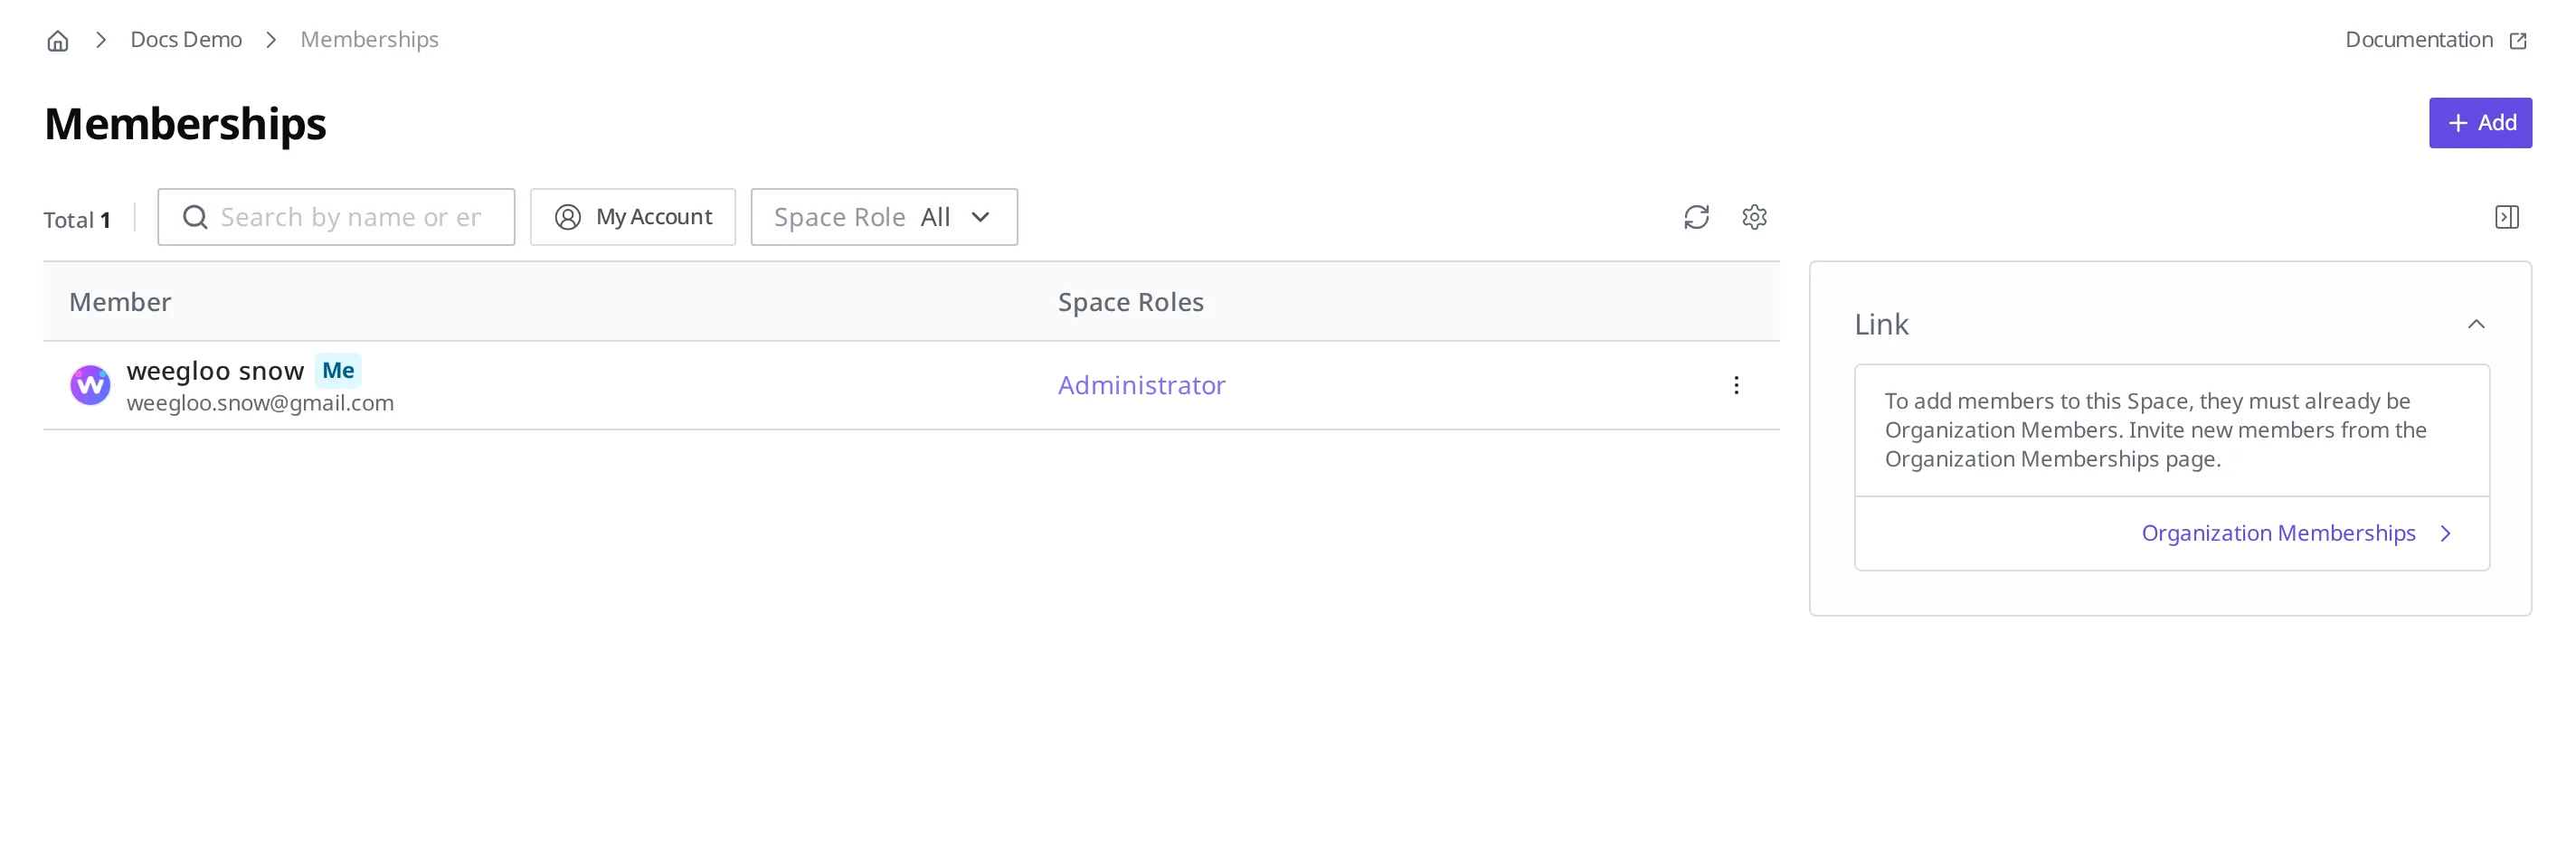
- In the left menu of the shopping mall Space settings, click Memberships under Settings & Management.
- At the top right, click the Add button.
- In the search field of the Select Members screen, find Dahee (
dahee.park@example.com) among the Organization members, and click the + button next to her to choose her.
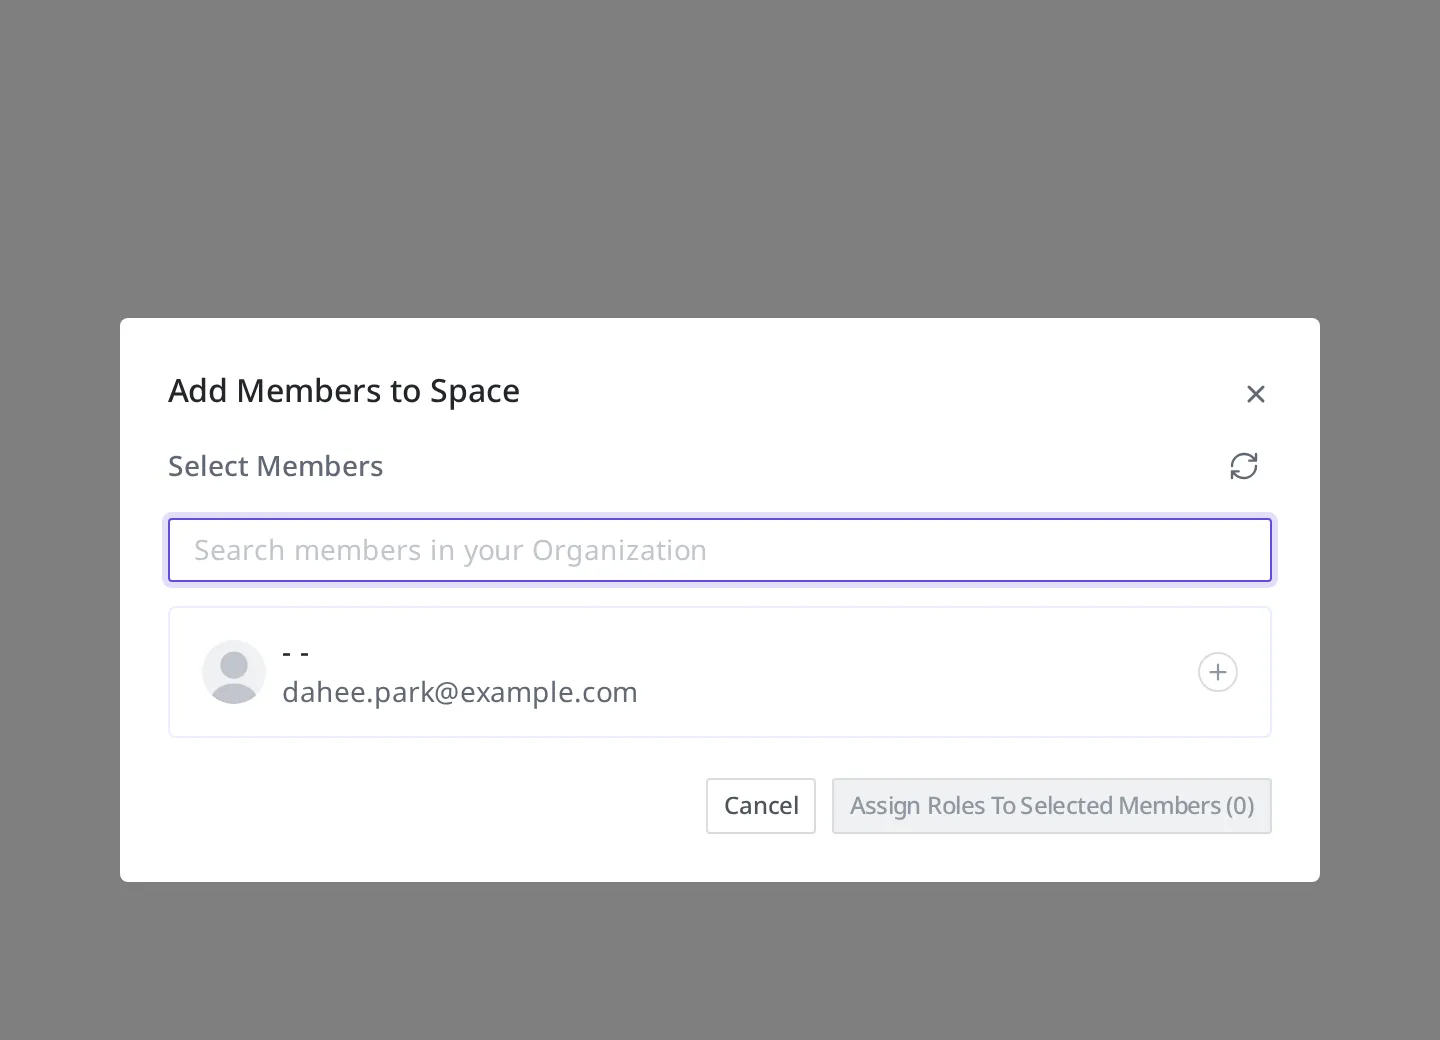
- Click the Assign Roles To Selected Members button.
- Under Select a Space Role, choose
Product Editor. - Click the Add Selected Members button to finish.
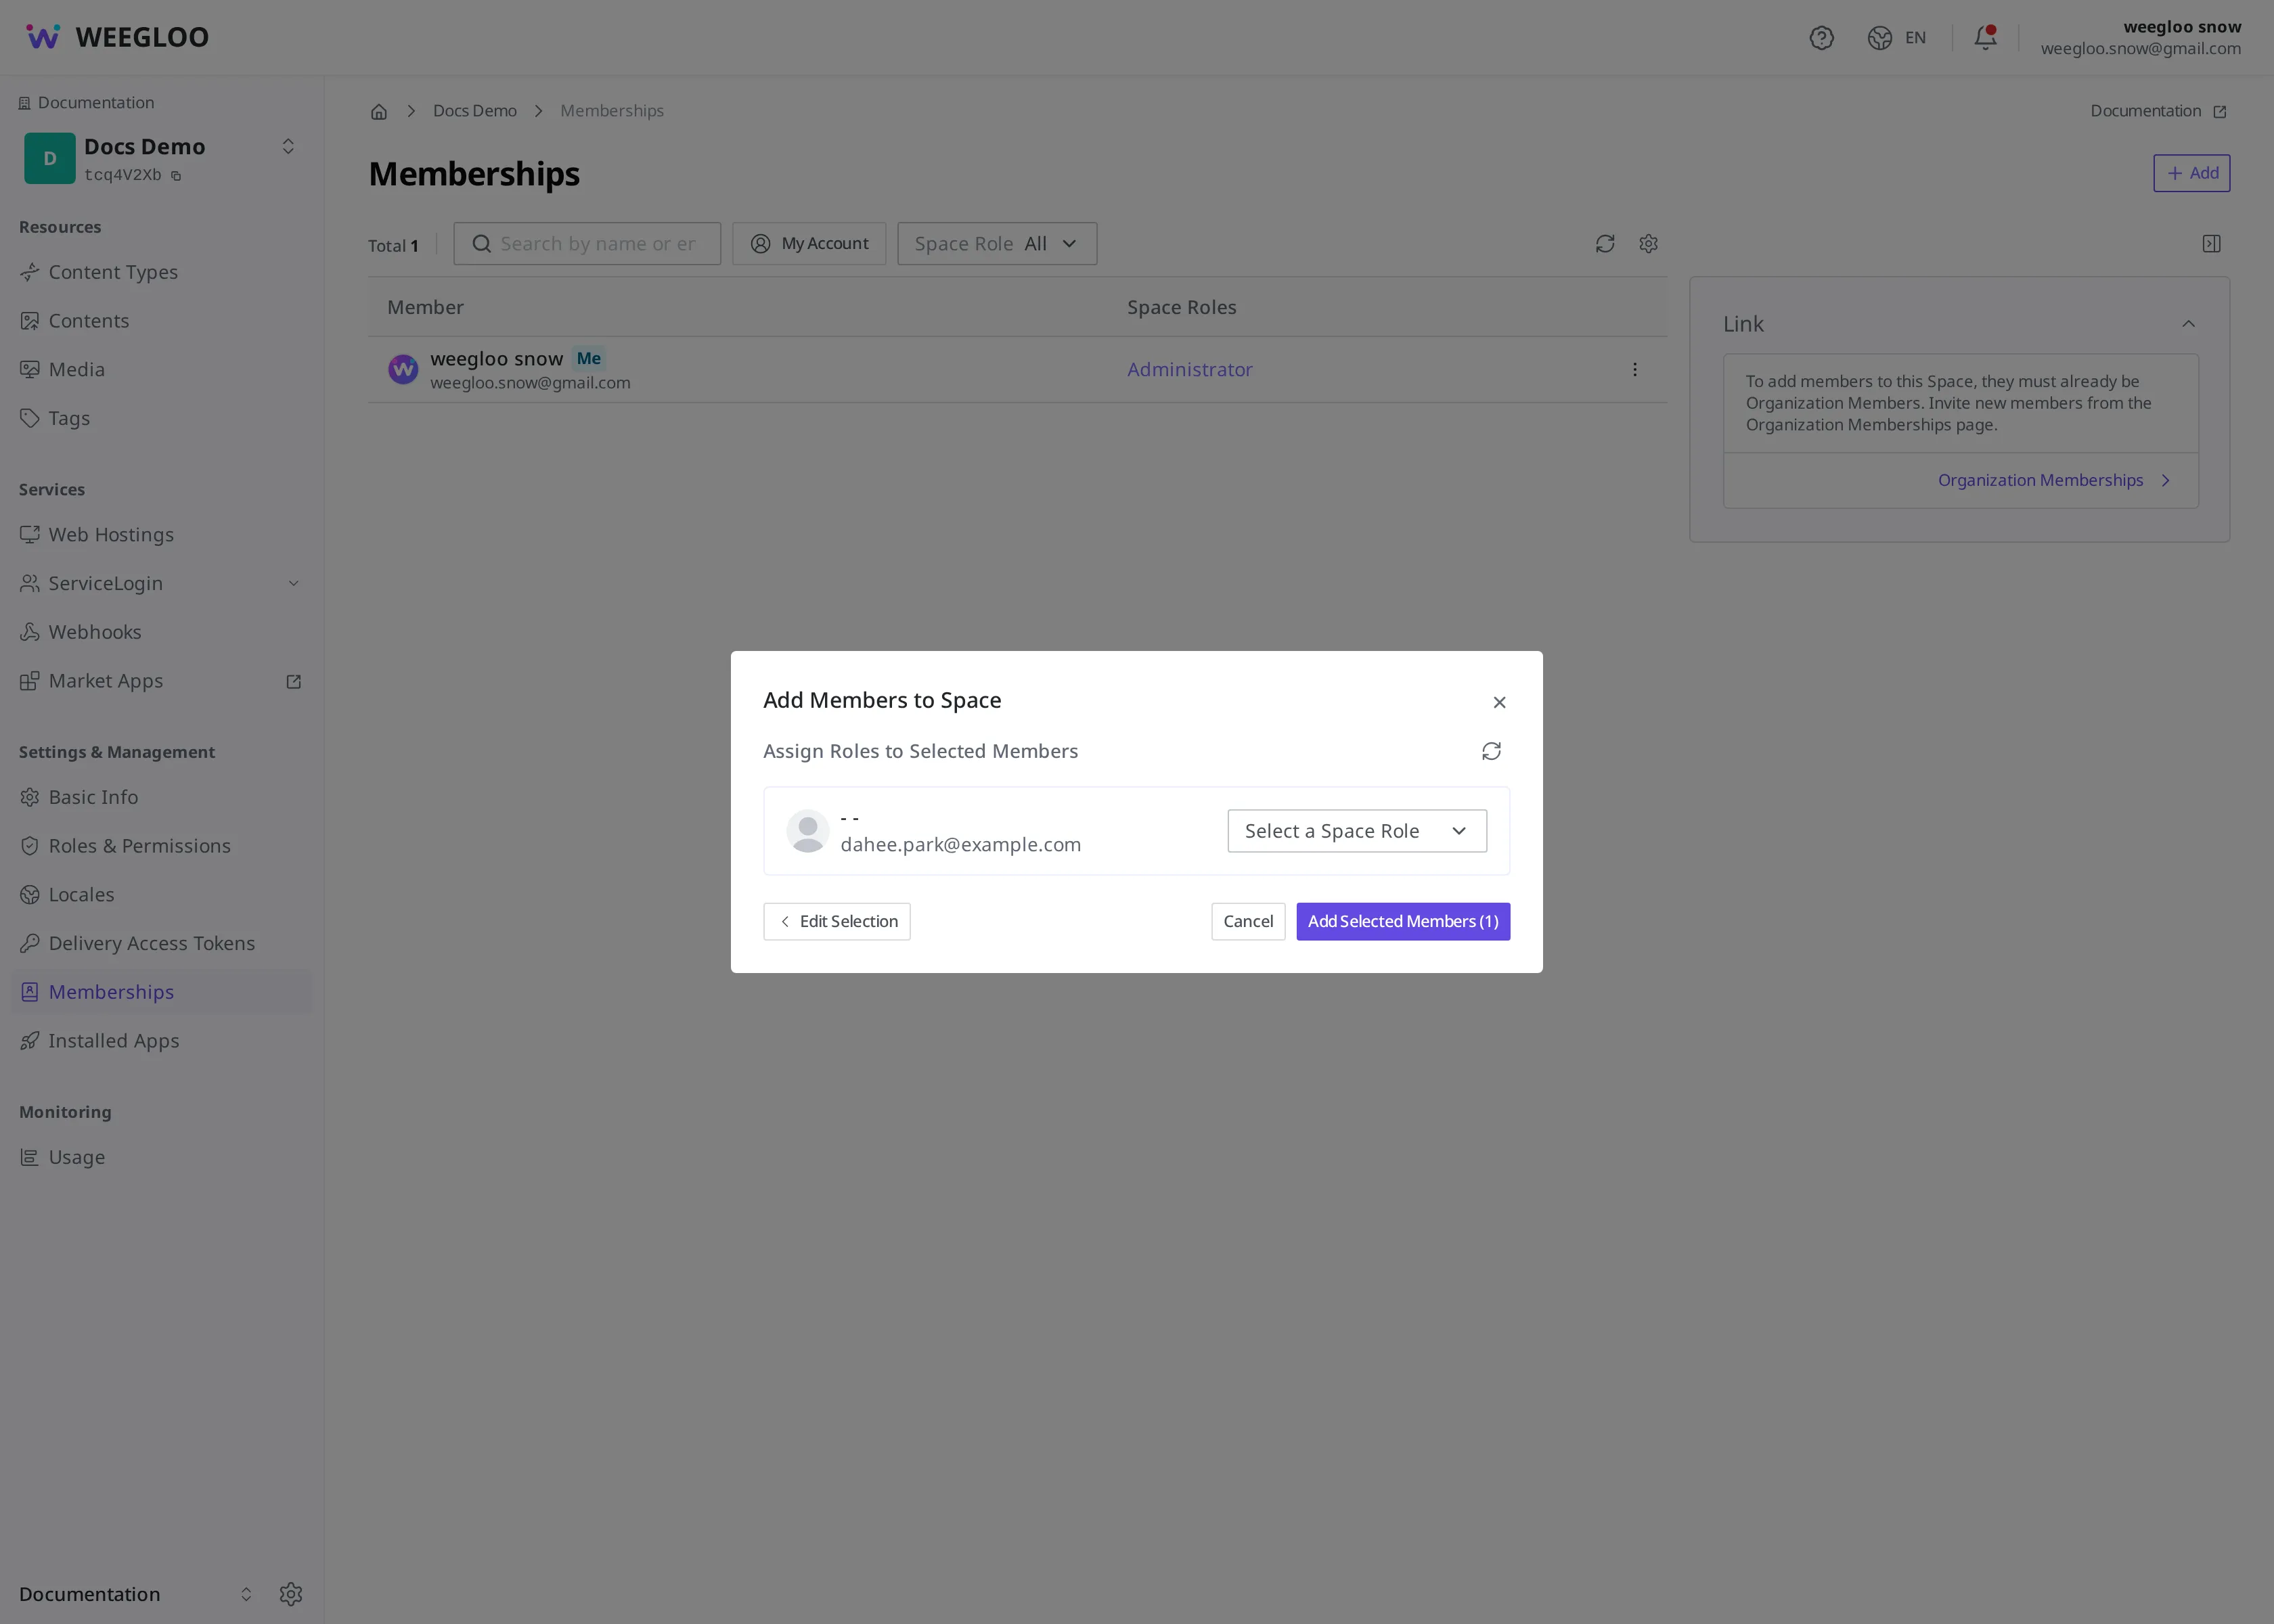
Once you finish adding, the following happens.
- Dahee can enter the shopping mall Space and start working right away.
- A notification email that she has been added to the Space is sent to Dahee's email.
- Two default Views that gather only her own work ("Created by me" and "Updated by me") are created automatically in Dahee's Content list. How to use these Views is covered in Finding the content you need.
Someone who is already a member of this Space is not added again. The same person never enters as a member twice.
Choosing which role to grant
A role (SpaceRole) is a bundle of permissions that decides what a person can do in this Space. Dahee's job is to register and edit products, so the "Product Editor" role created in Roles and Permissions is a good fit. Rather than starting someone off with a role that can do everything, it is easier to manage if you start with a role that covers just what the current job needs and change it as their work grows.
You can attach up to three roles to a single member. For a colleague who handles both product registration and photo management, you would give both roles together. What a member with several roles can do is covered in Roles and Permissions.
Changing roles as work changes
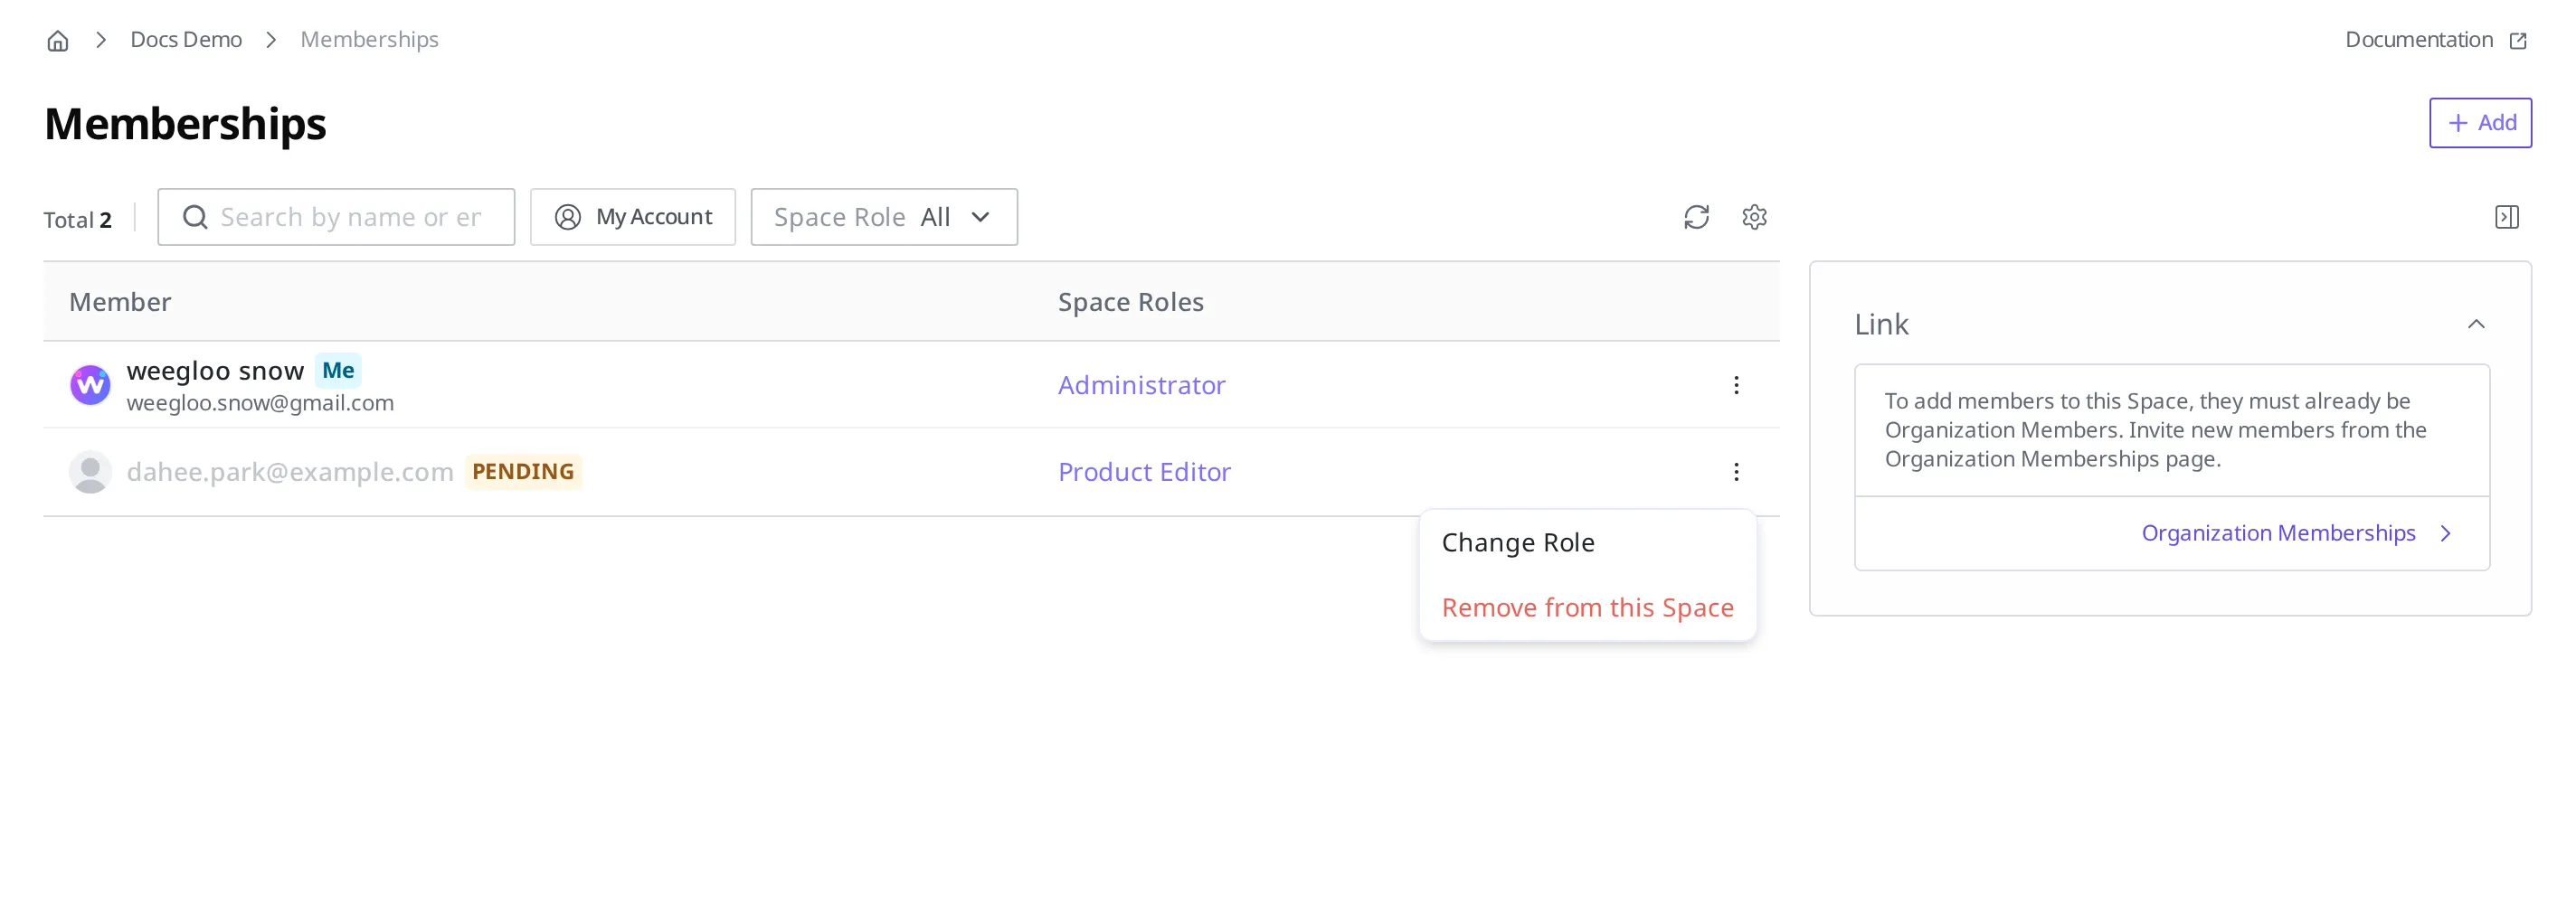
A role is not set once when you add someone and left that way forever. If, a few months later, Dahee takes on publishing products as well, you can change her role on the "Memberships" screen in the shopping mall Space settings.
- In the member list on the "Memberships" screen, click the ⋮ (more) button at the far right of Dahee's row.
- Click Change Role.
- Choose the new role and save.
Cleaning up access for people who have left
Say your contract with Haneul Lee (haneul.lee@example.com), the freelance photographer who handled product photos, has ended. If someone stays a member after their contract ends, they can keep accessing the Space's content, so you clean up people who have left from the member list.
- In the left menu of the shopping mall Space settings, click Memberships under Settings & Management.
- In the member list, click the ⋮ (more) button at the far right of Haneul's row (
haneul.lee@example.com). - Click Remove from this Space.
Remove from this Space sits in the same ⋮ (more) menu as Change Role. Once you remove them, the following happens.
- Haneul's access to this Space is revoked.
- A notice email that he has been removed from membership is sent to Haneul's email.
What this procedure cleans up is access to this Space. Removing someone from the Organization itself is done separately on the Organization's "Memberships" screen.
What to do next
- Roles and Permissions: Covers how to build a role such as "Product Editor" to give to a colleague.
- Organizations and Spaces: Covers the two places a colleague joins, the concepts of Organization and Space, and Organization roles.
- Finding the content you need: Covers how a colleague who has joined can use the default Views to see only their own work.