Publishing an App
Last updated: July 3, 2026
Imagine you run a clothing store business. A developer at your company has built a "Clothing Store Catalog" app. This app pulls in the products the store has registered in the content studio and displays them as they are. Now you want to put this app on the WEEGLOO marketplace (the storefront where apps are bought and used) so that other people can bring it into their own Space (the workspace that holds content, members, and settings) too. Putting an app you have built onto the marketplace from the content studio is publishing an app.
Publishing happens at the Organization level. The whole clothing store company (the organization) puts the app out, not just one of the several Spaces the company owns. That is why you publish an app from the organization screen rather than from inside any single Space. An app put on the marketplace is called a Market App.
What to prepare before you upload
Publishing is the step where you upload something you have already finished building. So two things need to be ready before you upload.
First, the app's screens must be built. Say the company developer has built the screens for the Clothing Store Catalog app. Building the screens is work that involves programs, so it is covered separately in Building an App.
Second, the resources to ship with the app must be ready in your Space. For a Clothing Store Catalog, those would be things like the product Content Type, the product Content, and the product photos (Media). What you ship together and what to watch out for are covered below in "Step 2: Selecting resources."
It also helps to decide the information you will fill into the screen ahead of time.
- App name and version: The name of the Clothing Store Catalog app, and the version number you are uploading now (e.g.
1.0.0). - Category: What kind of app this is.
- Description: A short summary and a detailed guide so that people who see this app on the marketplace can tell what it is.
- App icon and screenshots: One square icon to show in the marketplace listing, and screenshots showing what the app looks like (up to 6).
Putting an app on the marketplace
Here you upload the Clothing Store Catalog app as a Market App. The publishing screen is inside the organization screen. From the current organization screen, go into Market Apps and then open My Apps.
- On the My Apps screen, press the Create button.
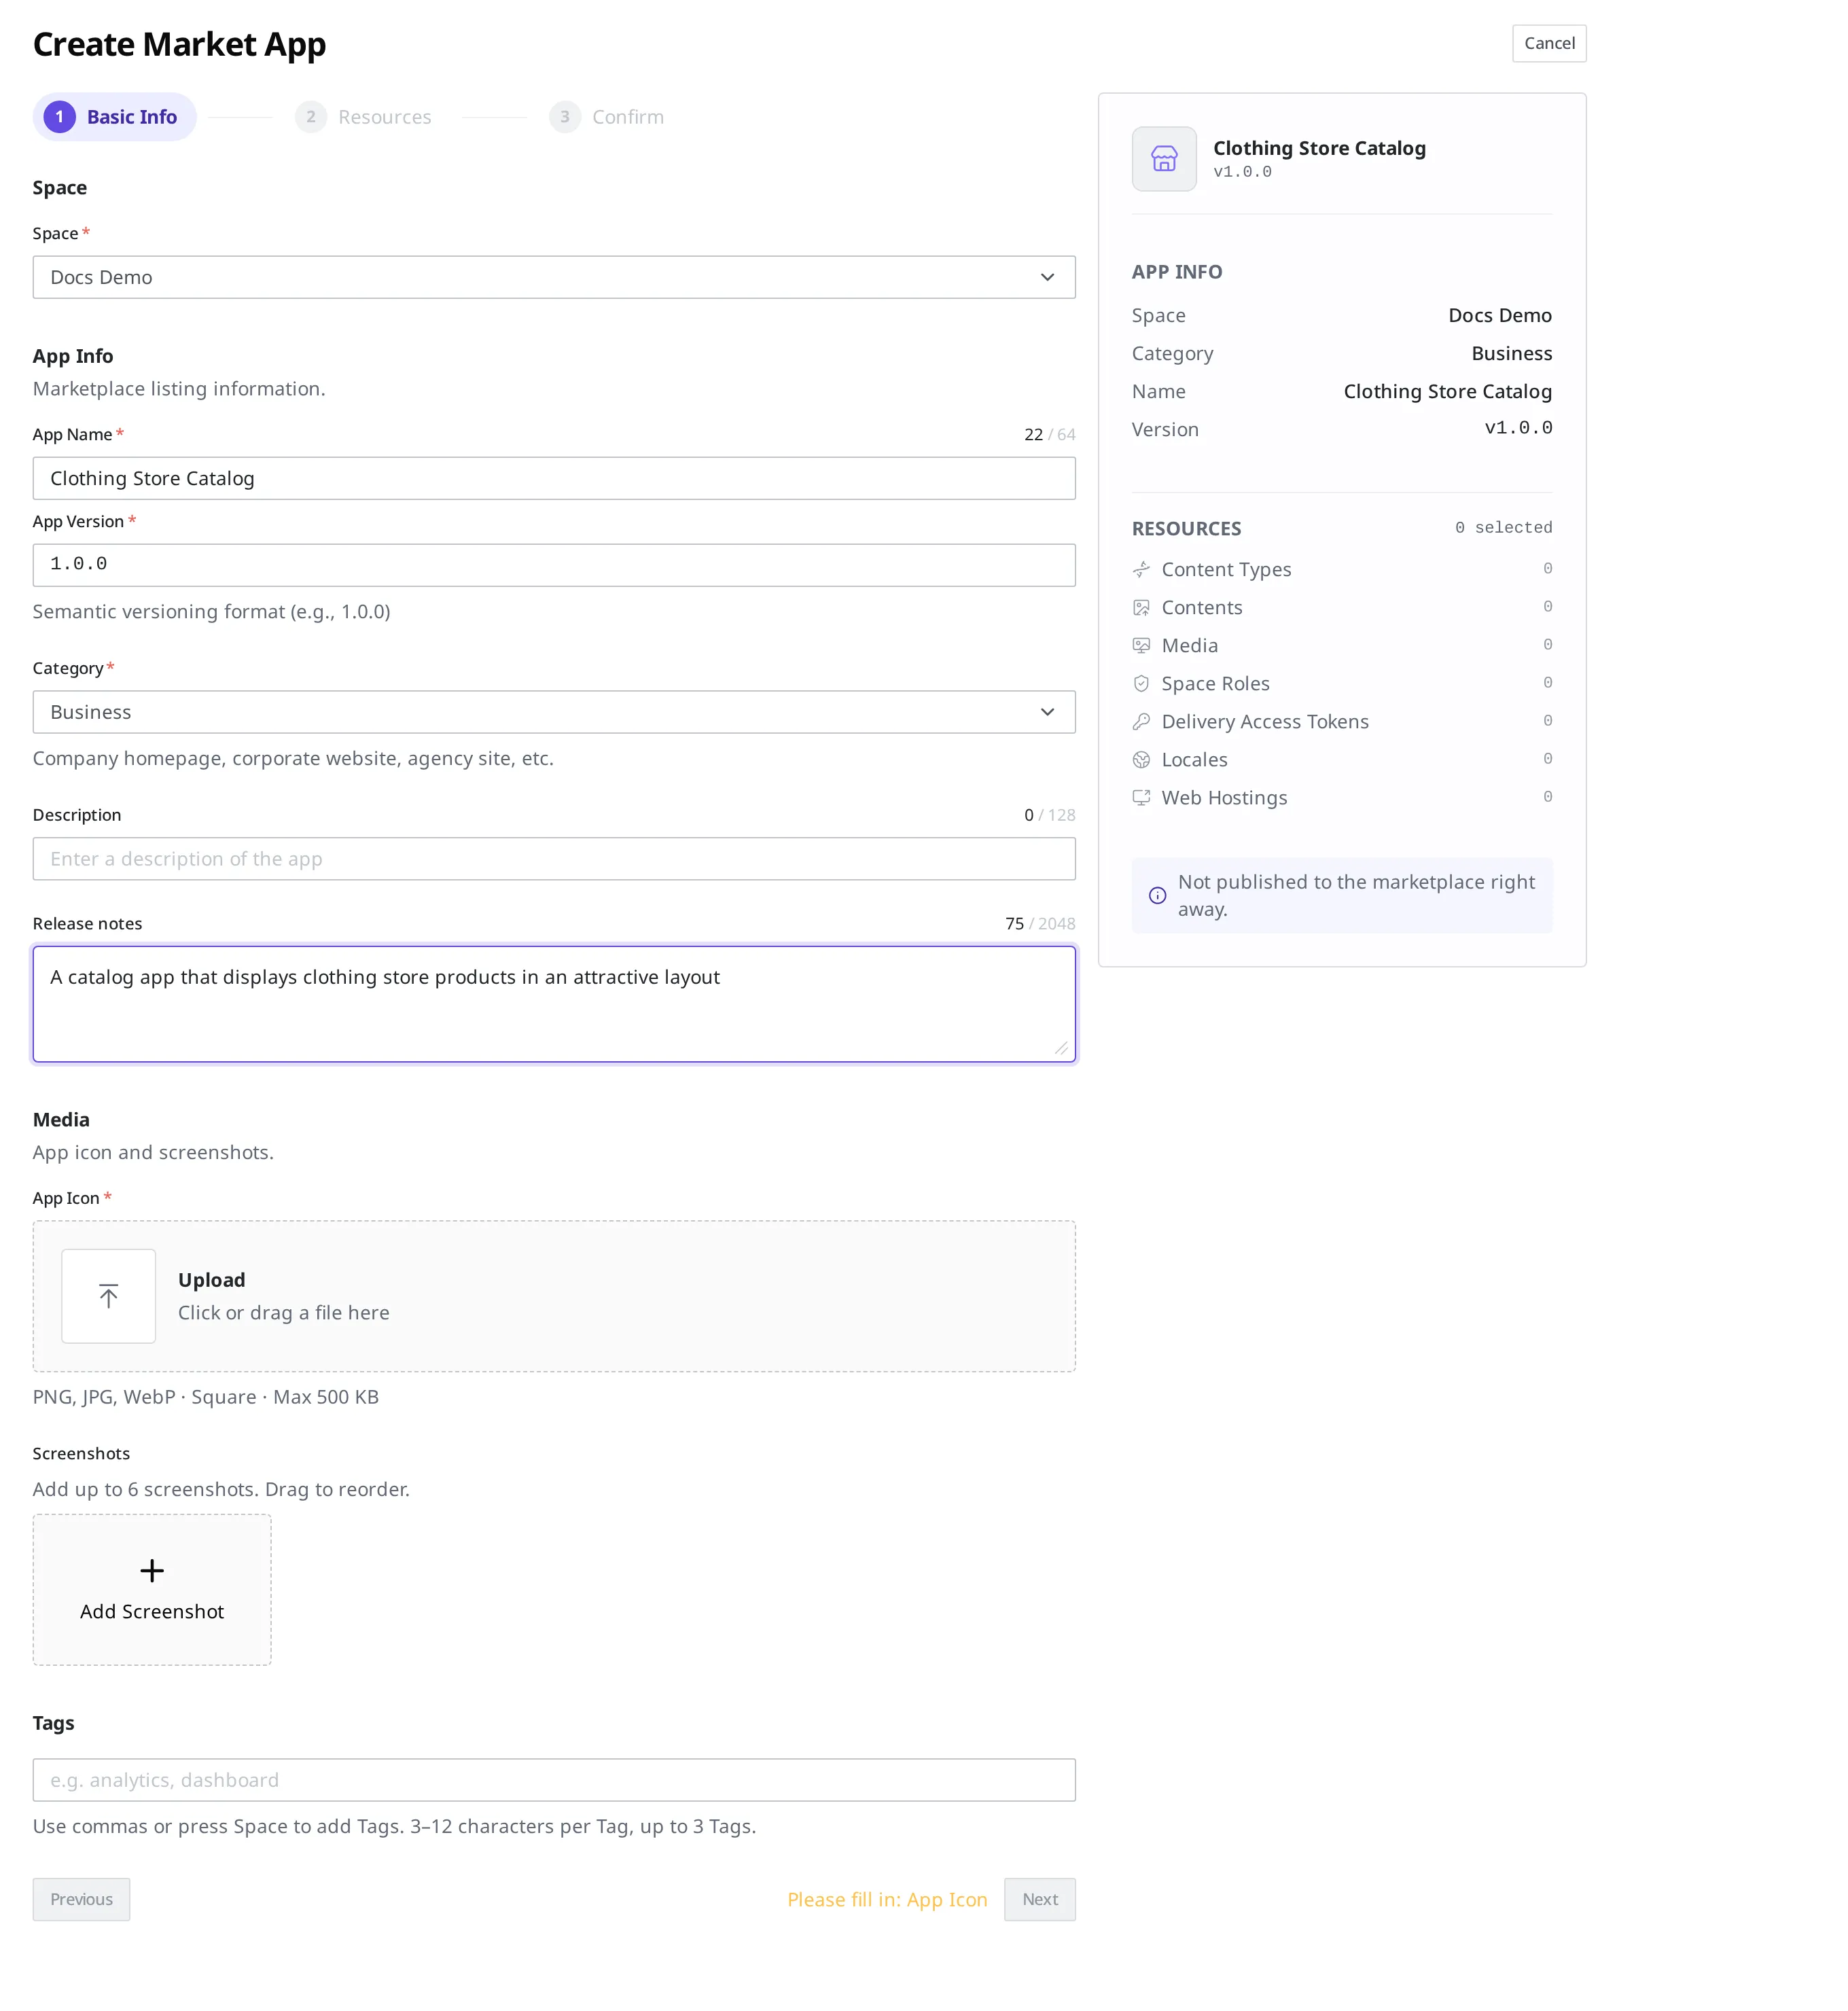
- The Create Market App screen opens. Three steps are shown at the top of the screen: Basic Info → Resources → Confirm. You start with the first step, Basic Info.
Step 1: Filling in the basic information
In the first step, you decide which Space the app belongs to and fill in the information that will be shown on the marketplace.
- Under Space, choose the Space that the Clothing Store Catalog app belongs to. This is the field where you decide which Space's app it is.
- In App Name, enter
Clothing Store Catalog. It will appear in the marketplace listing under this name. You can enter up to 64 characters. - In App Version, enter the version you are uploading now. Write it as a version number split by dots, like
1.0.0. - Choose a Category. You pick one from the list, choosing the one that fits your app among
Blog,Document,Portfolio,Landing,Business,Personal,Community,Event, andGeneral. For a Clothing Store Catalog, you might chooseBusiness, which is closer to a business. - In Description, write a line or two introducing the app. Up to 128 characters. Example:
A catalog app that displays clothing store products in an attractive layout. - If you have more to explain in detail, write it in Release notes. Up to 2048 characters.
- In App Icon, upload the icon image that will be shown in the marketplace listing. It must be a square image, in PNG, JPG, or WebP format, up to 500KB.
- In Screenshots, upload photos taken of the app's screens. You can upload up to 6, and you can drag the photos to change the order they appear in.
- You can add keywords in Tags so the app turns up in marketplace searches. Add up to 3, separated by commas, each 3 to 12 characters (e.g.
catalog). You do not have to add any.
App name, App version, category, and App icon must all be filled in. Once everything is filled in, press Next to move on to Step 2: Selecting resources.
Step 2: Selecting resources
In the next step, you choose, by type, the resources that the Clothing Store Catalog app will ship with. The types you can choose are Content Type, Content, Media, SpaceRole, Delivery Access Token, Locale, and Web Hosting. For example, if the app pulls in and displays products, you would choose the product Content Type and its Content, the Web Hosting that is the app's screens, and the Delivery Access Token used to read in the content. The resources you choose are shown by type and count in the RESOURCES summary on the right of Step 1 (see the right side of the capture above).
There is one rule when choosing resources. If a resource you choose is connected to (references) other resources, you must choose those too. When the app is installed, the resources you chose are copied as they are into the installer's Space, so if a connected target is missing, that spot ends up empty where it is installed. That is why, if even one is missing, the Step 3 creation tells you what is missing and blocks registration.
The cases where you must ship things together are as follows.
- If the product Content Type has a field that links to a brand, so it points to a brand Content Type, choose the brand Content Type too.
- If the product Content points to a specific brand Content, choose that brand Content too.
- If the product Content uses a photo (Media), choose that Media too.
- If you use multiple languages and it is set up so that when one language is empty, another language is shown instead (a Locale Fallback), choose the Locale that will be shown instead too.
- If you ship a Delivery Access Token, choose the SpaceRole connected to that token too.
- If a default role for member login (ServiceUserRole) is set on the Space, choose that role too.
Some things are shipped together automatically without you choosing them separately. If a SpaceRole's permission rule limits its scope to a specific Tag, that Tag is included automatically.
Conversely, there are things you do not have to ship together. Even if a Webhook or a permission rule has a condition based on a specific user (such as who created something), people are not something an app ships, so you do not have to choose them and registration is not blocked.
Connections that loop back on each other (where a product points to a brand and the brand points back to the product) are not registered.
Step 3: Review and create
In the last step, you review everything you filled in earlier at a glance. After checking that the name, version, category, description, uploaded images, and chosen resources are correct, you press Create.
When you press Create, the app screens you built and the resources you chose in Step 2 are made into a single version package. This package is called an App Bundle. From now on, when you revise the app and upload it again, you upload it again as a new version of the App Bundle.
After uploading: it goes through review before being shown
Pressing Create does not mean the Clothing Store Catalog app shows up on the marketplace right away. An uploaded app first goes through review. It has to pass review before it is shown to other people on the marketplace and they can bring it into their own Space.
The uploaded app appears as one row in the My Apps list. In the list, each app has columns for name, category, version, Review Status, and the modified date, and in the Review Status column you can check how far review has progressed so far.

What to do next
- Building an App: Covers how to build the app screens you will publish, and how resources are copied and connected when the app is installed.
- Installing an App: Covers how to bring an app you put on the marketplace into another Space and install it.
- API Reference: Covers technical specifications such as the request formats you need when working with a Market App directly from a program.